

For those who have never painted rocks but have heard about the painted rocks kindness movement and would love to be involved, here’s a whole bunch of tips on how to get started and paint your first rock. If you order a Complete Starter Kit online, it will be delivered to your door and you can get started. The kit has everything you need to paint your first 6 rocks! Seven rainbow colours, black, white and varnish, four different sized brushes and a set of 5 double-sided dotting tools. It also includes a handful of smooth, rounded pebbles which are ready-washed and perfect for rock painting.
What’s rock painting all about?
According to Wikipedia, the Painted Rock Kindness movement started in Cape Cod in 2015 and started spreading around the world. Cape Town Rocks seems to be the first one started in South Africa over the Easter Weekend, April 2017, and the concept is quickly spreading to other provinces as the kindness movement grows, getting families outdoors, hiding, finding and re-hiding painted rocks. It’s all about delight, creativity and spreading joy. It doesn’t matter if you’re, young, old, artistic or not, you’re invited to be a part of the rock painting kindness movement.
So, let’s get started with rock painting …
Your rock should be smooth, rounded and clean. The rocks in the Complete Starter Kit are washed before they’re sent to you, so no need to wash them again. If you’re wanting to buy some additional rocks, you can order online at this link: Order more rocks.
Prepare a work area which has plenty of light, lay out some newspaper, brown paper or an old dishcloth to work on. Get yourself a container for water and a piece of cloth or serviette for drying your brush.
Base coat:
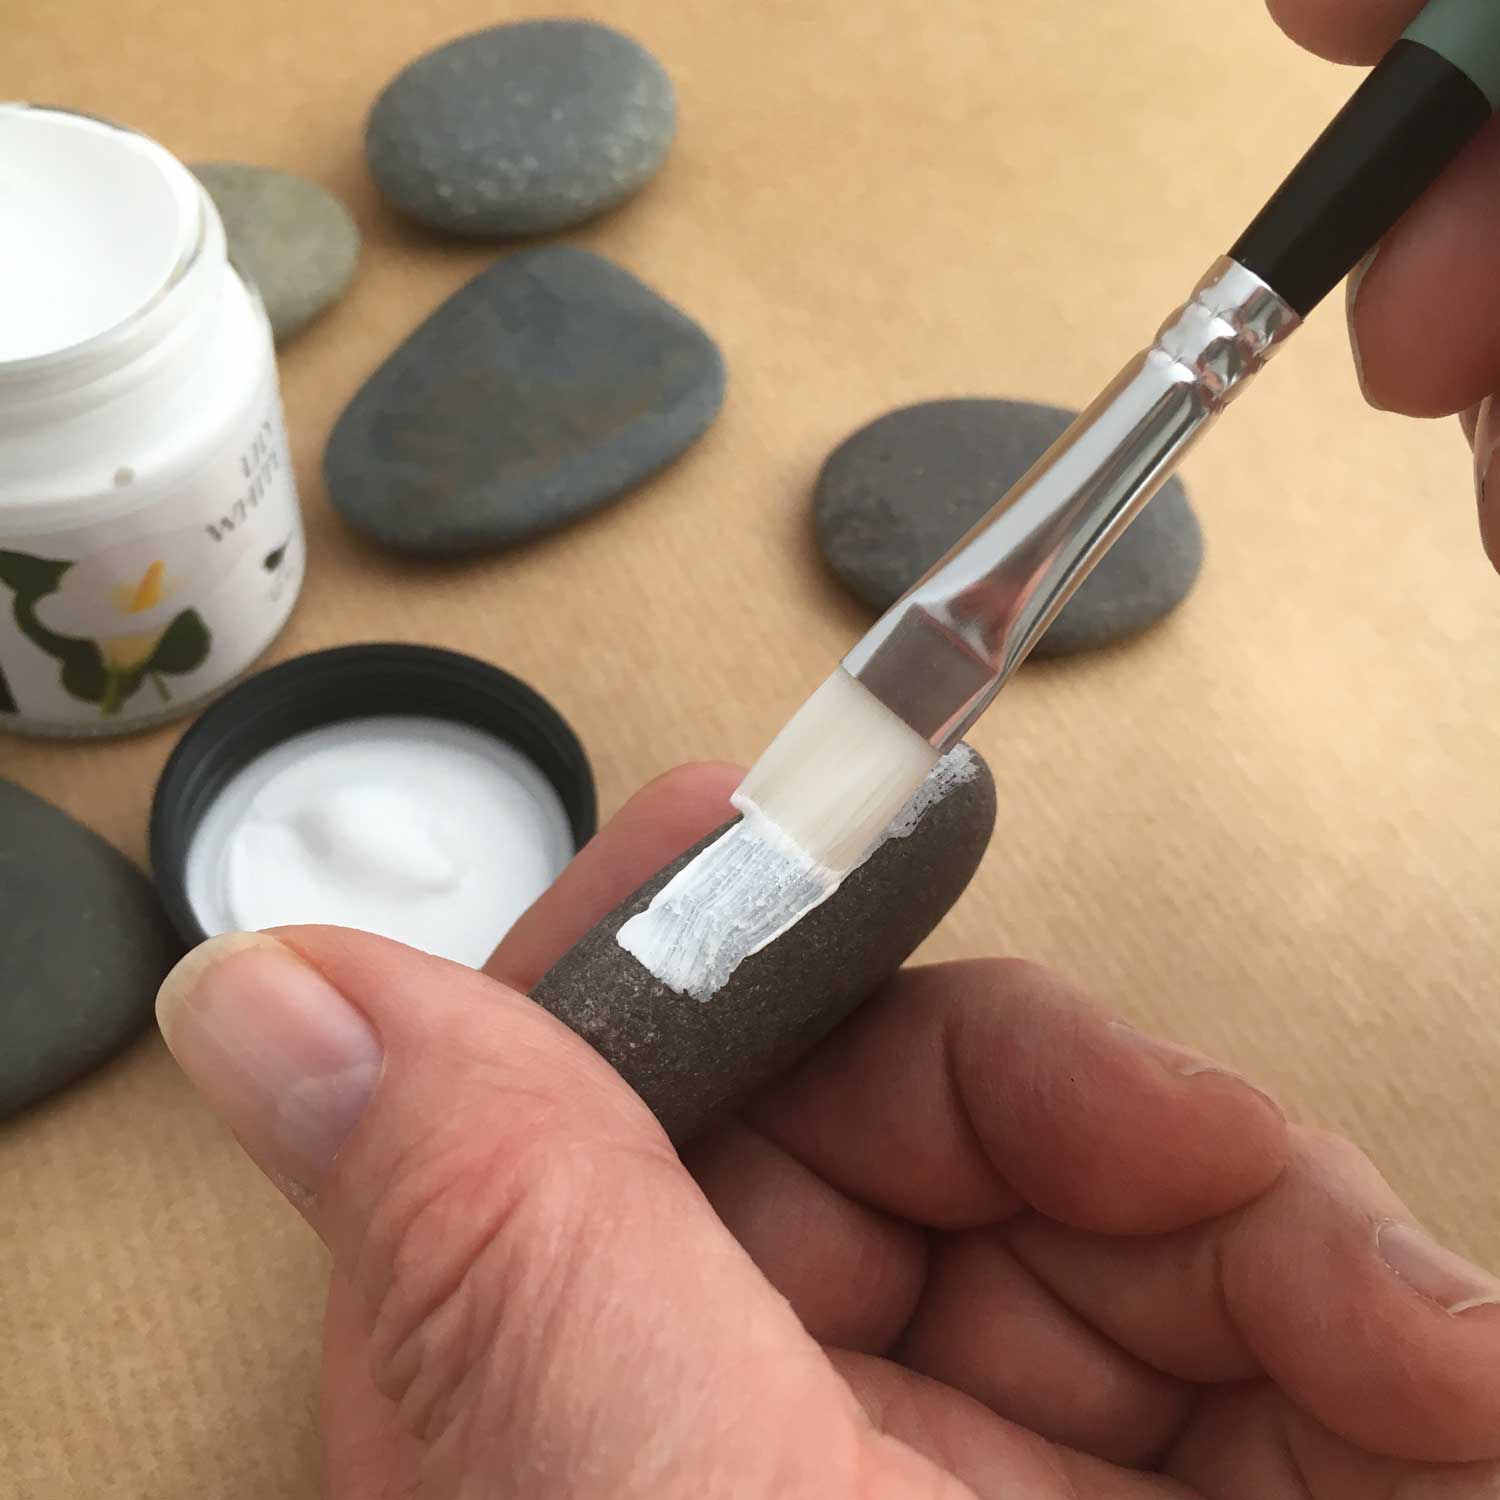
We’re going to start by painting your pebble with a background base colour, white. The reason we use a white base coat is so that any colour painted on top of the white, will end up being the correct, clean, bright colour. The paint takes on the brilliance of the white. If you paint colour straight onto a dark rock, it will take on the rock colour and look darker than you expected.
Give your pot of Lily White paint a shake and remove the lid. Hold the pebble by its sides, between thumb and forefinger, so that the pebble edge is facing towards you, dip your big brush into the white paint and start painting the edge of the pebble, all the way around the pebble, making sure the layer of paint is quite thin. Put the pebble on your work surface and paint the top, leaving the bottom of the pebble unpainted for now. When you dip your brush into the paint, carefully dip it no more than half way up the paint brush bristles, not all the way to the metal. As you’re painting the pebble, you’ll be able to see the colour of the dark pebble through the first layer of paint, don’t be tempted to paint a thick layer to get better coverage – it will take too long to dry and could leave textured paint marks. We’re looking for a thin layer that probably won’t look very nice at first.
Make sure the pebble has a thin even coverage of white paint then start with a couple more pebbles, using the same method as above, first the edges of the pebble while holding it, then the top. When you have a few prepared, give your brush a wash.
Brush care:
When washing your brush, dip it into the water and swirl gently. Dab the bristles lightly at the bottom of the water jar to loosen the paint. Don’t jab the brush roughly as this will damage the glue area at the top of the brush where the bristles go under the metal part and will cause the bristles to splay. Once the brush is clean, dab gently onto an old cloth and re-shape the bristles by squeezing any excess water out using the cloth and your fingers.
Painting side 2:
Once your pebbles are dry enough to touch, turn them over and paint the other side with a thin layer of white, allowing your brush strokes to meet up with the edges of the paint and slightly overlap. Do all the rocks you’re busy with in this way so that both sides are painted with one layer of white. When waiting for paint to dry, give your brush a clean and close your paint pot lid. When your pebbles are nice and dry, give them a second coat of white by starting with the edges while holding the pebble, then paint the top surface. When all dry, paint the other side again so your pebbles have 2 layers of paint on both sides.
It may not be 100% coverage but will be perfect as a base for colour paints. If you need a white background for one of your designs, give that rock a third coat of white paint now.
Choosing a design:
The possibilities are endless so I’ll show a really simple idea in this blog and more complex ideas in my step-by step tutorials – just choose your own comfort level. First off will be a smiling face.
Smiley Face:
Take one of the rocks you’ve already painted white with at least 2 layers and start again by holding the pebble between thumb and forefinger so you can paint with Canary Yellow paint, all around the edges. Then lay the pebble flat on your work surface and paint the top. You’re going to let this dry, do wash your brush and close the lid of your paint. When the pebble is dry enough to touch, paint the other side with yellow paint. When dry, give the pebble a second coat of yellow, first the edges, then the top, allow to dry and then the bottom. It does take some patience allowing paint to dry but you can work on more than one pebble at a time.
Once the yellow paint is completely dry, use an ordinary pencil to mark eyes and a smile. The eyes on a smiley face are usually ovals (not round), so mark those first. Then mark a big gentle arc for a smile. Draw very lightly on the rock, the pencil line will be a guide for when you paint.
Give your Jet Black pot of paint a shake and open the lid. Using your medium round brush, dip it into the black paint half way up the bristles and begin painting first the left eye, to avoid smudging as you go along (if you’re right handed). Keep the point of the brush on the inside of the pencil line and swivel the rock around so that you only use the front point of the brush to make the paint marks. Create your oval shape and fill in the inside with your brush.
Give your brush a quick clean and dry before starting the mouth, with this round brush, only swivel the brush while it’s pushed up against the inside of your water jar to loosen paint. Dry and re-shape with your cloth. Dip the brush halfway up the bristles and paint your smile carefully, pulling the brush from the end point on the left hand side of the mouth, towards the middle. When you reach the middle, dip the paintbrush in the paint again, turn the rock 180º and paint the second side of the mouth, again starting at the end point of your pencil line and work towards the middle. If the eyes look like they need a second layer, paint those while you have the smiley face upside down. Wash your brush then grab your dotting tool with the big metal ball end.
Dip the big end into your black paint, you can use your paint lid as it’s nice and shallow. Paint will stick to the dotting tool, dot the end of the smile. Dip and dot again for the other side. Your smiley face is complete, give your dotting tool a rinse and dry on your cloth. If you wish to place your pebble outdoors or wish to give it extra protection, you should give it a coat of varnish. The more coats you give, the shinier it will get. Leave a few hours between each coat of varnish.


