

A guide to Rock Painting and spreading a little joy and kindness through your own creativity.
Sometimes called Kindness Stones or Rocks, a Painted Rock is simply a rock that someone has taken the time to decorate with either a picture, an inspirational message or anything whimsical. This is what rock painting is all about.
When walking around, have you ever come across a colorful, hand-painted rock that has been painted in bright, friendly colours? Perhaps it had an uplifting message written on it? You’ve probably found yourself a kindness rock.
Rock painting or rock art is a trend that has picked up popularity in recent years and it’s for all ages and all levels of talent. Whether you’re an artist who is looking for a new art project or someone who wants to share a positive message with others, painting rocks might be perfect for you.
It’s fun to participate and brings much joy to adults and children alike.

How can painted rocks spread kindness?
Painted Rocks, sometimes called Kindness Rocks, are simply rocks that someone has decorated with a picture or an inspirational message. The rocks can be any size or shape, as big or small as you like. The aim of this Rock Painting project is to sprinkle positivity around your community or while on a holiday or road trip. Once you’ve created your Painted Rock, the idea is to leave it somewhere for another person to find unexpectedly and enjoy. As we all know too well, a simple message of encouragement or a cute little painted pebble surprise can spark joy and brighten someone’s entire day.
Before you start rock painting, here are a few common questions that we can answer.rock
What materials do you need to paint rocks?
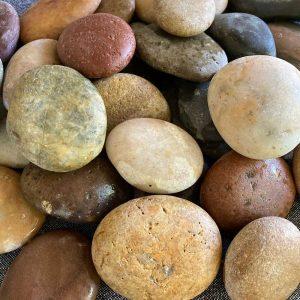
- Rocks, stones or small pebbles: They should be as smooth as possible because rough or textured rocks are quite tricky to paint. Rocks and Pebbles can be purchased online from our website and they are all pre-selected and washed:
Box of Rocks
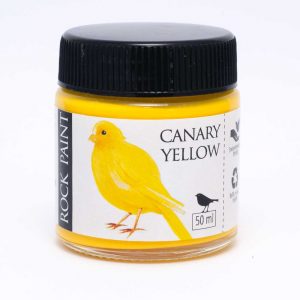
Tiny Pebbles - Paint: The best and least messy to use are water based acrylic paints which we sell from our online shop. We have a wonderful range of 34 different colours which can also be blended and mixed together to make additional shades. Have a look at our range of paints.
- Brushes: You’ll need a range of brushes which consist of wide, flat brushes and round brushes. We sell a Starter Brush Set on this website and also some more specialised brushes for fine detail work and writing. Have a look at this link for our range of brushes.
- Dotting Tools: They’re versatile and handy to have. We recommend our Set of 5 Double-sided, wooden-handled Dotting Tools which can be purchased at this link.
- Varnish: The varnish will protect your painted rocks from scuffing and will also protect them from the weather when outdoors. We sell a paint-on varnish which is water-based and dries to a protective finish. This is where you can buy our varnish
How do you make your own Painted Rock?
- Gather together your rocks, paints, brushes, dotting tools and varnish. If you’re not sure exactly what to buy, we have some starter kits which are a great place to get started and each one has everything you need:
Complete Starter Kit
Bumblebee Starter Kit
Penguin Starter Kit
Bunny Starter Kit - You’ll also need a container for water and an old cloth for wiping hands and drying brushes.
- Prepare a rock painting work area for yourself, a desk which has plenty of light, lay out some newspaper, brown paper or an old dishcloth to work on.
Let’s start off by painting your pebble with a background base colour, called a base coat or undercoat. We usually use white paint as a base coat so that any colour painted on top of the white, will end up being the correct, clean, bright colour. The colourful paints take on the brilliance of the white, especially when the paints are semi-translucent. If you apply colour paint straight onto a dark rock, it will take on the rock colour and look darker than you expected.
You can use Lily White paint or White Chalk paint as a base coat. Hold the pebble by its sides, between thumb and forefinger, so that the pebble edge is facing towards you. Dip your flat, wide brush into the white paint and start painting the edge of the pebble, all the way around the pebble, making sure the layer of paint is quite thin, no thick paint areas. If you do have thicker streaks, dry off your brush on a cloth then smooth them out. Put the pebble on your work surface and paint the top, leaving the bottom of the pebble unpainted for now. When you dip your brush into the paint, carefully dip it no more than half way up the paint brush bristles, not all the way to the metal. As you’re painting the pebble, you’ll be able to see the colour of the dark pebble through the first layer of paint, don’t be tempted to paint a thick layer to get better coverage – it will take too long to dry and could leave textured paint marks. We’re looking for a thin layer that probably won’t look very nice at first.
- Once the top layer is dry, you can turn it over and paint the underside, allowing it to dry completely. Give the rock a second coat of white paint in the same way you did previously (follow step 5).
- Brush care: Never leave paint to dry on your brush, always wash it immediately after use or while waiting for paint to dry on the rocks. When washing your brush, dip it into the water and swirl gently. Dab the bristles lightly at the bottom of the water jar to loosen the paint. Don’t jab the brush roughly as this will damage the glue area at the top of the brush where the bristles go under the metal part and will cause the bristles to splay. Once the brush is clean, dab gently onto an old cloth and re-shape the bristles by squeezing any excess water out using the cloth and your fingers.
- Choosing a design: The possibilities are endless so I’ll show a really simple idea in this blog and additional basic ideas and complex ideas in my step-by step tutorials – just choose your own comfort level. First off, let’s paint a smiling face.
- Take your rock which has at least 2 base coats of white paint and start again by holding the pebble between thumb and forefinger so you can paint with Canary Yellow paint, all around the edges. Then lay the pebble flat on your work surface and paint the top. You’re going to let this dry, remember wash your brush and close the lid of your paint. When the pebble is dry enough to touch, paint the other side with yellow paint. When both sides are dry, give the pebble a second coat of yellow, first the edges, then the top, allow to dry and then the bottom. It does take some patience allowing paint to dry but you can work on more than one pebble at a time.
- Once the yellow paint is completely dry, use an ordinary pencil to mark eyes and a smile. The eyes on a smiley face are usually ovals (not round), so mark those first. Then mark a big gentle arc for a smile. Draw very lightly on the rock, the pencil line will be a guide for when you paint.
- Using Jet Black paint and a medium round brush, dip the brush into the black paint half way up the bristles and begin painting first the left eye, to avoid smudging as you go along (if you’re right handed). Keep the point of the brush on the inside of the pencil line and swivel the rock around so that you only use the front point of the brush to make the paint marks. Create your oval eye-shape and fill in the inside of the oval shape with your brush.
- Give your brush a quick clean and dry. To clean this little round brush, only swivel the brush while it’s pushed up against the inside wall of your water jar to loosen paint. Dry and re-shape with your cloth or fingers.
- To paint the smile, dip your finest round brush halfway up the bristles and paint the smile carefully, pulling the brush from the end point on the left hand side of the mouth, towards the middle. When you reach the middle, dip the paintbrush in the paint again, turn the rock 180º and paint the second side of the mouth, again starting at the end point of your pencil line and work towards the middle.
- If the eyes look like they need a second layer, paint those while you have the smiley face upside down.
- Wash your brush then grab a dotting tool. You’re going to use the end with the bigger metal ball.
- Dip the tip of the dotting tool into your black paint – it’s fine to use the paint lid for this.
- The paint will stick to the dotting tool, dot the end of the smile. Dip and dot again for the other side. Your smiley face is complete now, you can give your dotting tool a rinse and dry on your cloth.
- If you wish to place your pebble outdoors or wish to give it extra protection, you should give it a coat of Varnish. The more coats you give, the shinier it will get. Leave a few hours between each coat of varnish so that each coat can dry properly.
Hiding your Painted Rock
If you’re keen to hide your Painted Rock, you might like to stick a label on the back of it so that anyone finding it will know that they can either keep it or re-hide it and, if they are able to, can post a picture to the appropriate Facebook Group. Downloadable labels and what to use to stick them to your rock can be found at this link.
If you’re keen to join a Facebook Rock Painting / Kindness Rock group, there’s a list of groups on our How it all Started blog post. The groups listed are mostly based in South Africa, some have originated from Cape Town Rocks, some have sprouted up on their own. If you would like to follow any of these Facebook groups, just add yourself, add friends and family too if they’re in that area.
Where to hide your Painted Rocks
When hiding your Painted Rocks, we use the word ‘hide’ very loosely because we do want people to find our little treasures. Think of somewhere that gets a lot of foot traffic – a local park, a public bench in town or at the seaside, or outside a community centre are all great options.
You can also be more intentional about where you place your Painted Rocks – you can leave one in a communal area of your office building, on a teacher’s desk. They don’t always have to be hidden – you can give them as gifts, or hand a Painted Rock to someone that you think could use words of encouragement.
Be considerate when looking for places to hide your Painted Rocks. Don’t leave them at a private establishment or business where you don’t have prior permission. National parks are also a no-go for ecological reasons which we respect. The purpose of these rock painting creations is to be kind, so let’s be respectful of others’ privacy and of our environment.
Enjoy your rock painting journey and email us with any questions.


