
Have you ever wondered why red robins are associated with Christmas?
Back in the times of Victorian Britain, postmen were nicknamed “robins” because of their red-breasted coloured uniforms. From there, the robin on the Christmas card came to represent the postman who delivered the card. But it isn’t quite as simple as that, as there are links that pre-date this explanation.
Have you noticed a robin’s red-breast is actually orange? The bird was named before the English language had a word for the colour ‘orange’. Many things that were really orange were called red instead even though we did have the word for ‘orange’ as in the fruit. The colour orange was not named as a colour in English until the 16th century. The name for the colour comes from the fruit.
Source: The Bird House Blog
What you’ll need for this rock painting project:
- Smooth, rounded rocks
- Lily White paint
- Periwinkle Blue paint
- Jet Black paint
- Chocolate brown Paint
- Dragon’s Gold paint
- Cherry Red paint
- Dotting Tools
- Flat brush and finer round brushes (see our Starter Brush Set)
- A pair of scissors
- A soft pencil (6B) or graphite
- A harder, sharp pencil (HB)
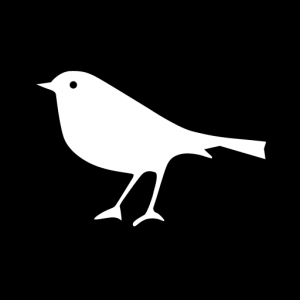
- Download your Red Robin Trace Sheet PDF here
Let’s begin, you can follow the step-by-step instructions and rock painting pictures below.
Step 1 You’ll need a smooth, rounded rock. Using Lily White paint and a flat wide brush, give your rock a coating, keeping your brush strokes even and smooth. Only paint one side of the rock (top side) and allow to dry, turn it over and paint the other side. You can use a flat, wide brush for this.
Step 2 Once both sides are dry, give the rock a second coat of white paint.
Step 3 Decide which is the top of your rock and which is the bottom then paint the bottom and edges using Periwinkle blue. You can use a flat, wide brush for this.
Step 4 When your Periwinkle Blue paint is dry, turn the rock over so that you can paint the edges. To do this, first dab a little Lily White and Periwinkle Blue paint onto a mixing dish. You can use a yoghurt tub lid or a saucer instead. Paint a little Periwinkle blue all around the edges, then dip the brush into your white paint on the mixing dish and blend that paint into the blue on the rock to create a lighter shade of blue. Do this all the way around the rock. You can use a flat, wide brush for this.
Step 5 Wipe your brush clean on a piece of paper or a rag, dip it into your white paint on your mixing dish and, starting at the centre of the rock (on the front) and work your way towards the edges, blending the white paint into the paler blue paint so that the centre front is more white, blending to blue at the edges.
Step 6 Download and print your Red Robin Trace Sheet PDF here.
Step 7 Choose a size of Red Robin to suit the rock you’ve prepared, the robins on the trace sheet are various sizes and face in both directions.
Step 8 Cut out the little robin from your trace sheet using a pair of scissors.
Step 9 Scribble on the back of the cut-out using your soft pencil or graphite.
Step 10 Place the paper robin right way up and position it on your prepared rock.
Step 11 Draw over the lined on the front of the paper robin so that the graphite underneath, transfers onto the rock. Don’t leave out any of the lines.
Step 12 The little robin lines might need touching up.
Step 13 Using Jet Black paint and a fine round brush, carefully paint the beak and the skinny little legs and feet.
Step 14 Using a dotting tool, dip into the black paint and create the bird’s eye.
Step 15 Place a dab of Lily White paint and another dab of Chocolate Brown paint onto your mixing dish and mix them together to create a light brown. The more white you add, the lighter the brown will be. About half-half is fine for this.
Step 16 Paint the top section of the bird using your light brown paint blend. It might need a second layer. Allow the first layer to dry before adding a second touch-up layer of paint. Remember to always keep your paint layers thin (not thick) so that the paint can dry properly. Keep the edges as neat as you can. A medium-sized round brush is good for this.
Step 17 Paint the underbelly of the bird using Dragon’s Gold paint. Paint first one thin layer which will probably not look great. The gold paint is quite translucent but as you build up the layers, it will become luminous and look great.
Step 18 Once the first layer of gold paint is dry, paint a second layer, allow to dry and paint a third layer. Keep your edges as neat as possible. A medium-sized round brush is good for this.
Step 19 Paint the robin’s redbreast using Cherry Red. A medium-sized round brush is good for this and you might need a second, touch-up layer once the first layer is dry.
Step 20 Using various sizes of your dotting tools, dip the tips into Lily White paint and create snow dots all around the robin.
Step 21 Using your finest dotting tool, or even a toothpick, dot a tiny reflection speck on the top right of the black eye.
Step 22 To finish off your Red Robin, paint a white, curved base of snow all around the bottom of the rock.
You’re done! Once all the paint and dots are dry, you can varnish your little Red Robin.
Products used in this tutorial
-

Starter brush set
R196.00 Add to cart -

Double-Sided Dotting Tool Set of 5
R70.00 Add to cart -

30ml Cherry Red
R28.00 Add to cart -

30ml Jet Black
R28.00 Add to cart -

30ml Lilly White
R28.00 Add to cart -

30ml Periwinkle Blue
R28.00 Add to cart -

30ml Chocolate Brown
R28.00 Add to cart -

30ml Dragon’s Gold
R40.00 Add to cart


