

Bring a touch of the seaside into your home with these cheerful Nautical Fishies! They’re simple to paint and make lovely decorations for bedrooms, bathrooms, or even Christmas trees. In this tutorial, I’ll show you two different fish designs using Rock Paint in a classic coastal palette of blues, red, and white.
Each wooden fish comes with light laser-engraved markings to guide your design – you can follow the engraved lines, paint freely in your own style, or follow this step-by-step tutorial for Rock Paint’s take on these fishies. Whether you’re painting solo or crafting with kids, these little fish are fun, easy, and wonderfully relaxing to make.
What you’ll need for this project:
Before you begin, gather your materials so everything is ready at hand. You can order your set of 4 wooden fishies here.
- Wooden Fishies
- Rock Paint colours:
White Chalk Paint
River Stone
Dragonfly Blue
Cherry Red
Jet Black
Lily White
Varnish - Brushes: broad flat (F4) and fine round (R1) and a Fine Brush (Memory Brush)
- Dotting tools (various sizes)
- Paint Mixing Dish (shallow palette or small white ceramic plate)
- Circle Stencil (optional, for tidy eyes/dots)
- Water container + paper towel/clean rag
- String for hanging your fishies once dry
Before you begin, gather everything so it’s within reach. You can order your set of 4 Wooden Fishies here. Then follow the step-by-step photos below.
Step 1 – Paint the undercoat
Begin by applying a thin, even layer of White Chalk Paint to your wooden fish. Chalk paint has a different texture and coverage to Rock Paint’s Lily White, so we’re using it here purely as an undercoat to help the next colours grip and to give a good base coverage. Once the first coat is dry, add a second coat for a smoother base. You can paint both sides of the fish. Leave to dry completely before moving on to your main colour.
Step 2 – Add the base colour
Once your chalk undercoat is completely dry, paint over it with River Stone. Use a broad flat brush and apply long, even strokes from head to tail.
This soft neutral shade gives a warm, coastal base for the blue stripes you’ll be adding later. Hold the tail end while you paint the body, and then swap to hold the body when painting the tail. Paint both sides of the fish. Leave to dry fully before moving on — it’s ready when the surface feels smooth and no longer cool to the touch.
Step 3 – Mark the positioning for the stripes
Using a ruler and a sharp pencil, measure and lightly mark your stripes about 5 mm apart along the centre line of your fish. Keep your pencil lines soft and even — they’re only there as a guide and will disappear once painted.
Step 4 – Draw the stripes
Using a ruler and pencil, lightly draw your stripe lines along the body of your fish, following the markings you made earlier. Keep your pencil pressure light so the lines are easy to paint over later.
Step 5 – Draw the eye
Using a circle stencil, lightly draw the eye near the front of your fish. You can also draw it freehand if you prefer a more organic look. Keep the outline neat — you’ll fill it in later with paint.
Step 6 – Draw the eye
Using Cherry Red, paint the tail section of your fish. Apply the paint in smooth, even strokes, following the edge of the tail shape. You can adjust the depth of colour with a second coat once dry.
Step 7 – Paint the edges and reverse side
While the tail dries, paint along the edges of your fish for a neat, finished look. Once dry, flip it over and paint the reverse side to match. Allow the paint to dry completely before moving on to your next step.
Step 8 – Paint the blue stripes
Using Dragonfly Blue, begin painting the stripes you marked earlier. Use a flat brush and steady, even strokes, following your pencil lines carefully. Work from the tail towards the head, leaving the lighter River Stone stripes between each blue one.
Step 9 – Add a second coat of blue
Once the first coat is dry, apply a second layer of Dragonfly Blue for a solid, even finish. Let the paint dry completely before handling your fish.
Step 10 – Paint the edges and reverse side
If your fish will hang as a mobile or Christmas tree decoration, paint along the edges and the reverse side to match. This gives your piece a neat, finished look from every angle. Allow it to dry thoroughly before moving on.
Step 11 – Prepare the eye
Check that your pencil-drawn eye is still visible. If it’s faint, trace over it again lightly using your stencil and pencil. Get your Lily White paint ready for the next step — this will form the base of the eye.
Step 13 – Paint the white of the eye
Add a small amount of Lily White paint to your palette or dish. Using the largest end of your dotting tool, dip it into the paint and dab it onto the eye area. Gently rotate the tool in a circle so the paint reaches the edges of your pencil line, forming a neat white dot for the eye. Allow it to dry completely before adding the pupil.
Step 14 – Add the pupil
Place a small amount of Jet Black paint on your palette. Using the same end of your dotting tool, make a smaller black dot right in the centre of the white eye. Let it dry — and your striped fishie is complete!
We’ll start on fish number two next.
Step 15 – Draw the eye and mark the head section
Using your circle stencil and a sharp pencil, lightly trace the eye near the front of the fish.
Step 16 – Mark the head area
Next, draw a vertical line about one-quarter across the fish (this will be roughly three-quarters of the way from the tail). This line separates the head section from the body pattern, and will help guide your painting in the next steps. It’s time to get your Dragonfly Blue ready – add a blob to your paint palette.
Step 17 – Start painting the blue
Using Dragonfly Blue, begin painting the body section of your fish (the area behind the pencil line).
Apply smooth, even brushstrokes across the surface.
Step 18 – Paint the edges
Remember to paint the edges of your fish as well. This gives a neat, finished look from all angles.
Step 19 – Add extra coats if needed
If you prefer a flat, solid colour, apply one or two additional coats of Dragonfly Blue. Allow each layer to dry before adding the next.
Step 20 – Paint the head
Once the blue is completely dry, switch to River Stone and paint the head area in front of your pencil line.
Use steady strokes to keep the transition between the two colours clean.
Step 21 – Paint the eye white
Using Lily White and the larger end of your dotting tool, dab paint onto the eye area. Gently drag the tool in a small circular motion to create a smooth, rounded white eye shape. Let it dry completely before the next step.
Step 22 – Begin drawing the scales
Using a white pencil, start drawing the scale pattern. Begin with a small half-circle just behind the eye, then draw a second concentric half-circle, and then a third. These first curves establish the shape and spacing for the full scale pattern.
Step 23 – Prepare to paint the scales
Once your first set of scales is drawn, place a small blob of Lily White paint onto your paint dish. Using a very fine brush (Memory Brush), dip only the tip into the paint — you want just enough paint to make thin, tidy lines.
Step 24 – Paint the scale lines
Carefully paint over the pencil lines of your first set of scales. Each scale is made up of three arcs, so paint each arc slowly and steadily for the neatest result. Work gently to keep the lines fine and even.
Step 25 – Continue the scale pattern
Draw the next set of scales using your white pencil, then paint over these lines in the same way. Rinse your brush often to prevent paint build-up — too much paint on the bristles can make your lines thicker than intended. Dry and reshape the brush tip before continuing to keep your lines crisp and consistent.
Step 26 – Continue the scale pattern across the fish
Now that you’ve completed your first set of scales, repeat the same process across the body of the fish.
Paint the pencil lines
Use your fine brush and Lily White to carefully paint over the arcs you’ve drawn.
Work slowly, keeping the lines thin and even.Add more pencil lines
Once the painted arcs are dry (they dry quickly), draw the next row of scales with your white pencil.
Each scale has three concentric arcs, so keep your spacing consistent.Paint the next row
Paint over the new pencil lines in the same way.
Remember to rinse and reshape your brush every few minutes — especially in warm weather — to prevent paint build-up and thick lines.Build the entire pattern
Now that you have the rhythm, continue drawing a row of scales, then painting it, until the entire fish body is covered in the pattern.
Take your time and enjoy the process — the repeated arcs create a beautiful folk-style pattern once complete.
Step 27 – Finish the eye and paint the reverse side
Add a small blob of Jet Black paint to your dish. Using the larger end of your dotting tool, place a neat black dot in the centre of the white eye. Let it dry — this brings your fishie to life!
If you’re planning to hang your fish as a Christmas tree ornament, add it to a mobile, or display it where both sides will be seen, repeat the same painting steps on the reverse side as well. Matching both sides ensures your fish looks lovely from every angle.
Once everything is dry, attach string through the hole — your Nautical Fishies are complete!
Products used in this tutorial
-

30ml Jet Black
R28.00 Add to cart -

Wooden Fishies – Set of 4
R55.00 Add to cart -

Double-Sided Dotting Tool Set of 5
R70.00 Add to cart -

Paint Mixing Dish: Shallow
R25.00 Add to cart -

Starter brush set
R196.00 Add to cart -

30ml River Stone
R28.00 Add to cart -

Circle stencil
R57.00 Add to cart -
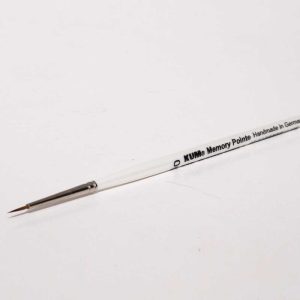
Memory Point – 2/0 brush
R152.00 Add to cart -

30 ml Varnish
R40.00 Add to cart -

30ml Lilly White
R28.00 Add to cart -

30ml Dragonfly Blue
R28.00 Add to cart -

30ml Cherry Red
R28.00 Add to cart


