

Step by step photos on how to paint a Mandala on a rock. (hover over the pictures for instructions)
1
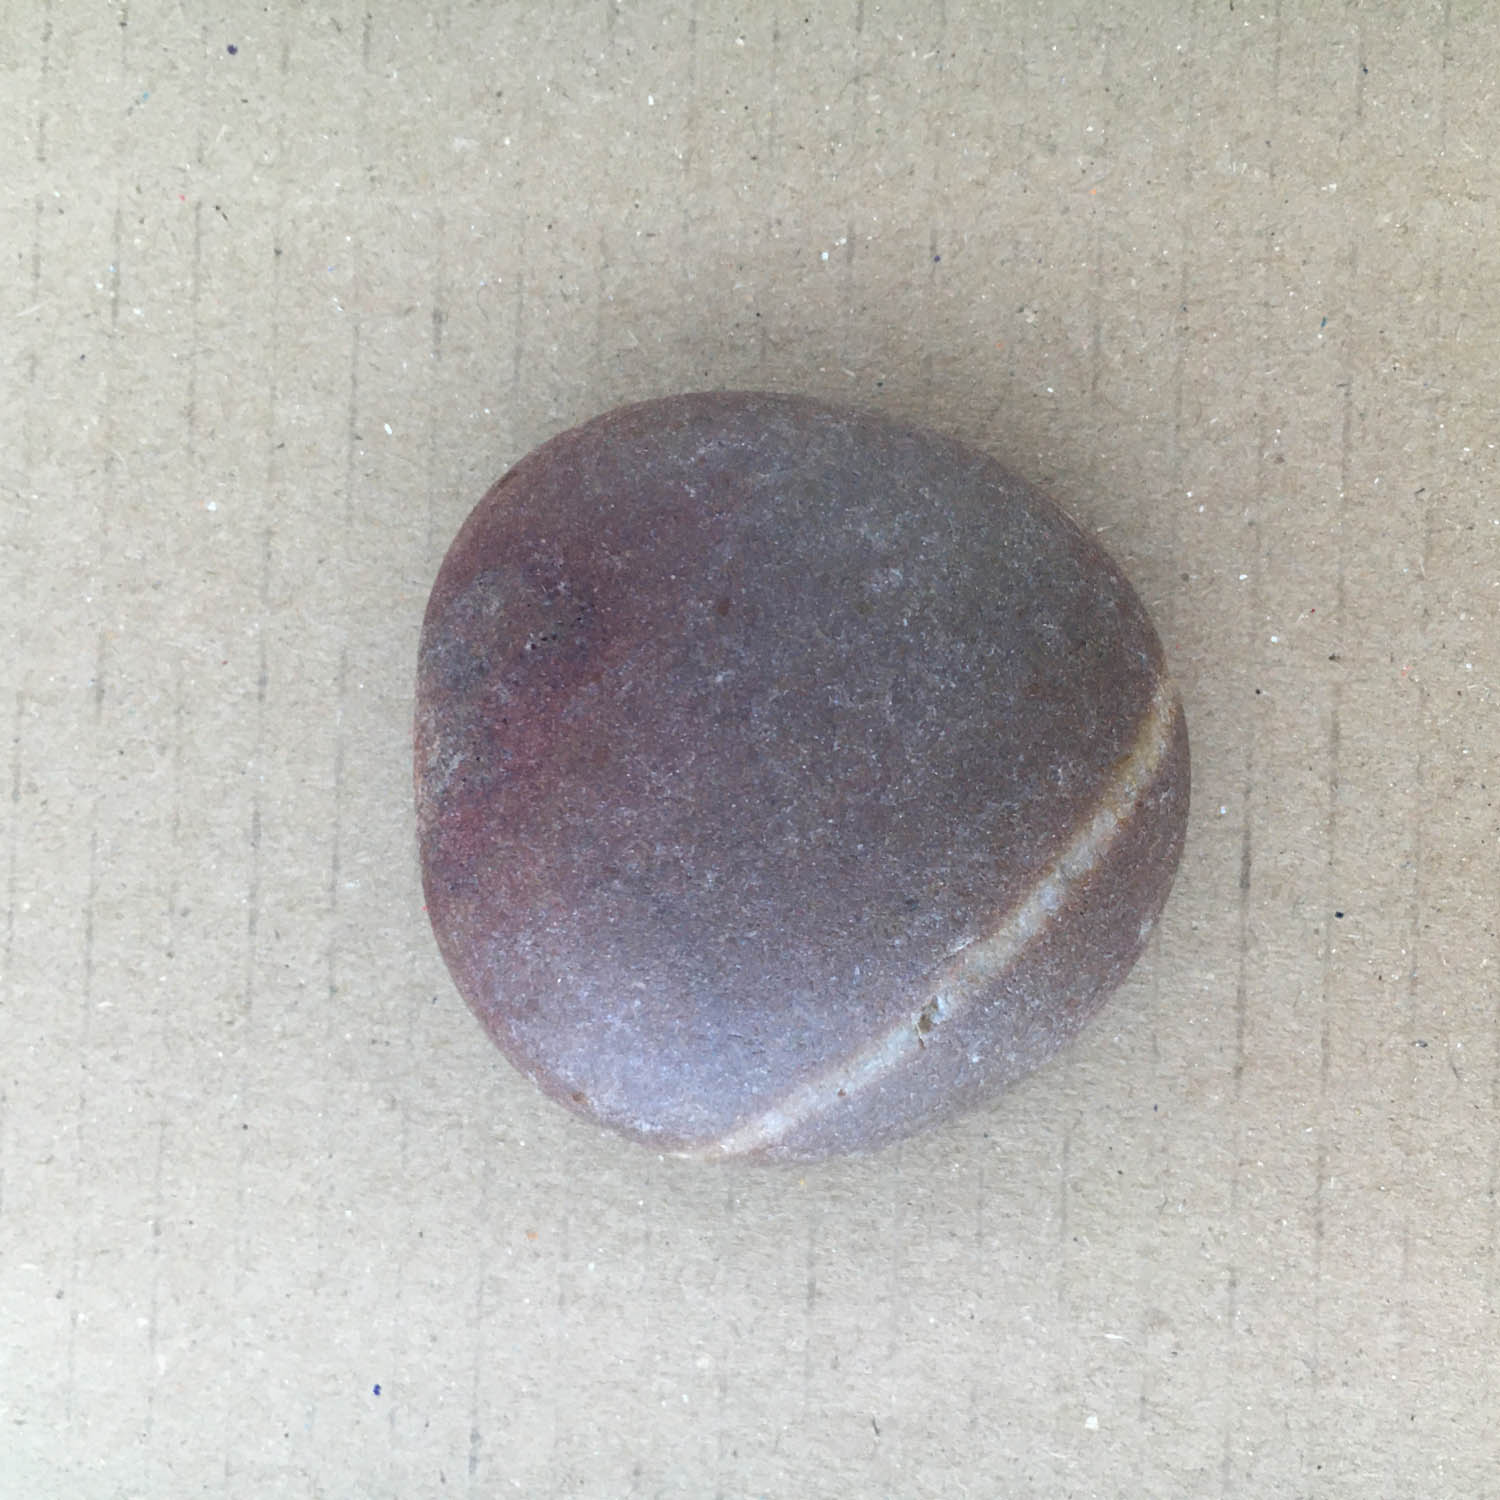
Find yourself a roundish, flattish, smooth pebble and give it a clean under water.
2
Once dry, give the pebble one layer of varnish, allow to dry and varnish the reverse. The varnish will soak into the pebble and bring out the natural colouring. It will dry quite quickly.
3
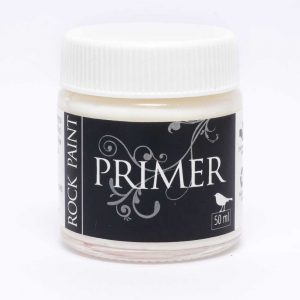
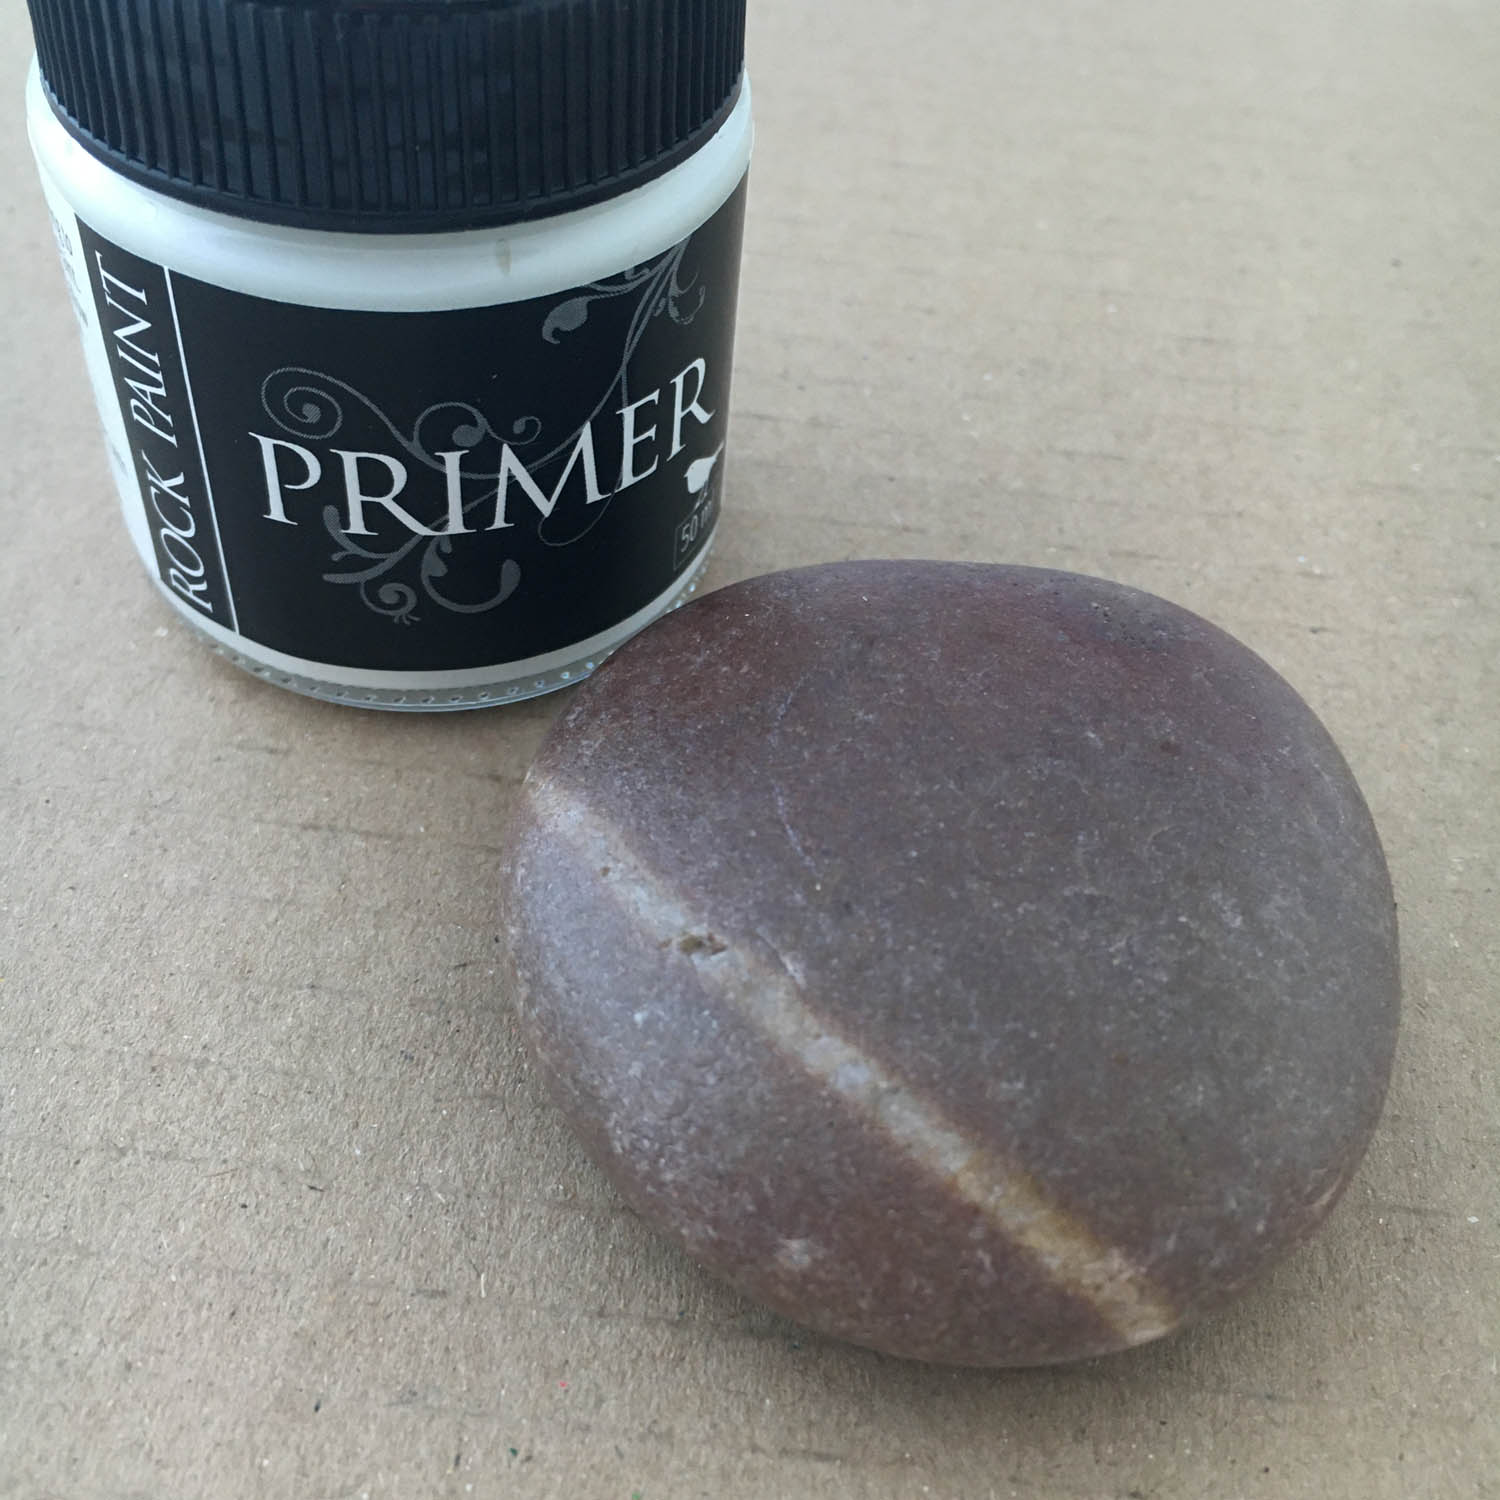
Once dry, apply a thin layer of primer over the top side of the pebble. Primer will give you a good surface for fine detail.
4
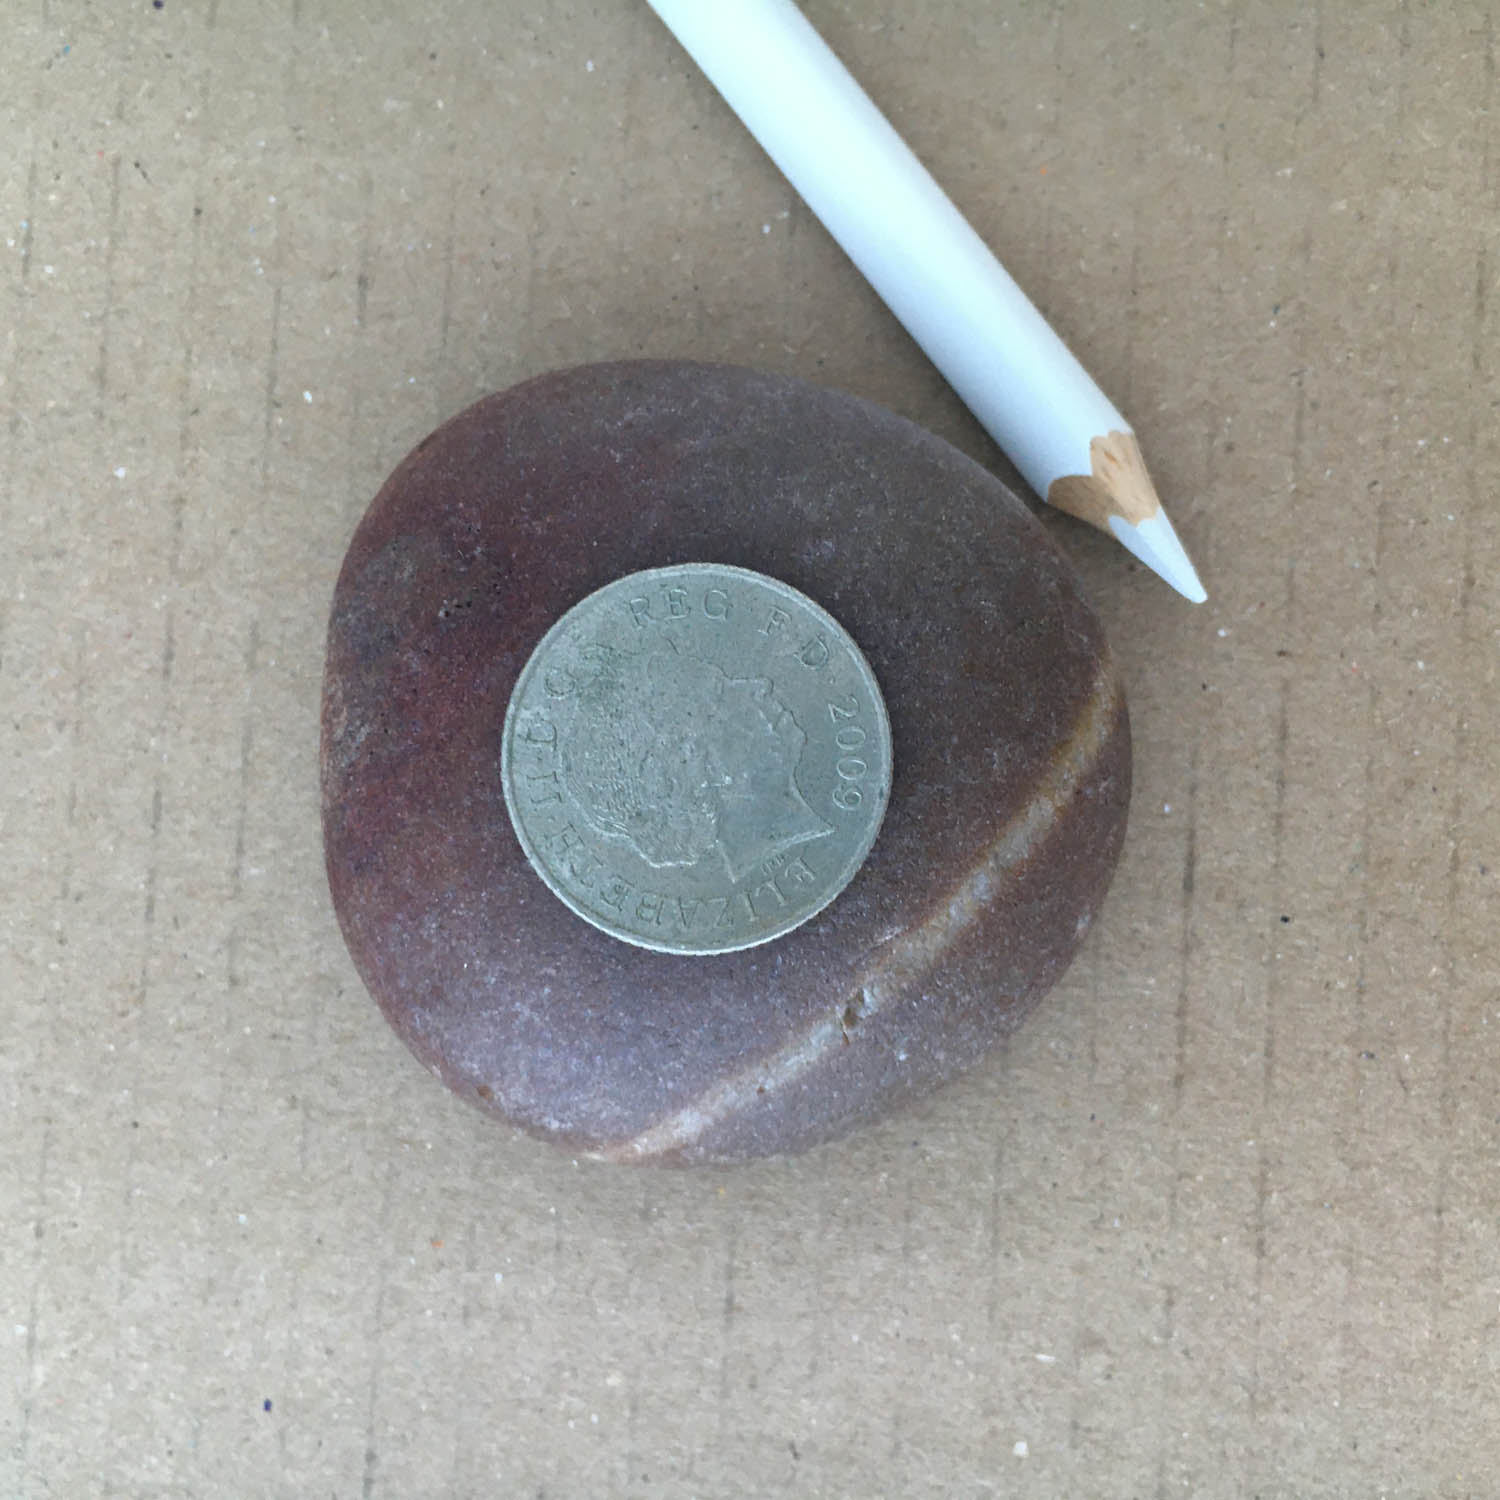
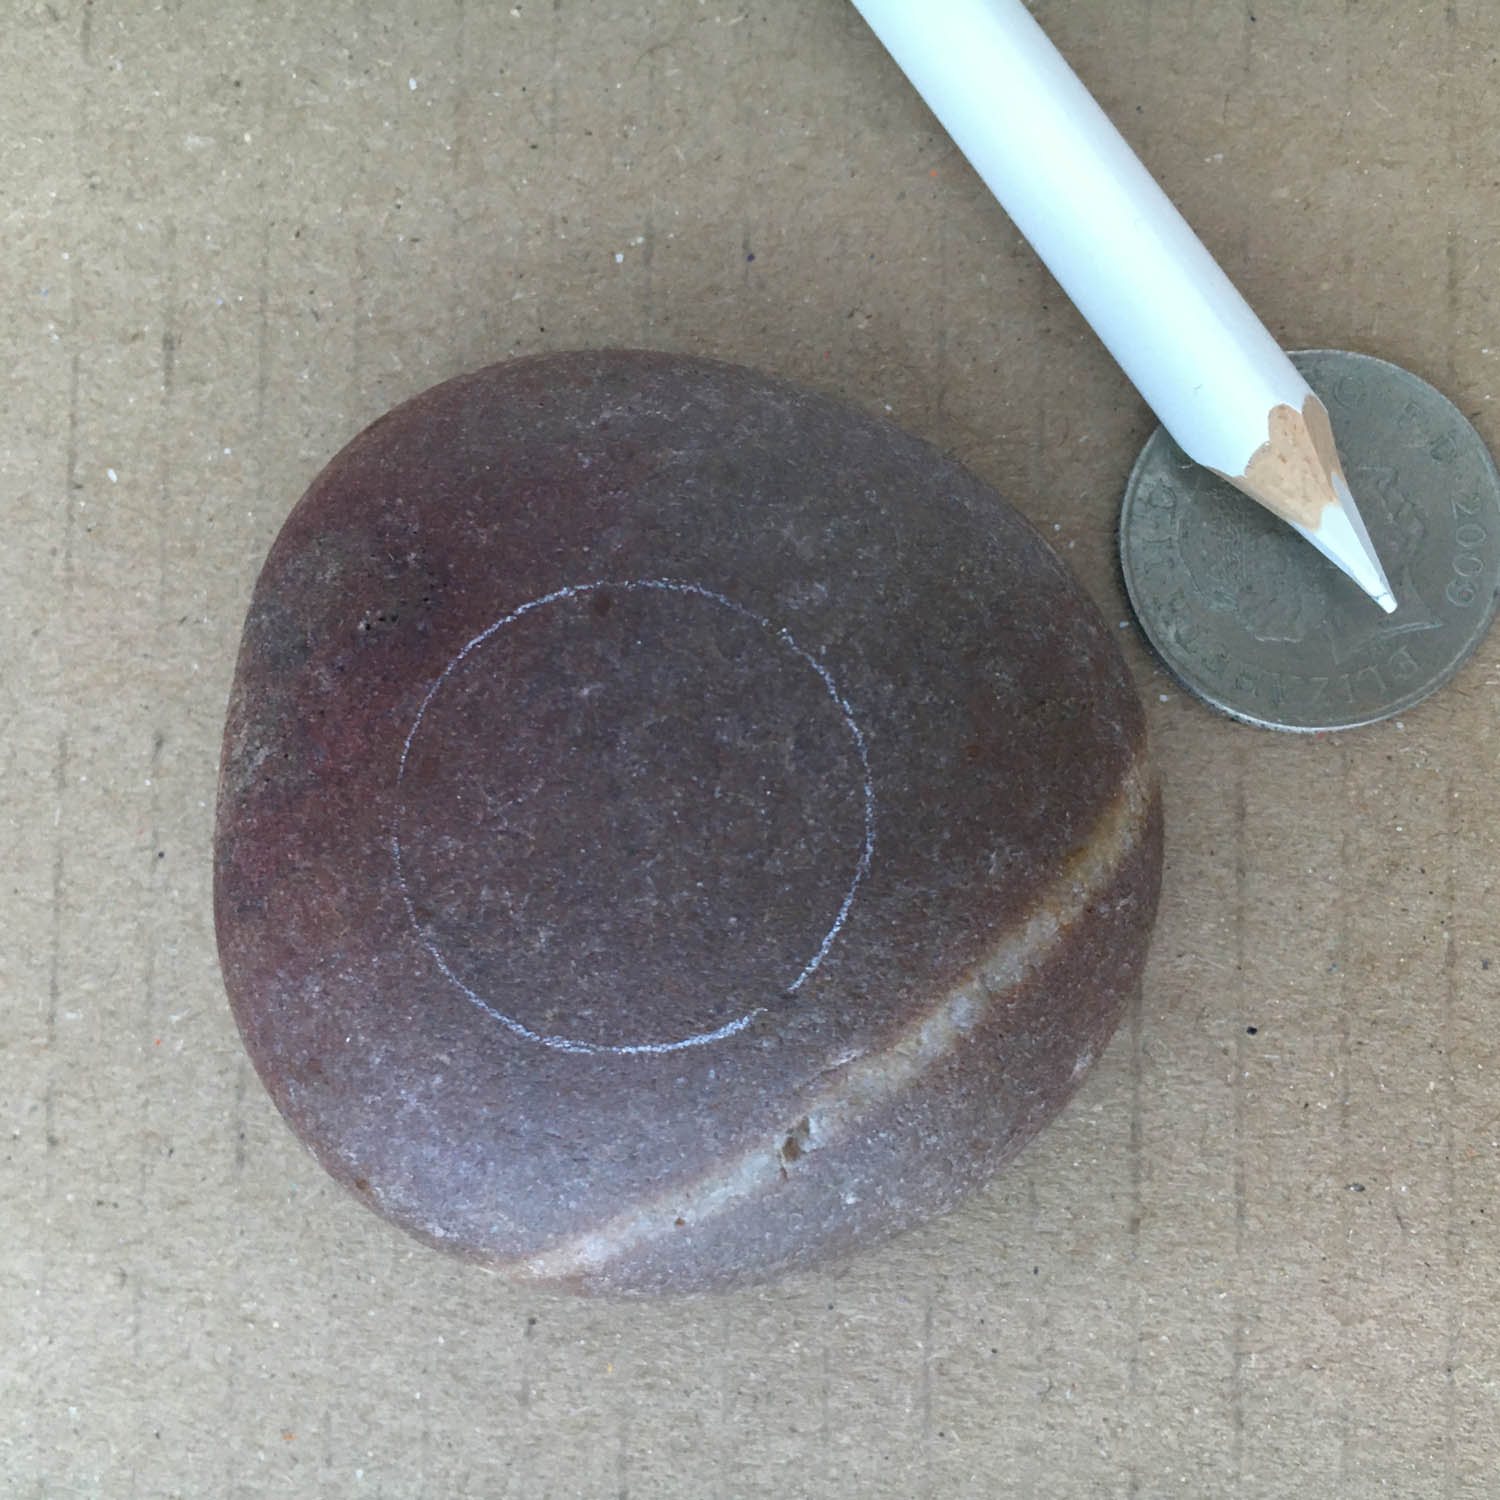
Find a coin which fits neatly on top of the pebble and trace around it with a white pencil.
5
This white circle is a guide and gives you a good idea of the centre of the rock. The pebble is not perfectly round so it's more the 'visual' centre and does not have to be exact.
6
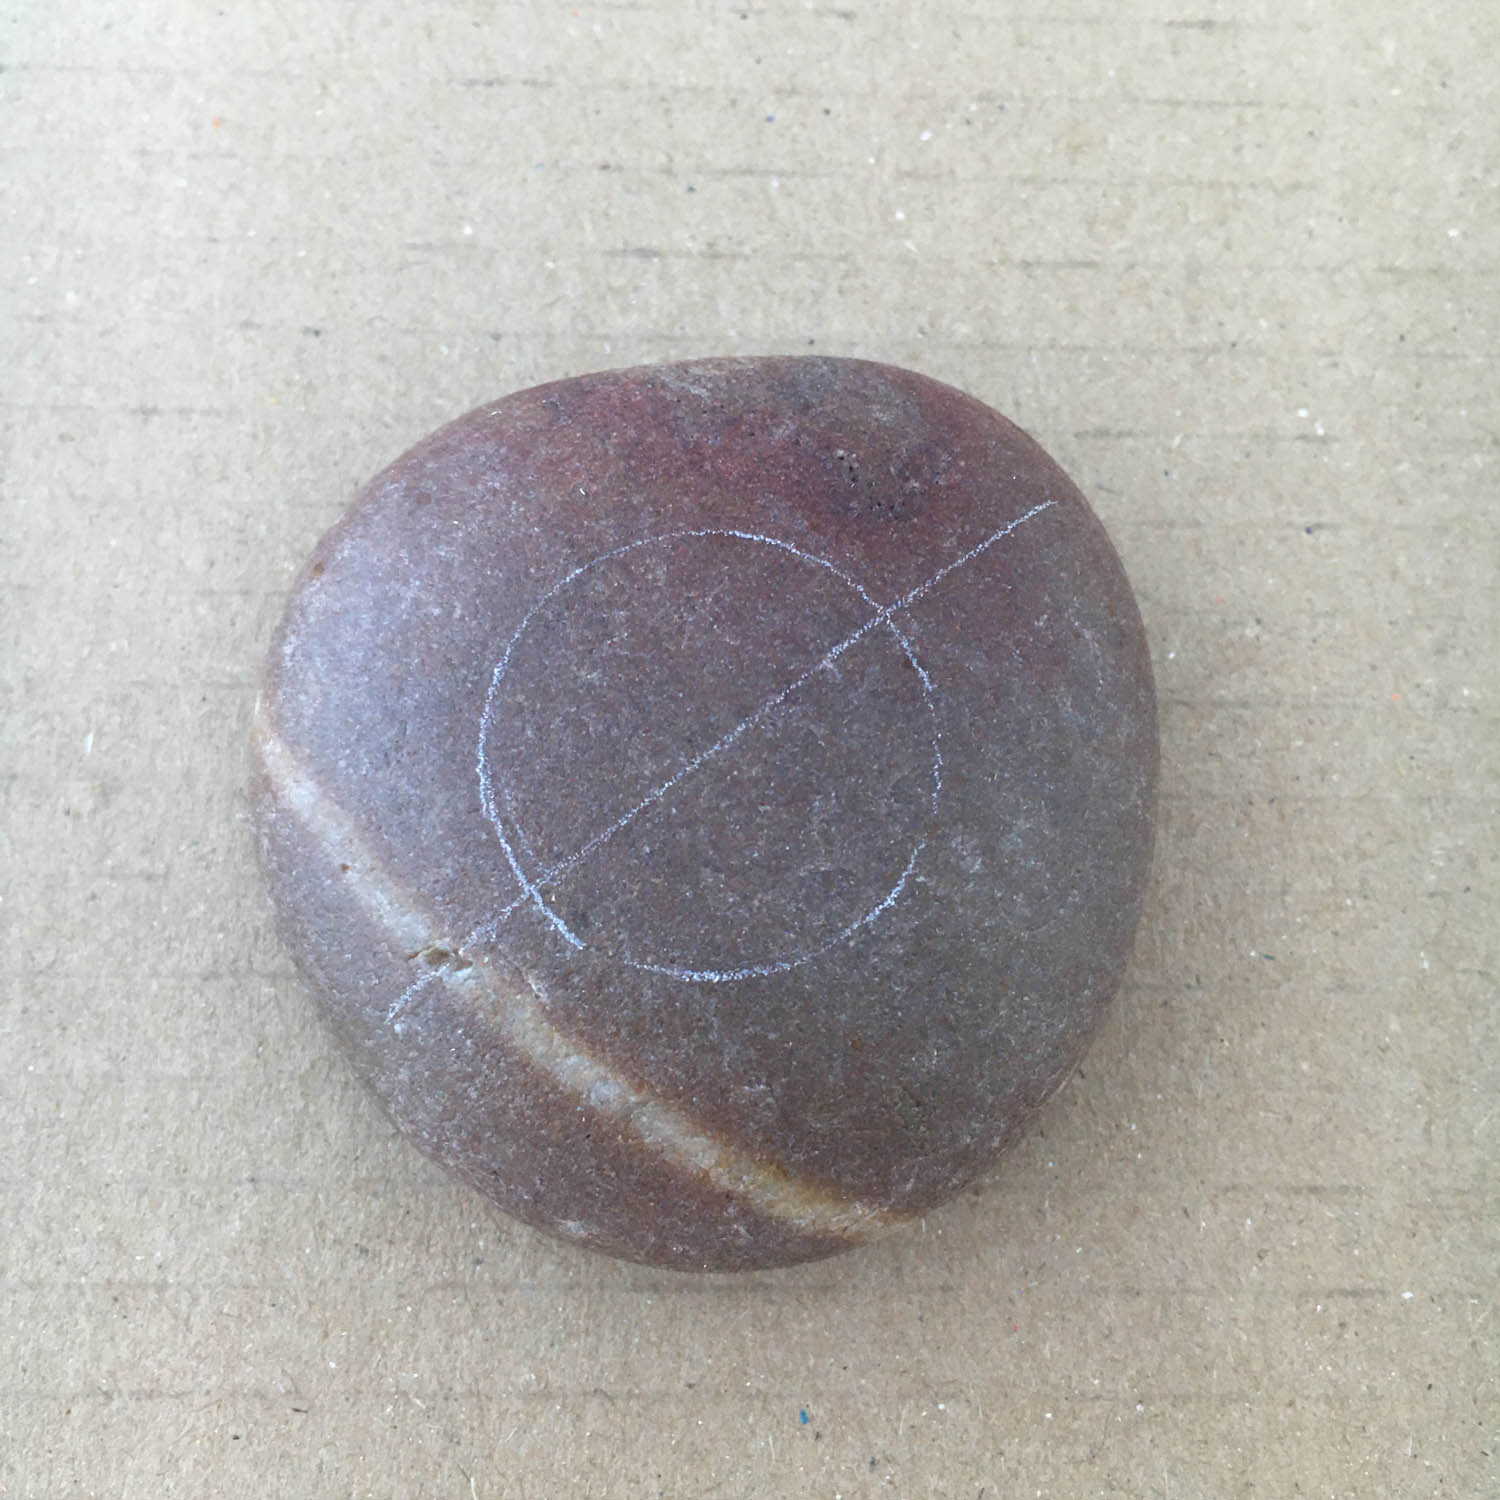
This white circle can serve as a guide to find the centre of the pebble by drawing a cross through the centre of the circle. Again, it doesn't have to be 100%. If you are way out with your lines, you can use an erasor on the white pencil lines.
7
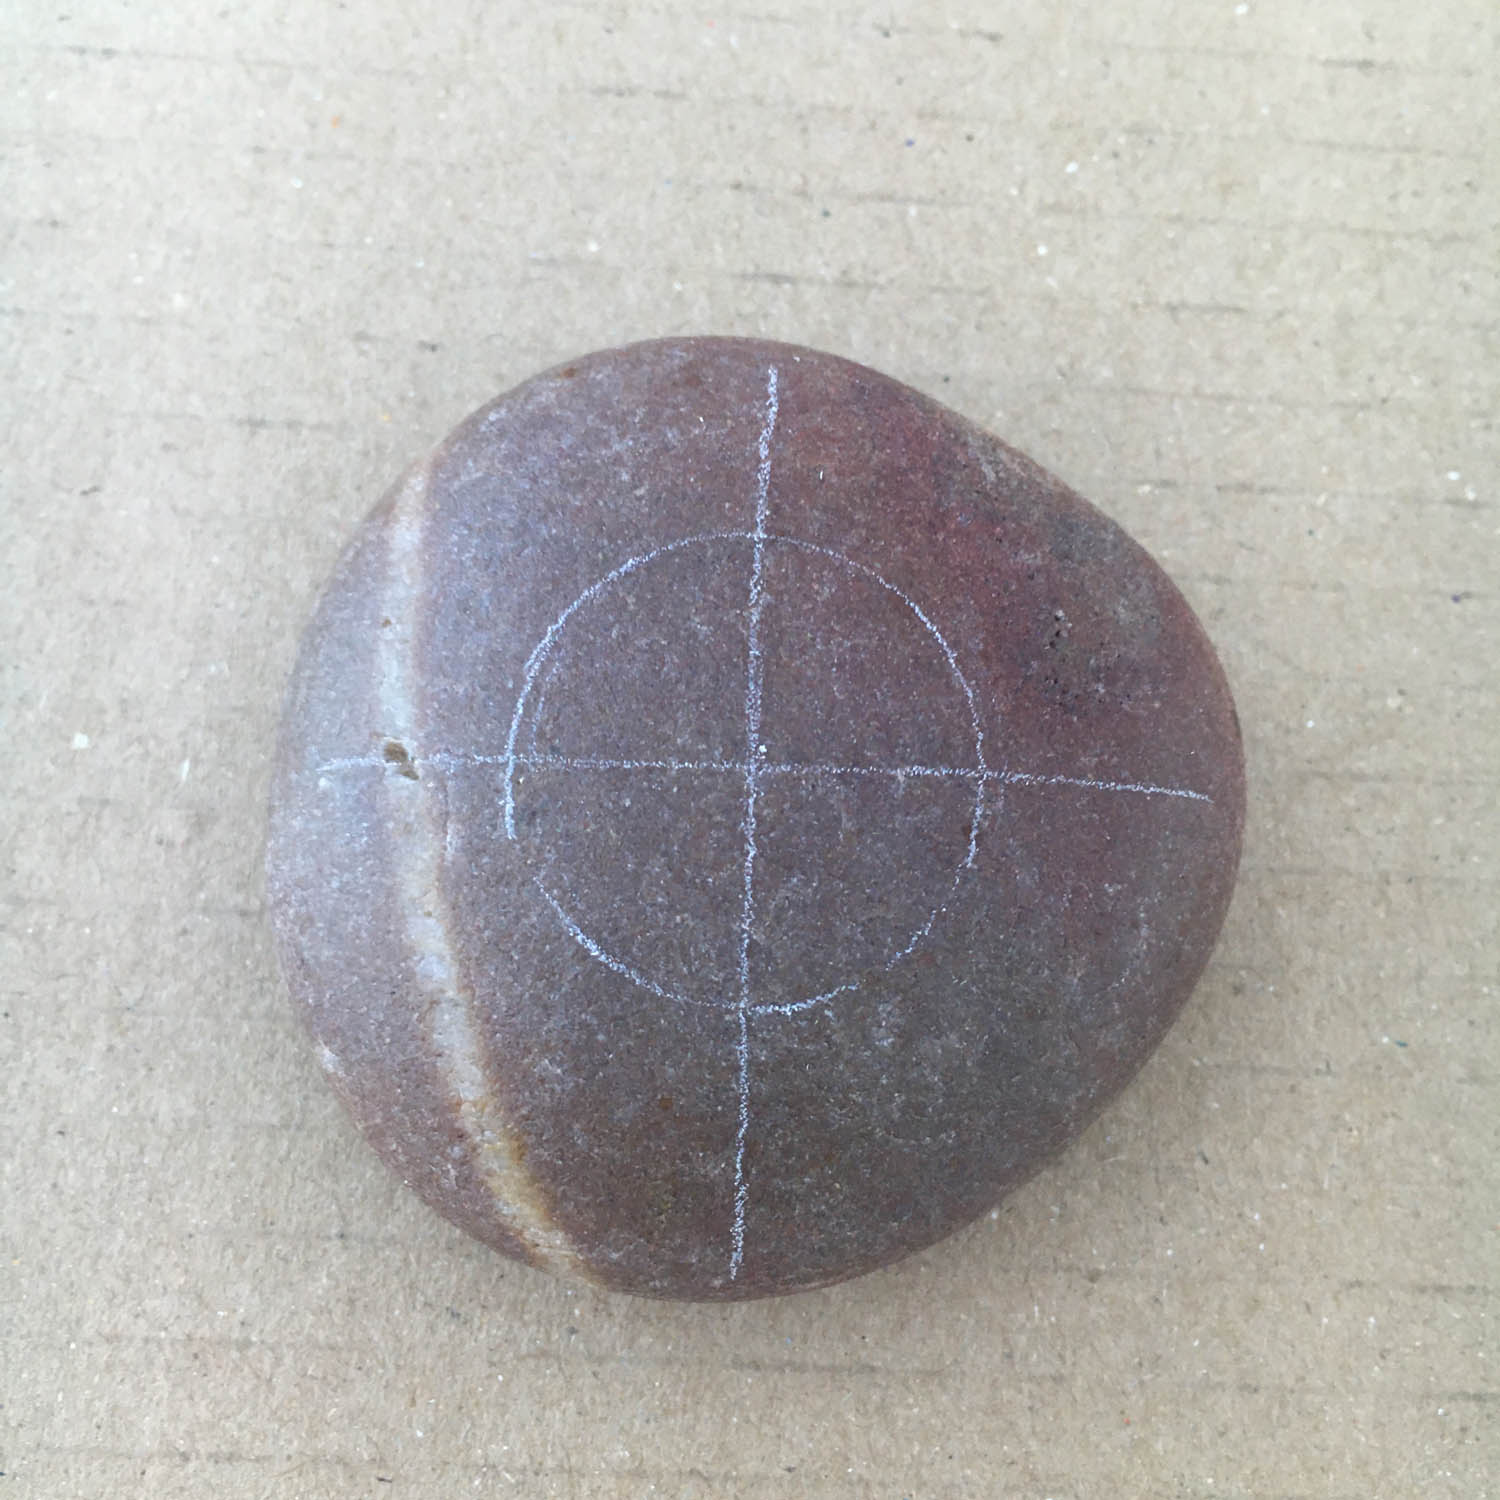
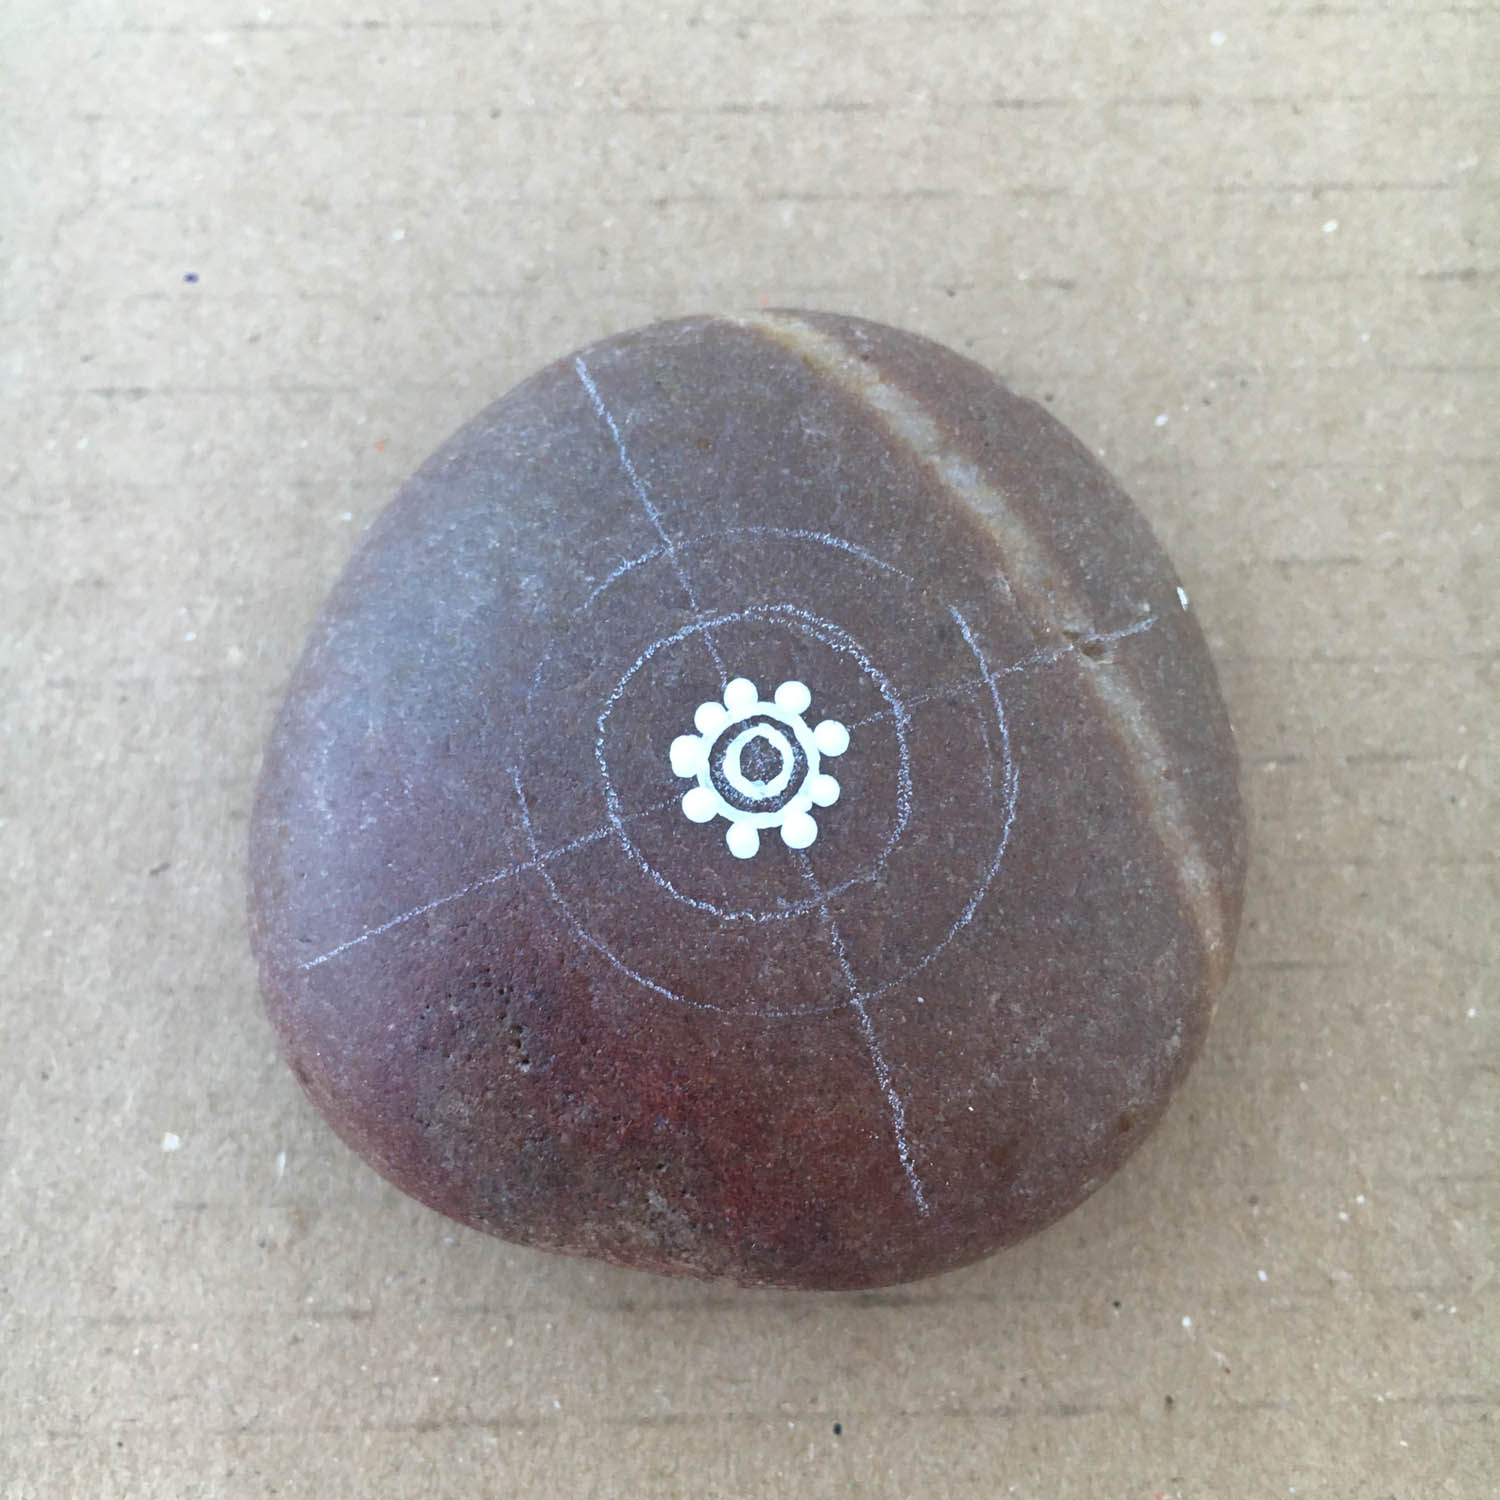
This shows both lines, so you have North, South, East and West lines.
8
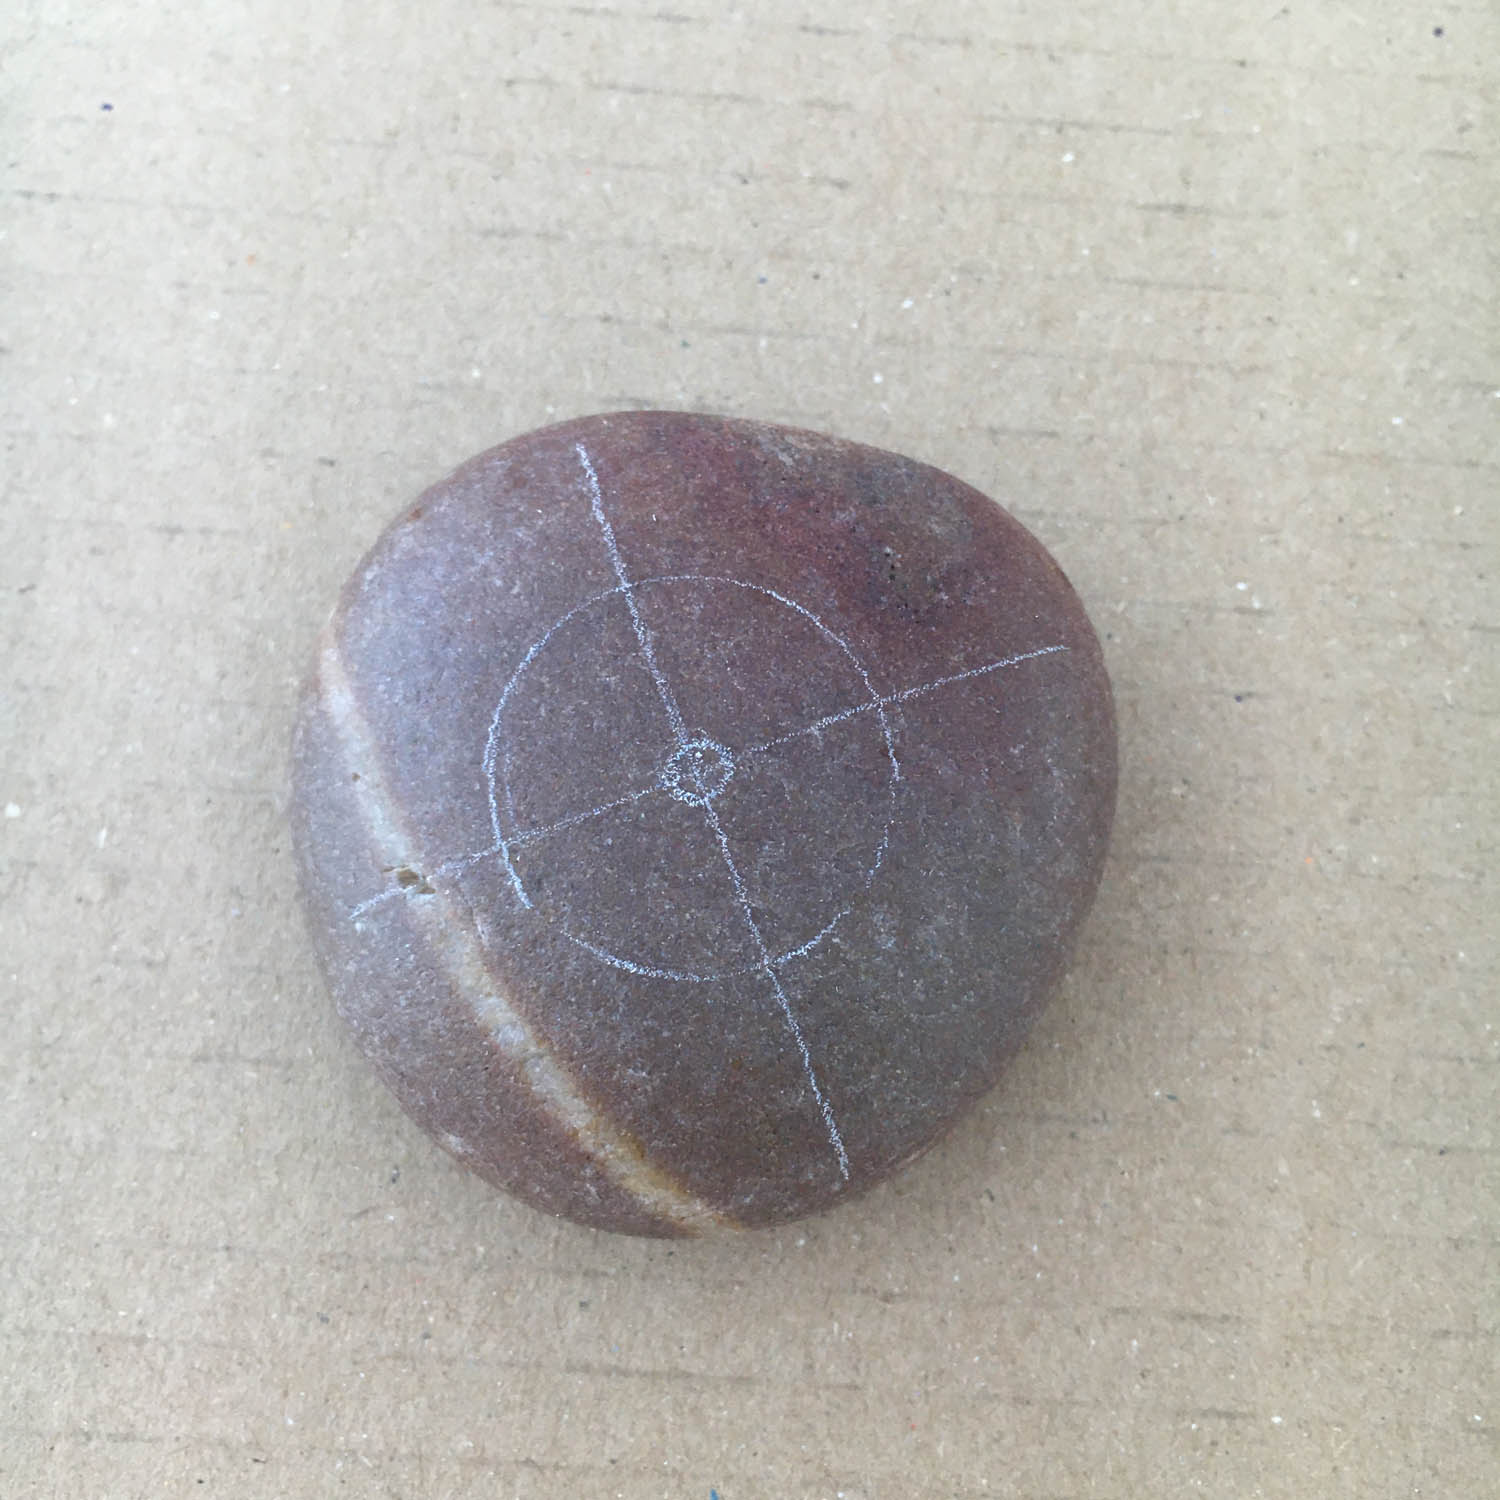
Draw a small circle right in the centre of the pebble where the lines cross.
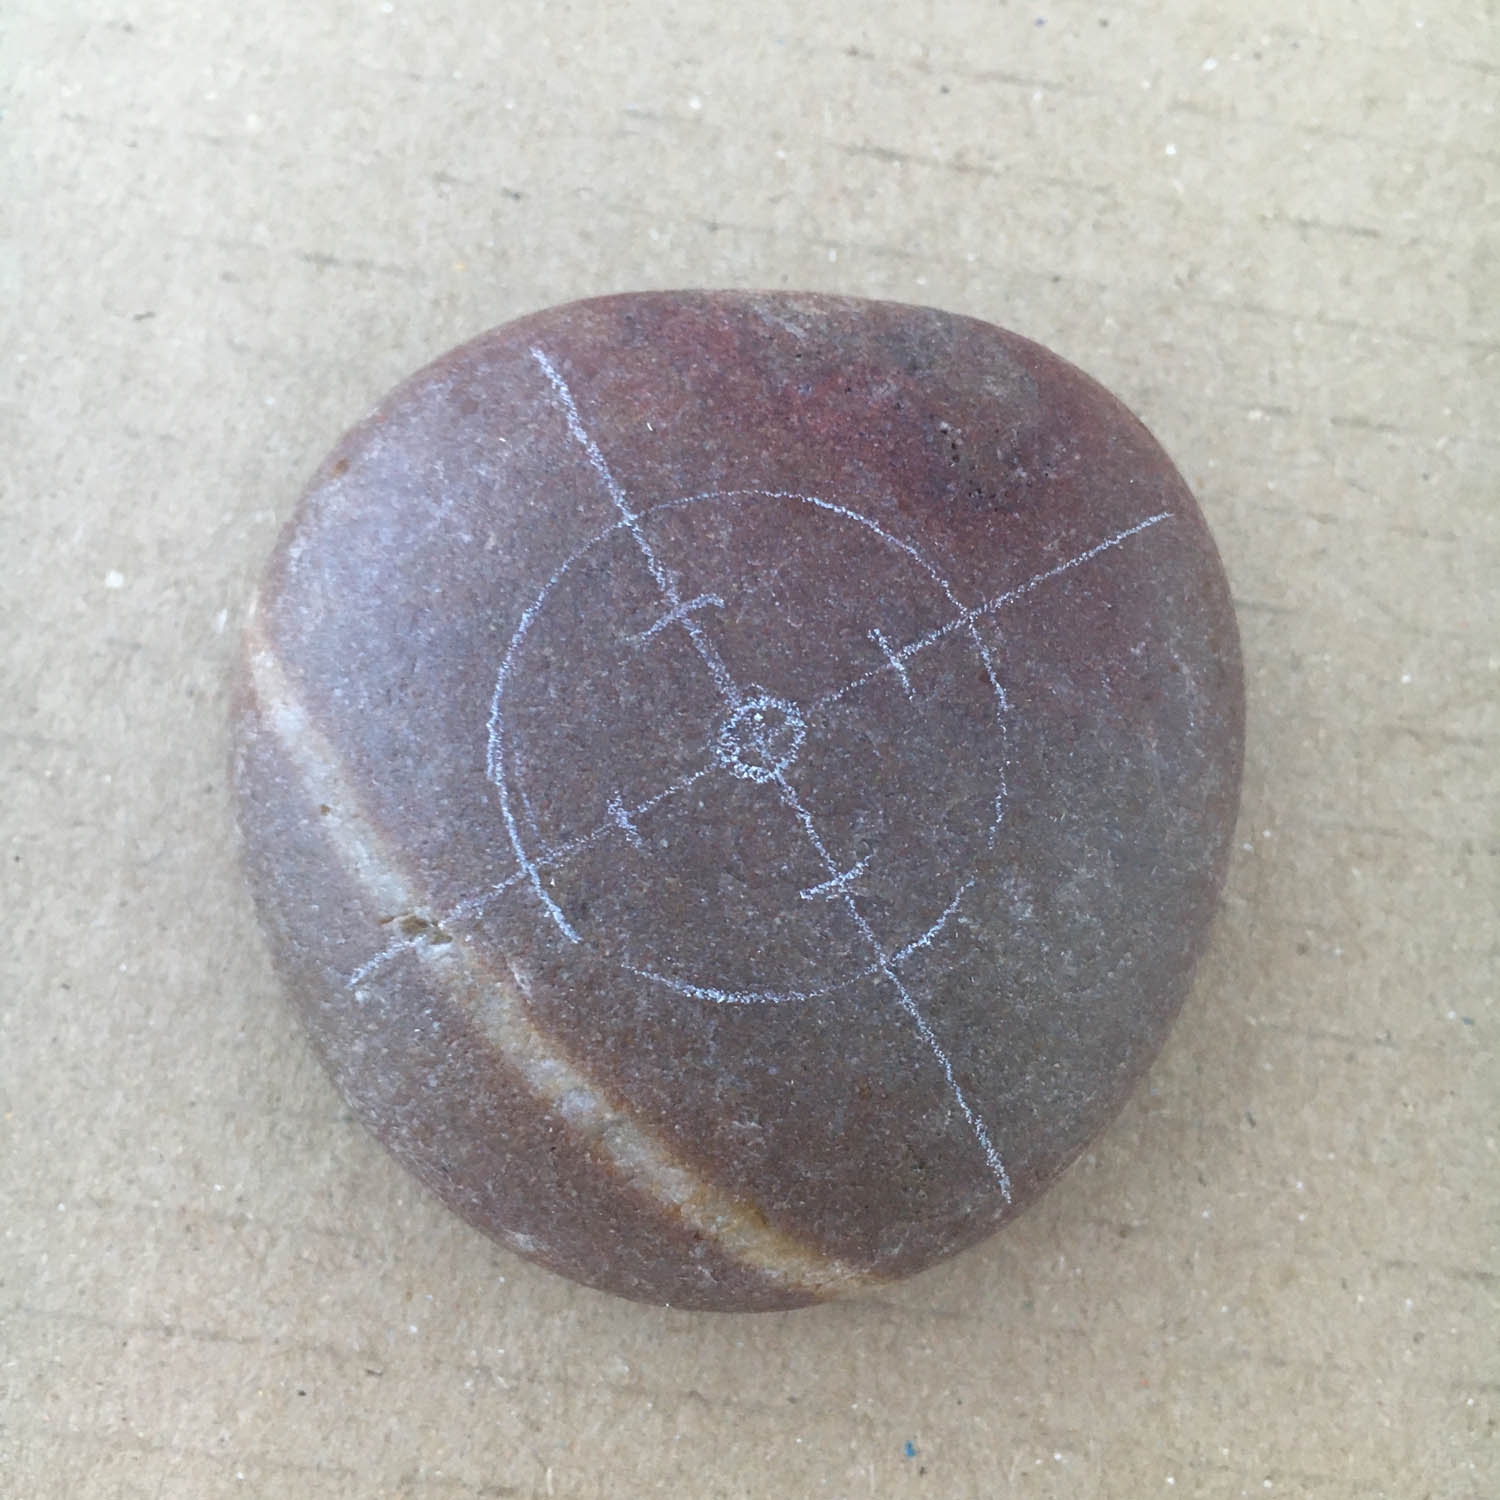
9
Make little marks with your white pencil half way between the centre circle and the coin circle.
10
Join up the marks to make another concentric circle.
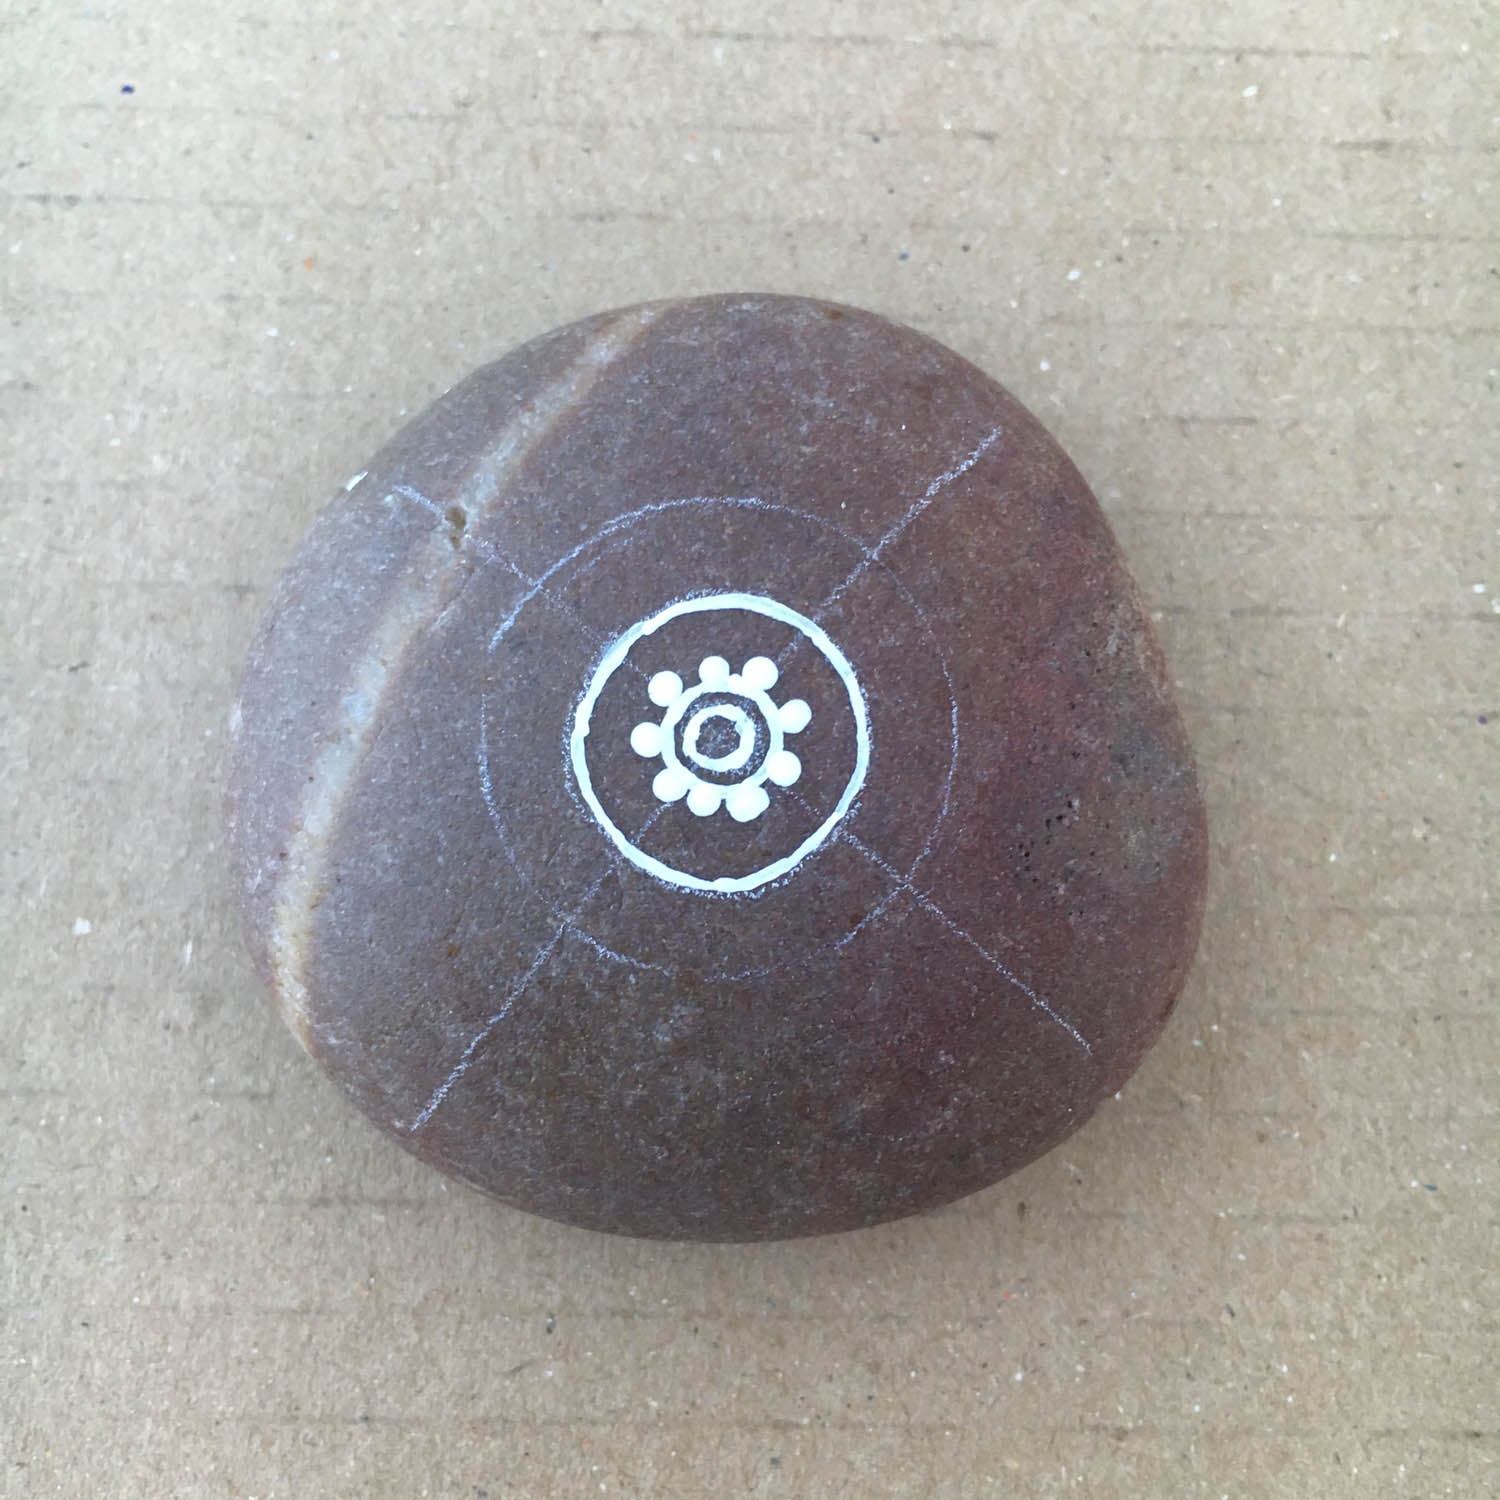
11
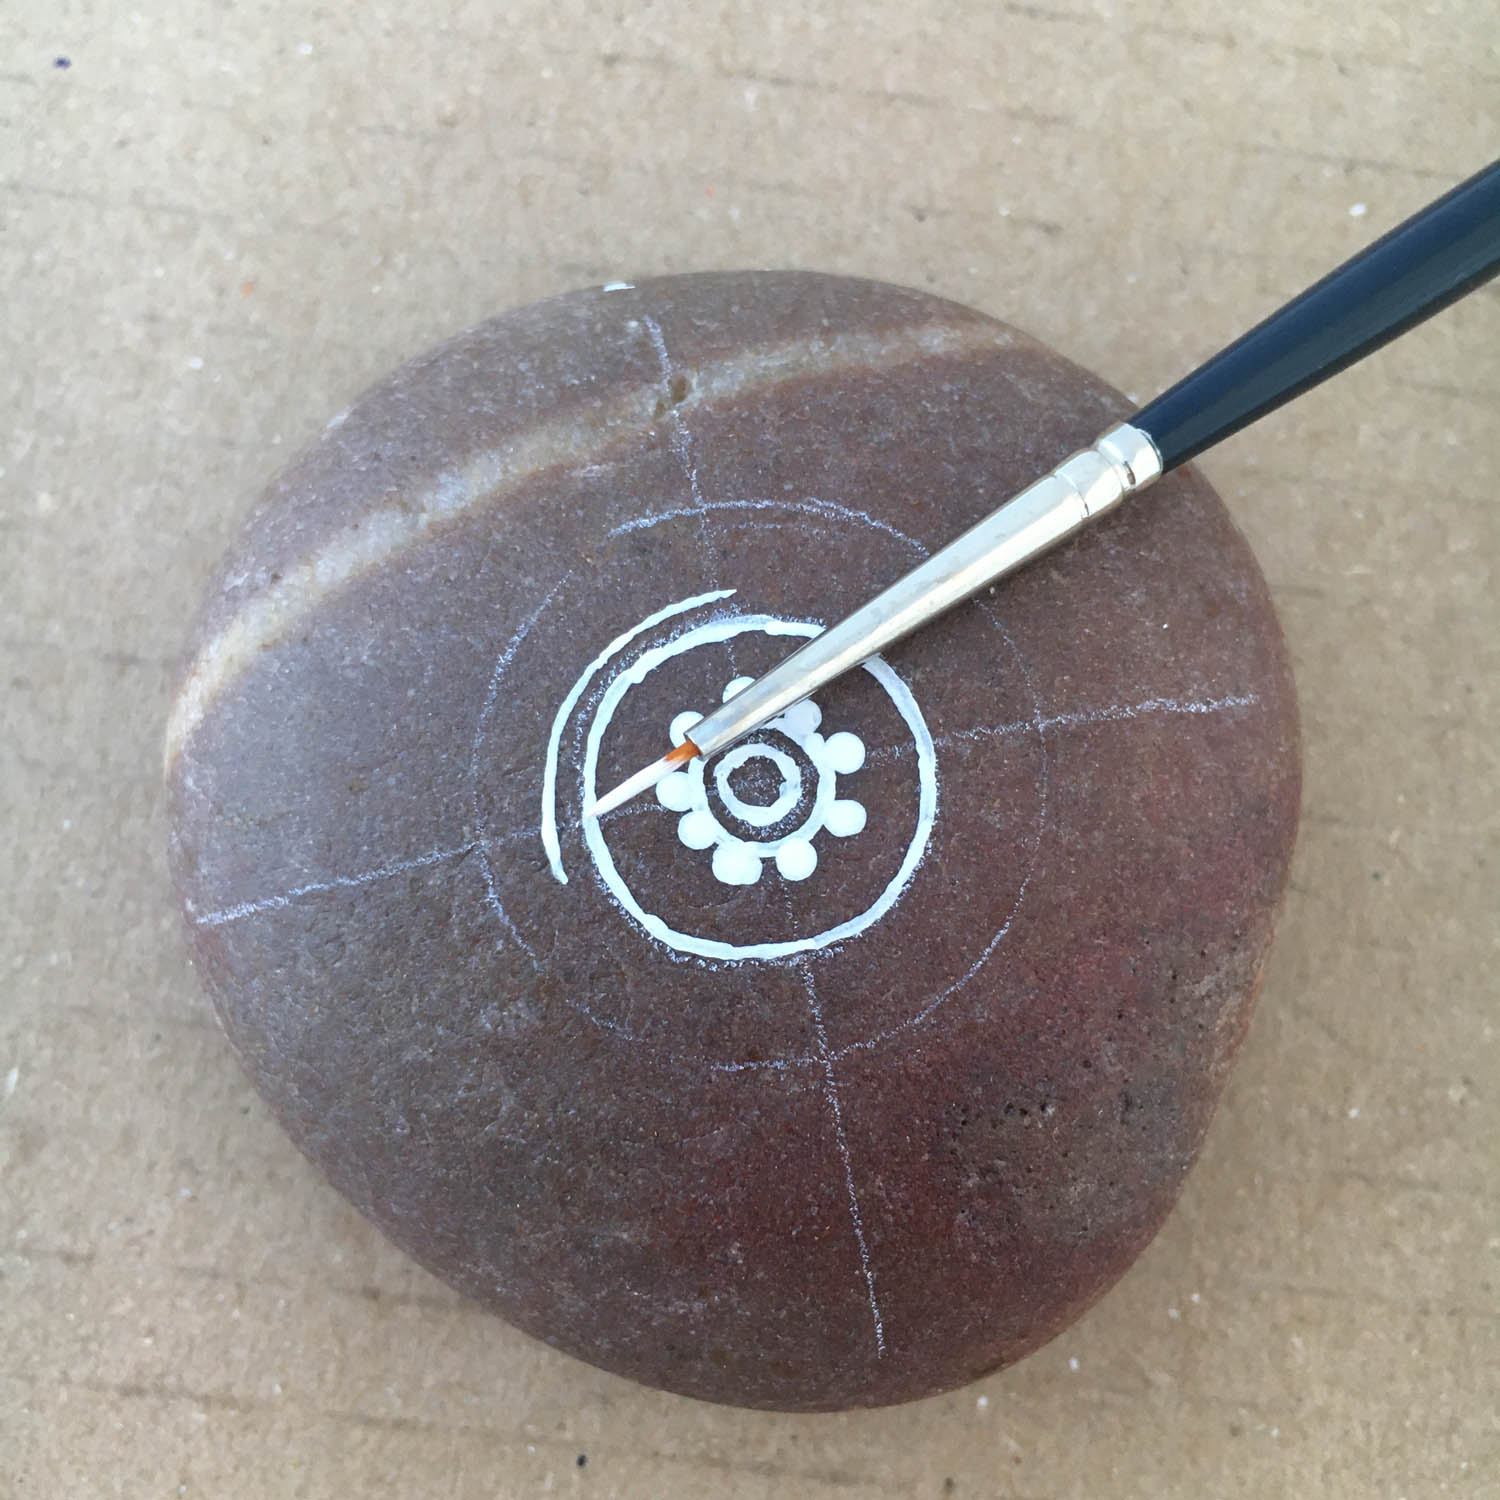
Use white paint and a very thin brush like a 3/0 or 4/0 to paint a thin circle. Only dip the front of the brush in the paint (not right up to the metal shaft) and gently rinse the brush often while working. To make a thin line, gently drag the brush away from you at a 45º angle.
12
Paint a second thin, delicate circle around the centre one. turning the pebble as you go along so you can make best use of the 45º angle.
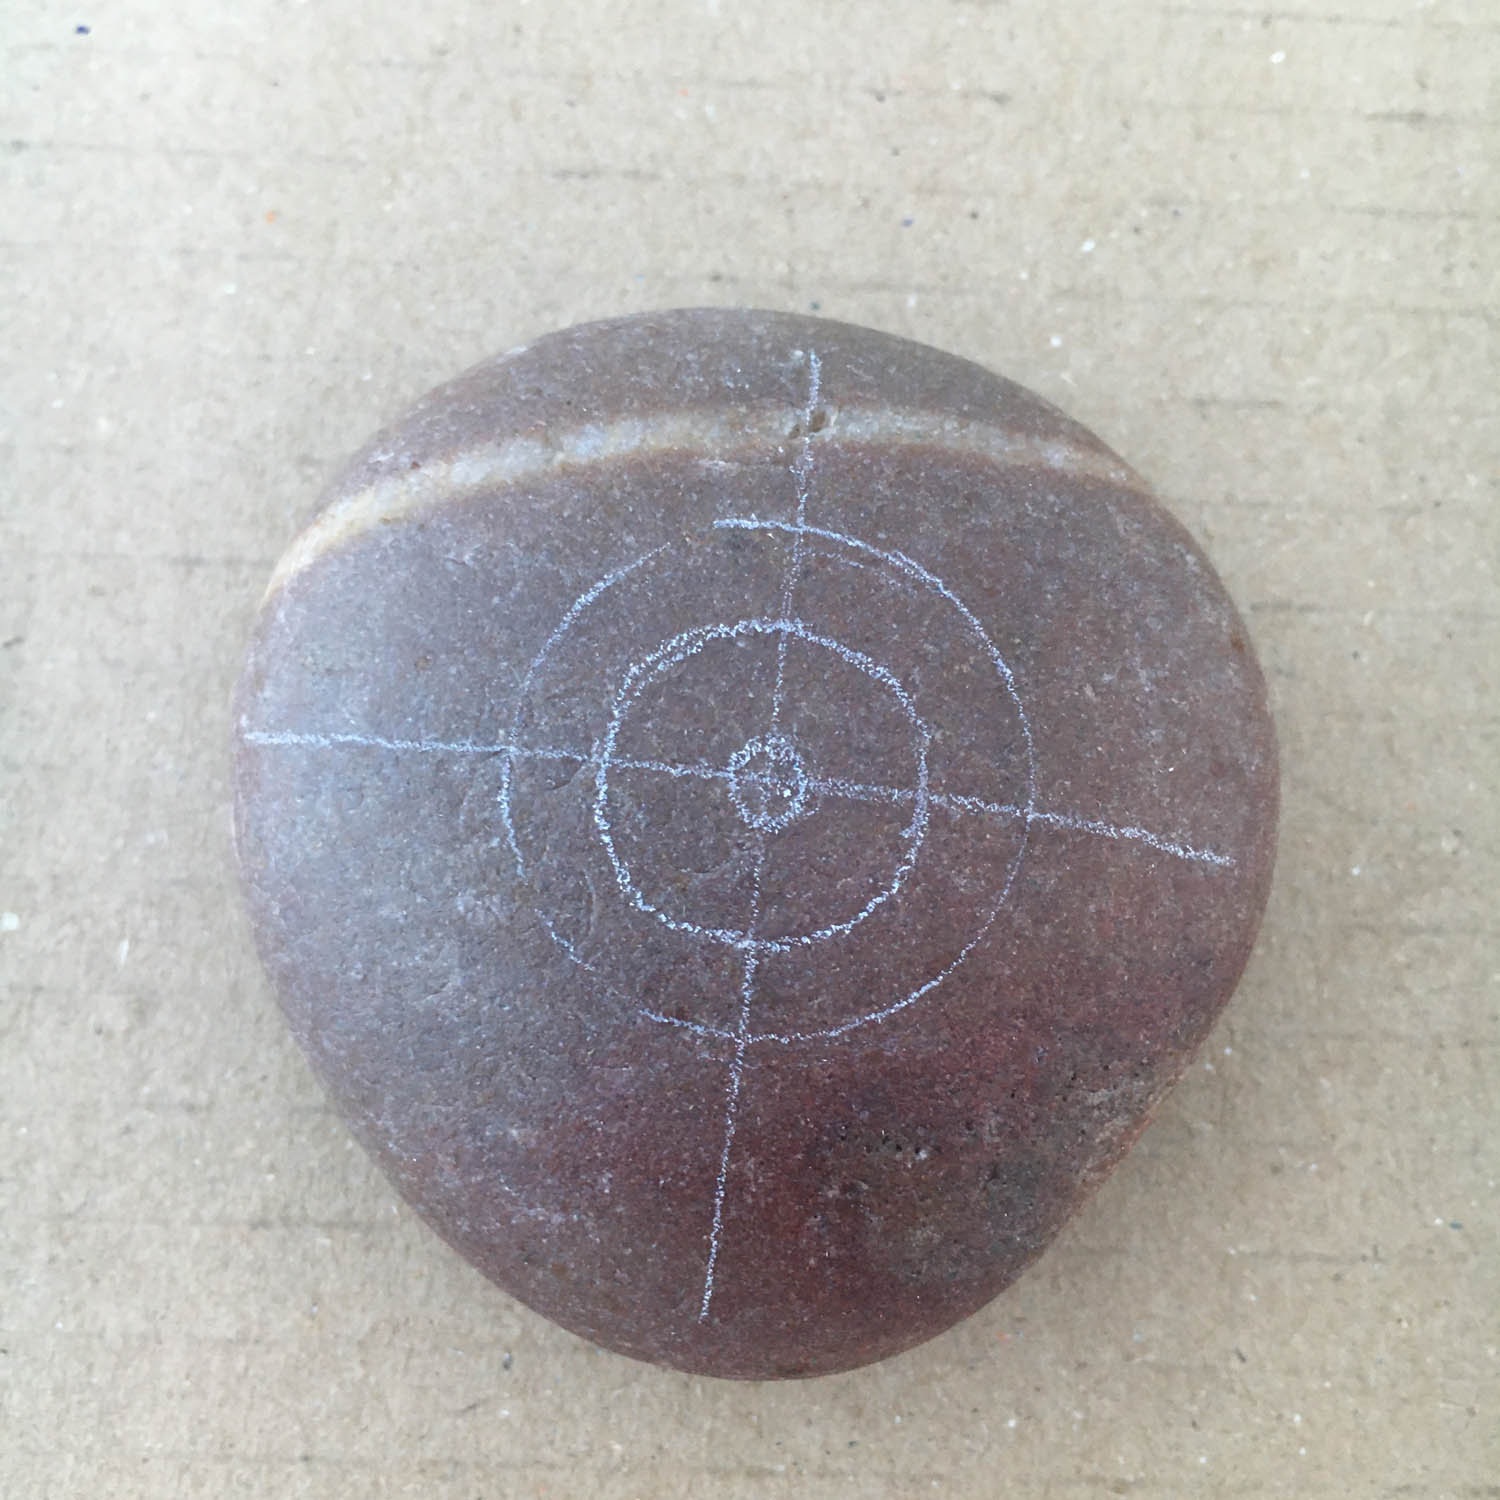
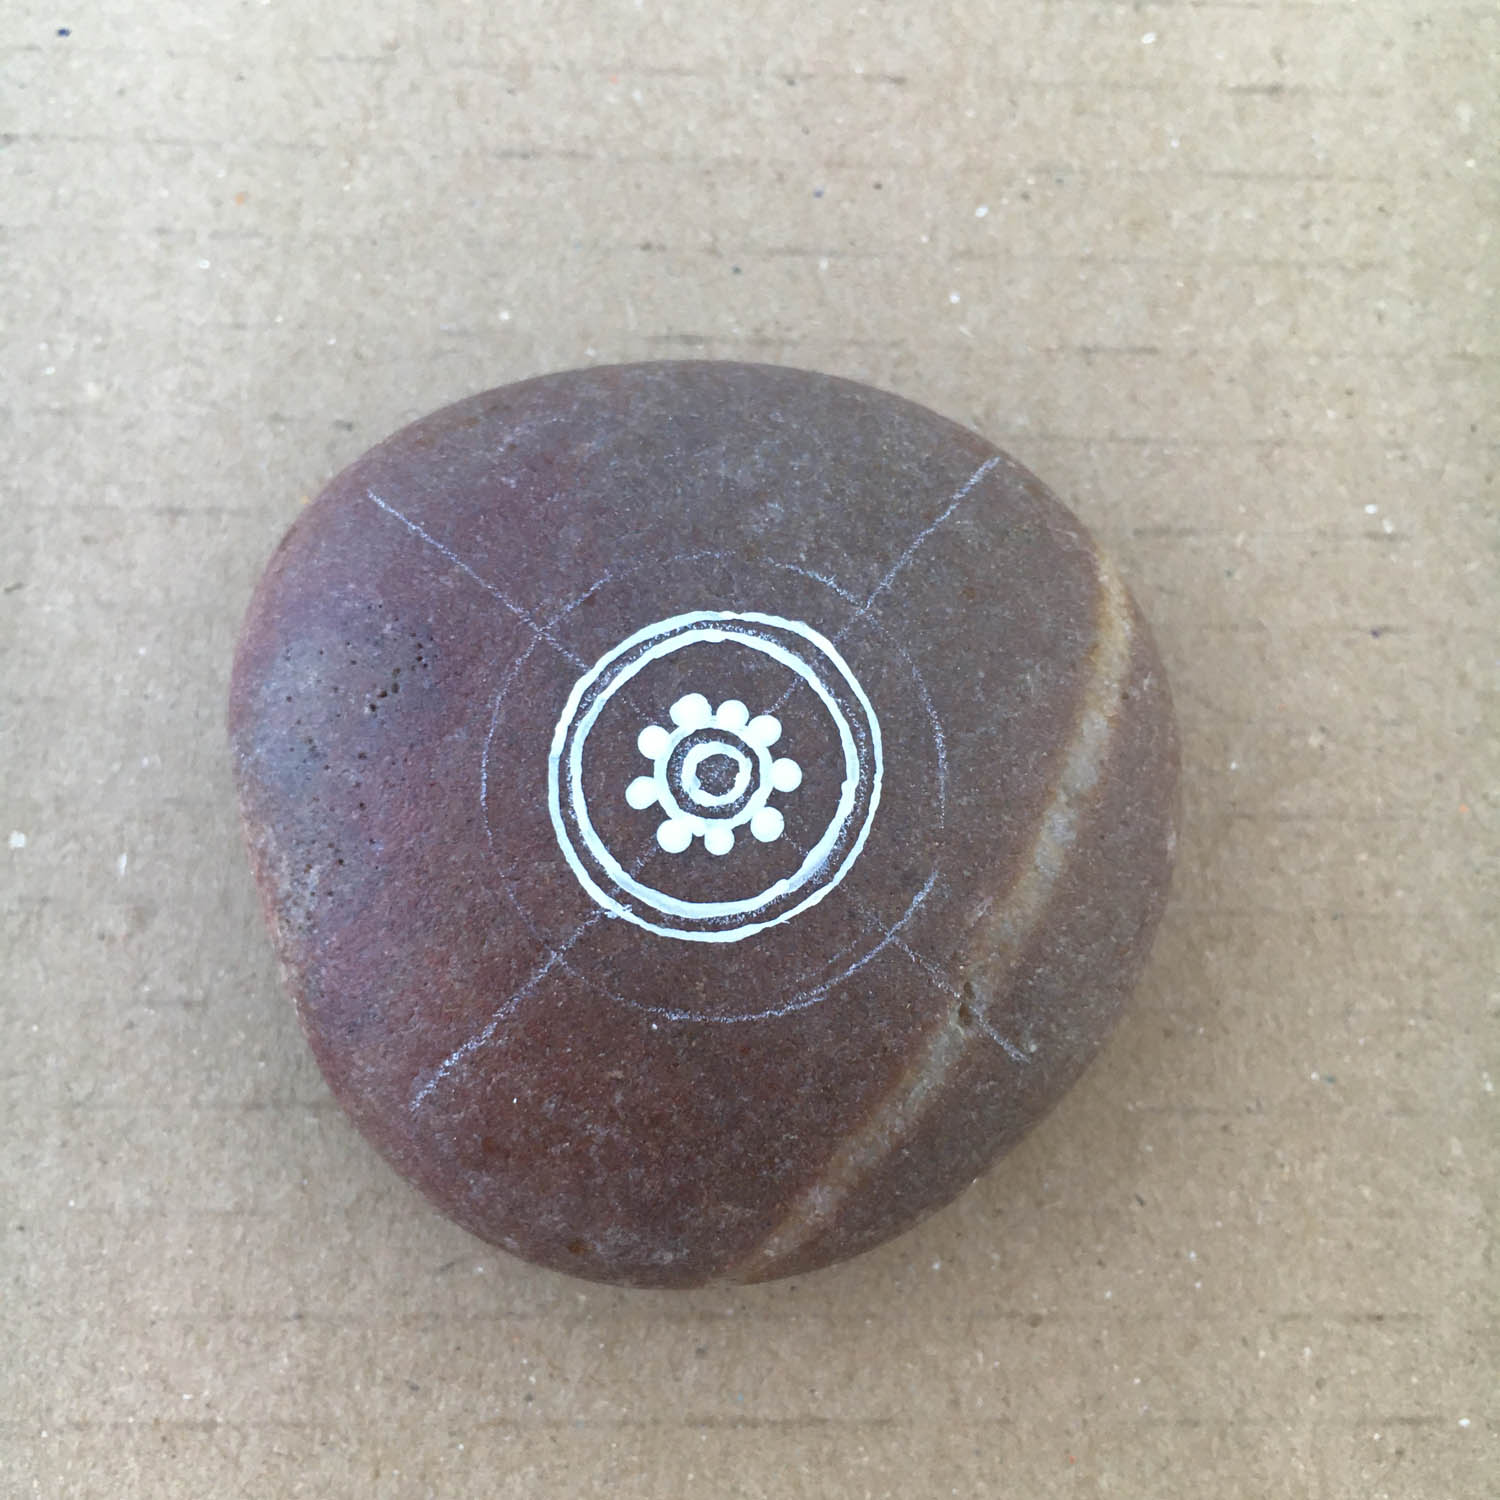
13
This slide shows the 2 circles.
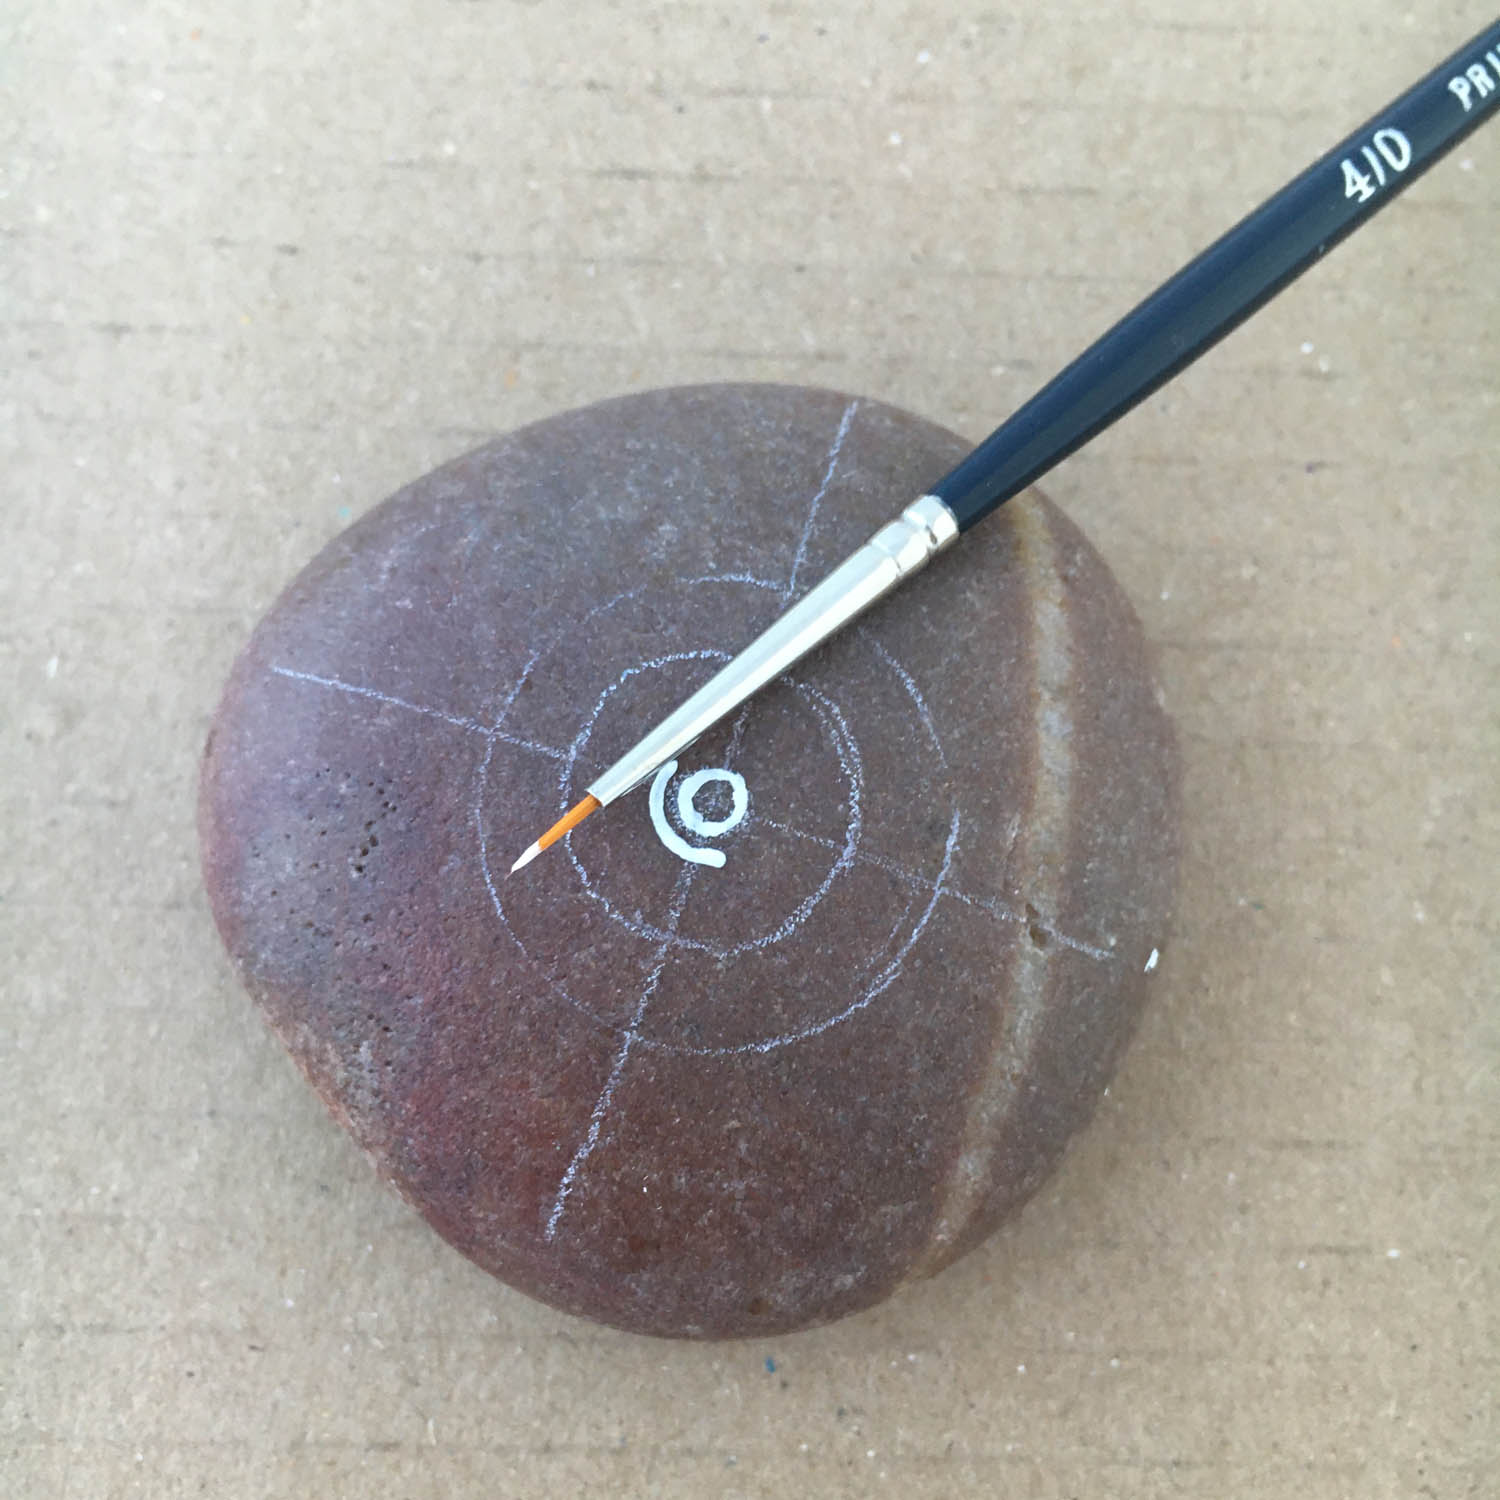
14
With a medium sized dotting tool, dip the dotter into the paint and make a white paint dot on the second fine line. It should touch the line.
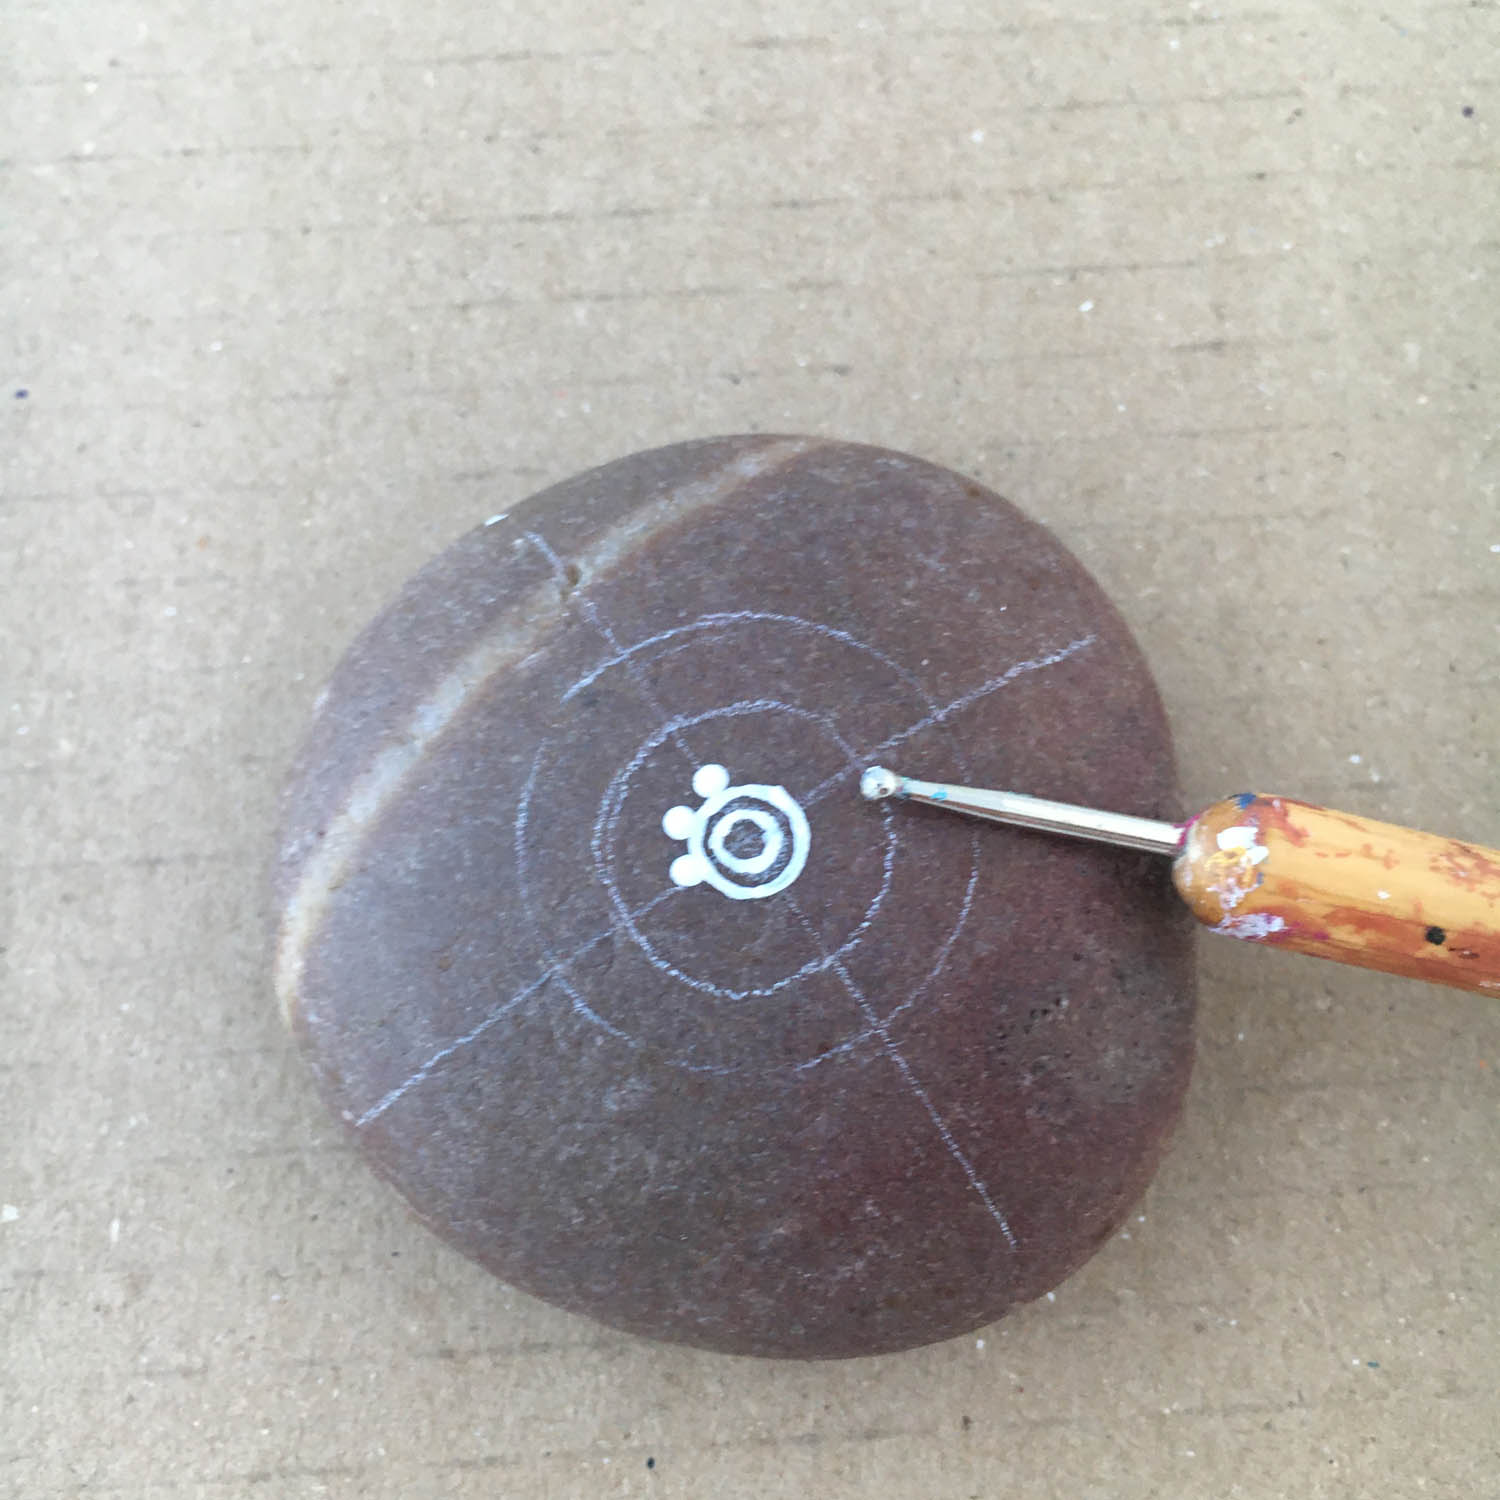
15
Continue dipping the dotter in the paint and make more dots going round the circle.
16
Once complete, give the dotter a clean.
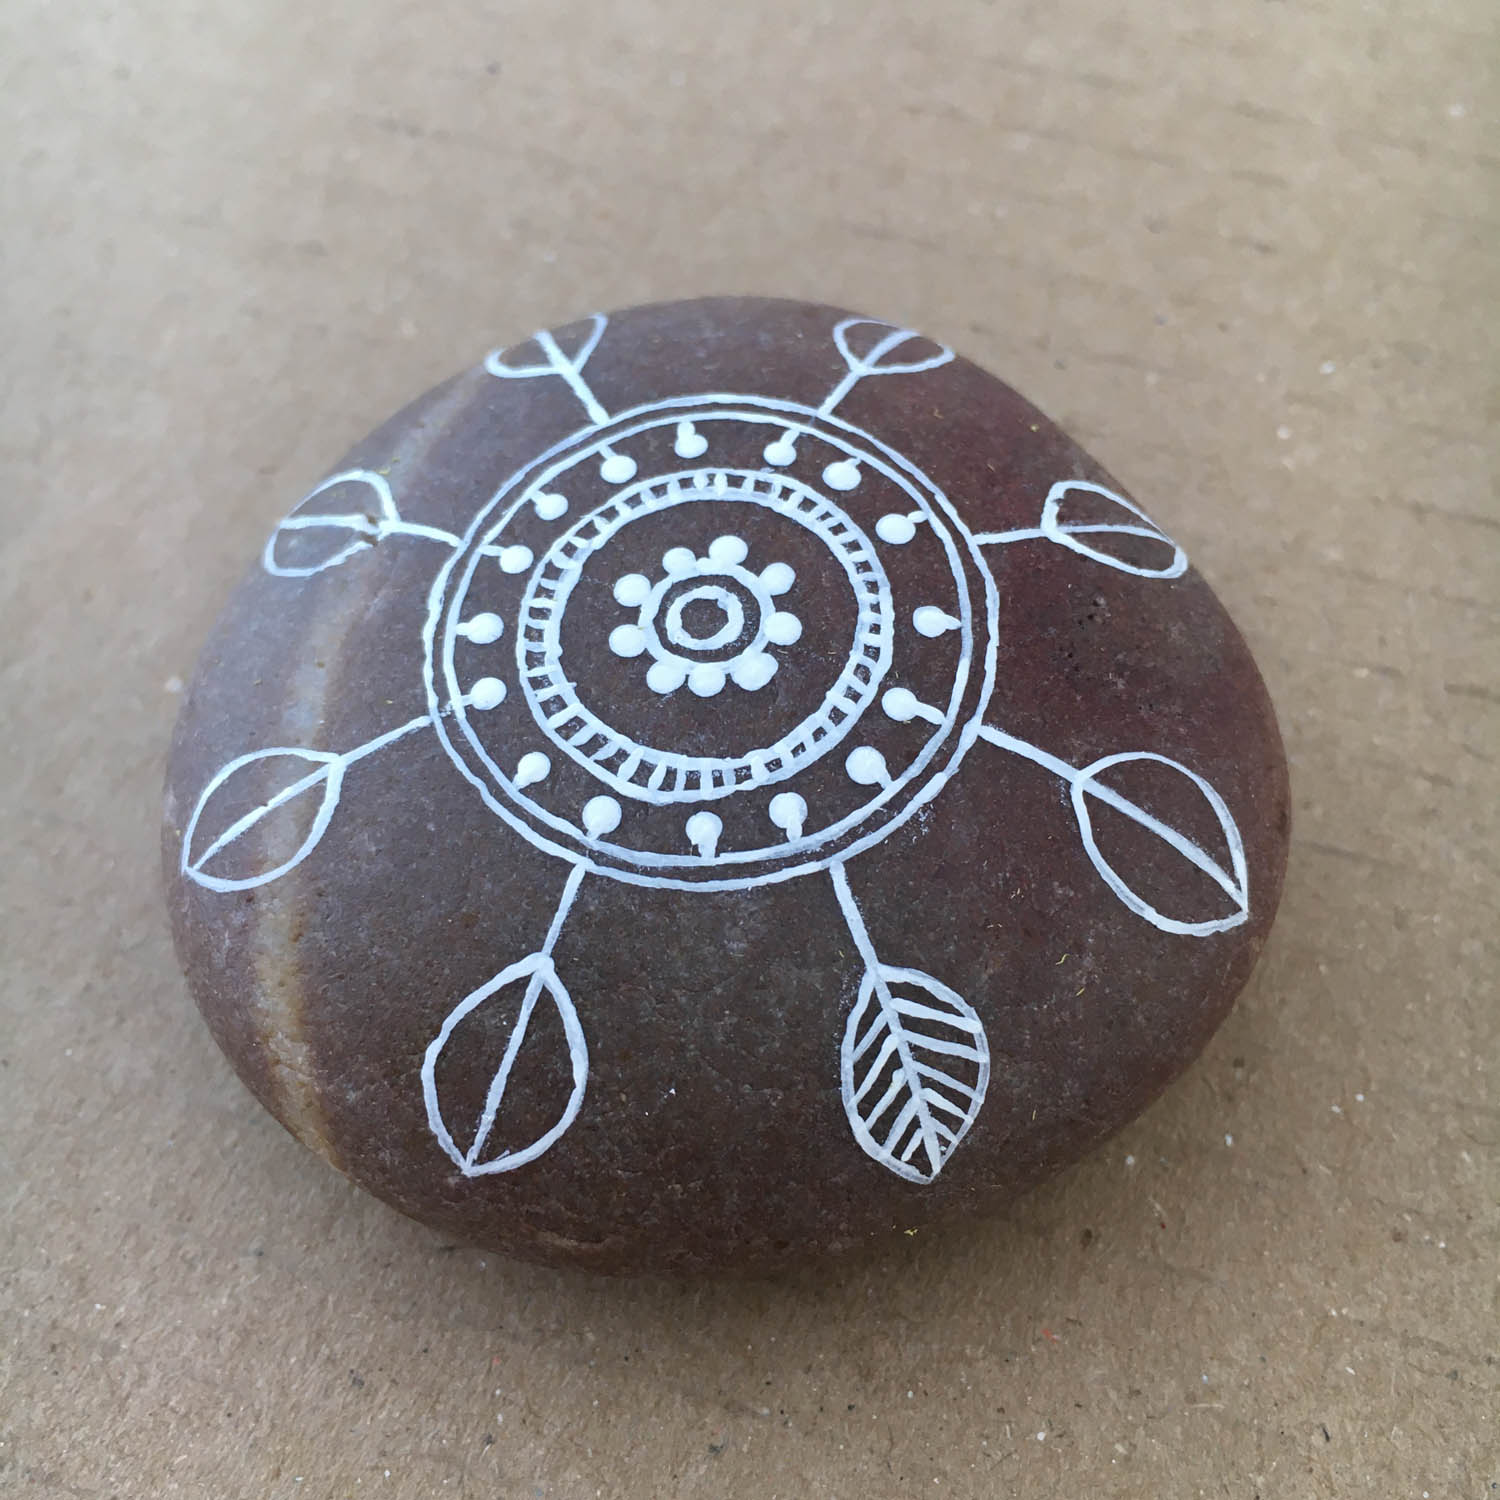
17
Now paint another circle on the marked area.
18
This slide shows the second circle.
19
Another thin line around that circle.
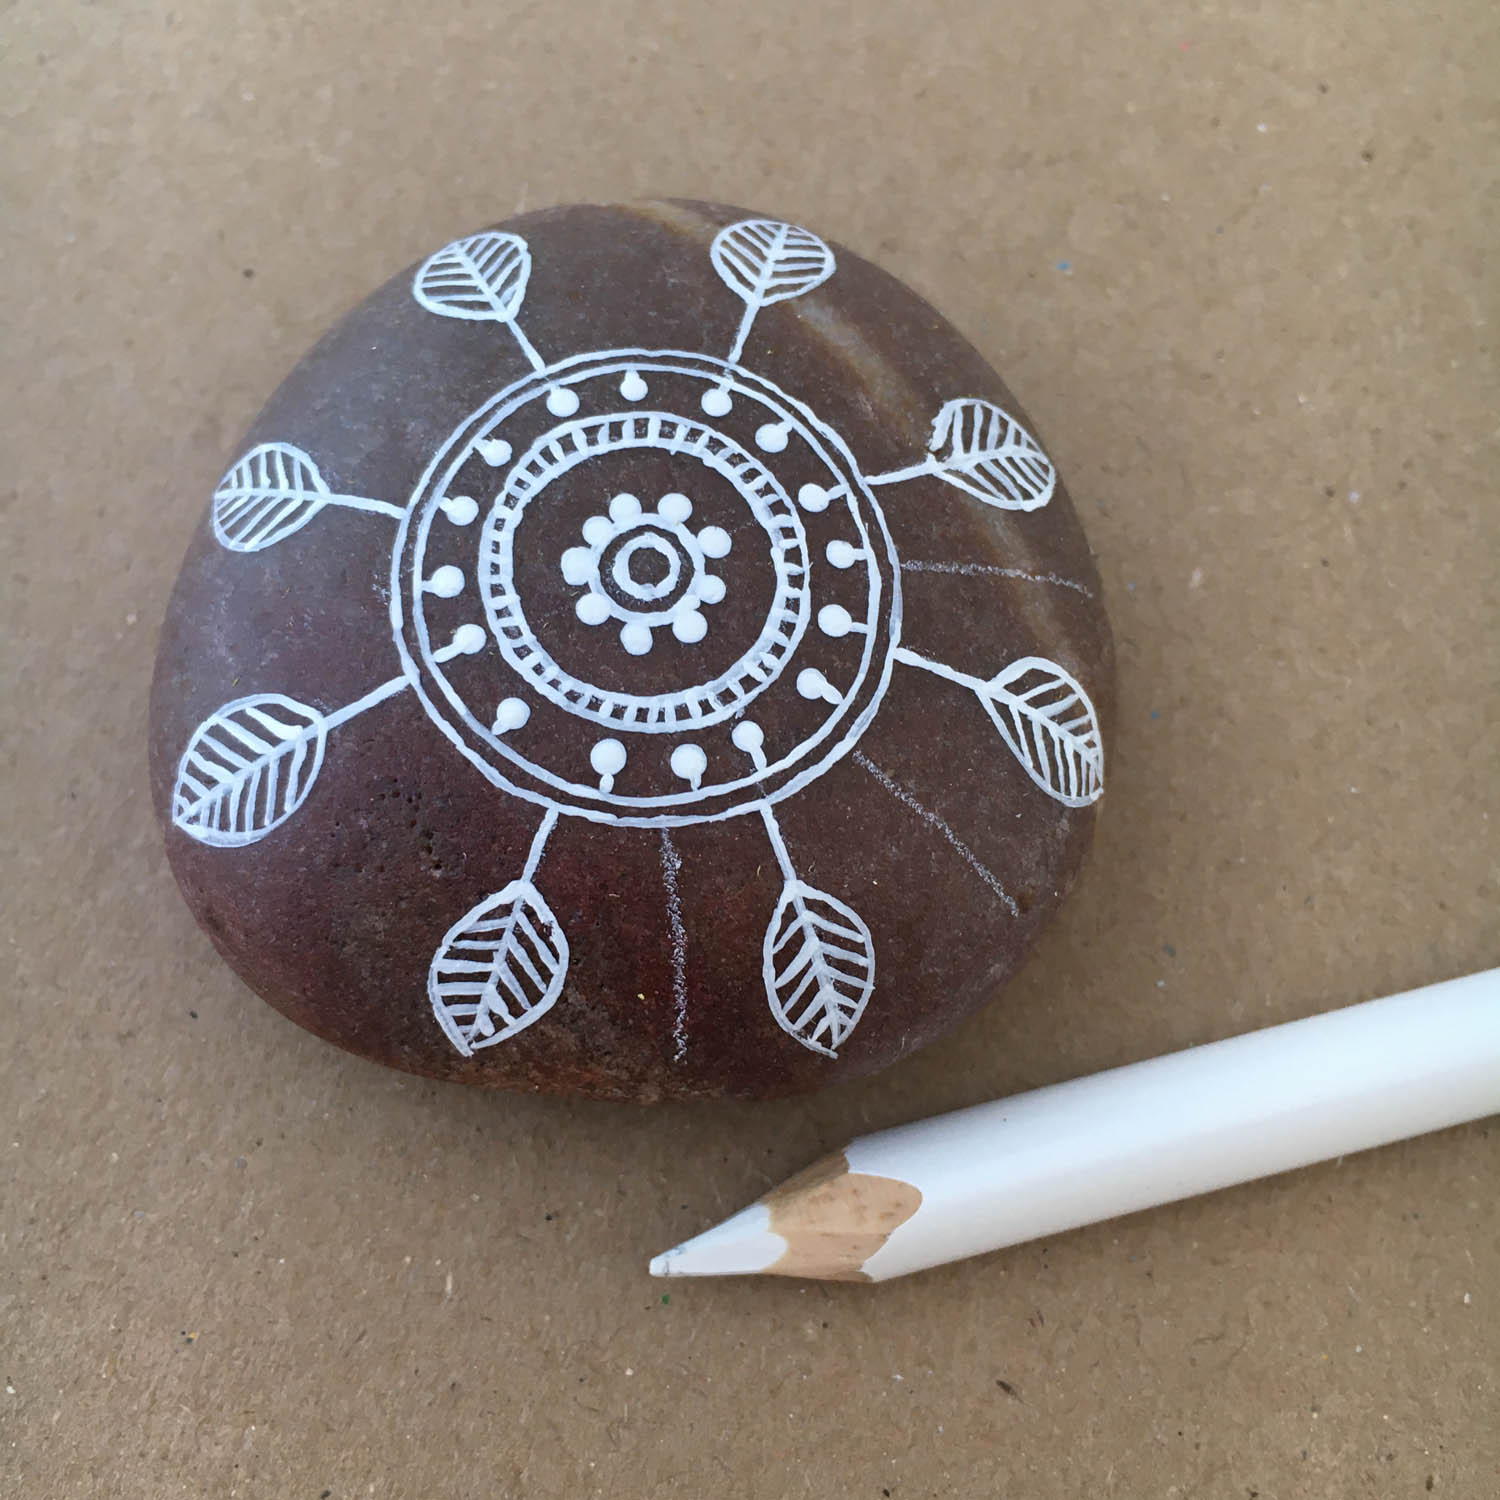
20
This slide shows the completed circle.
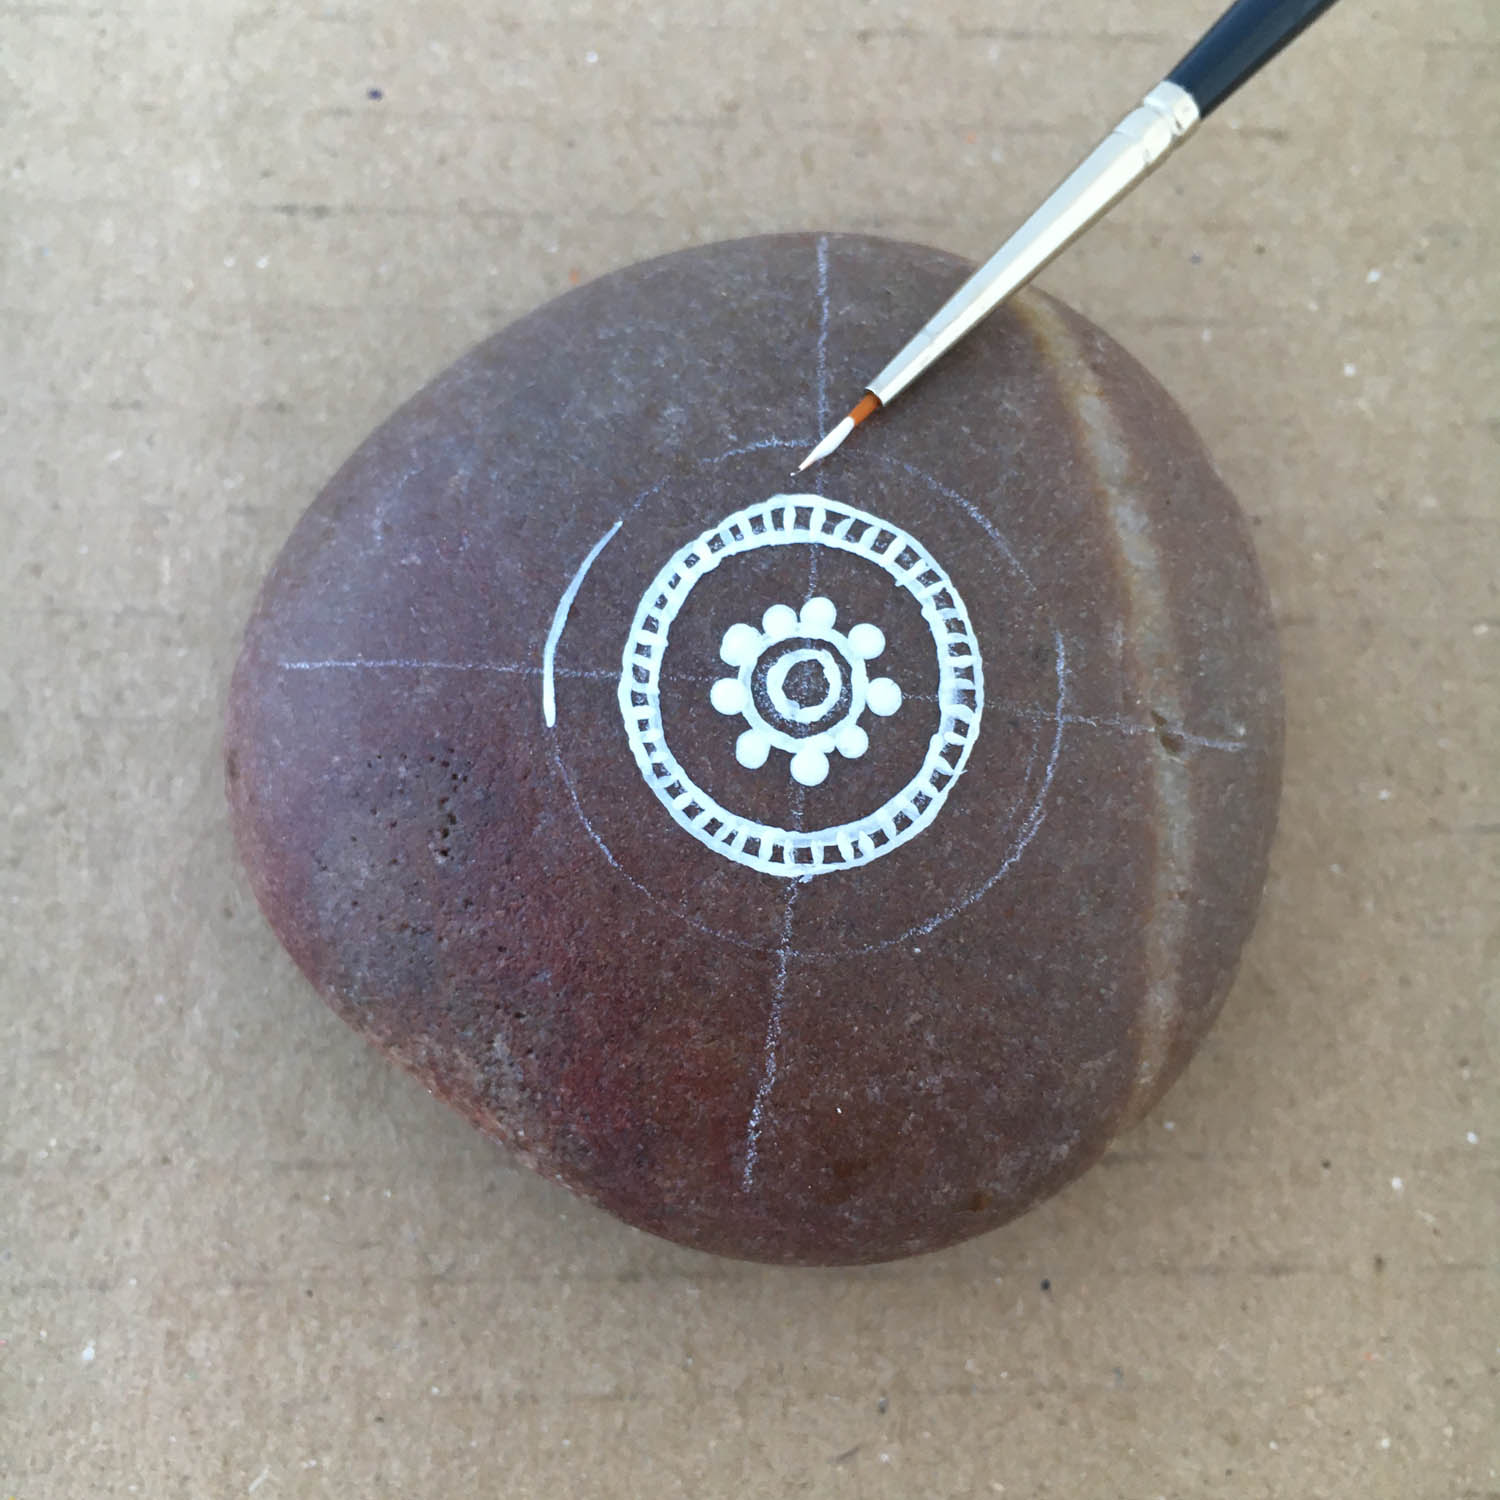
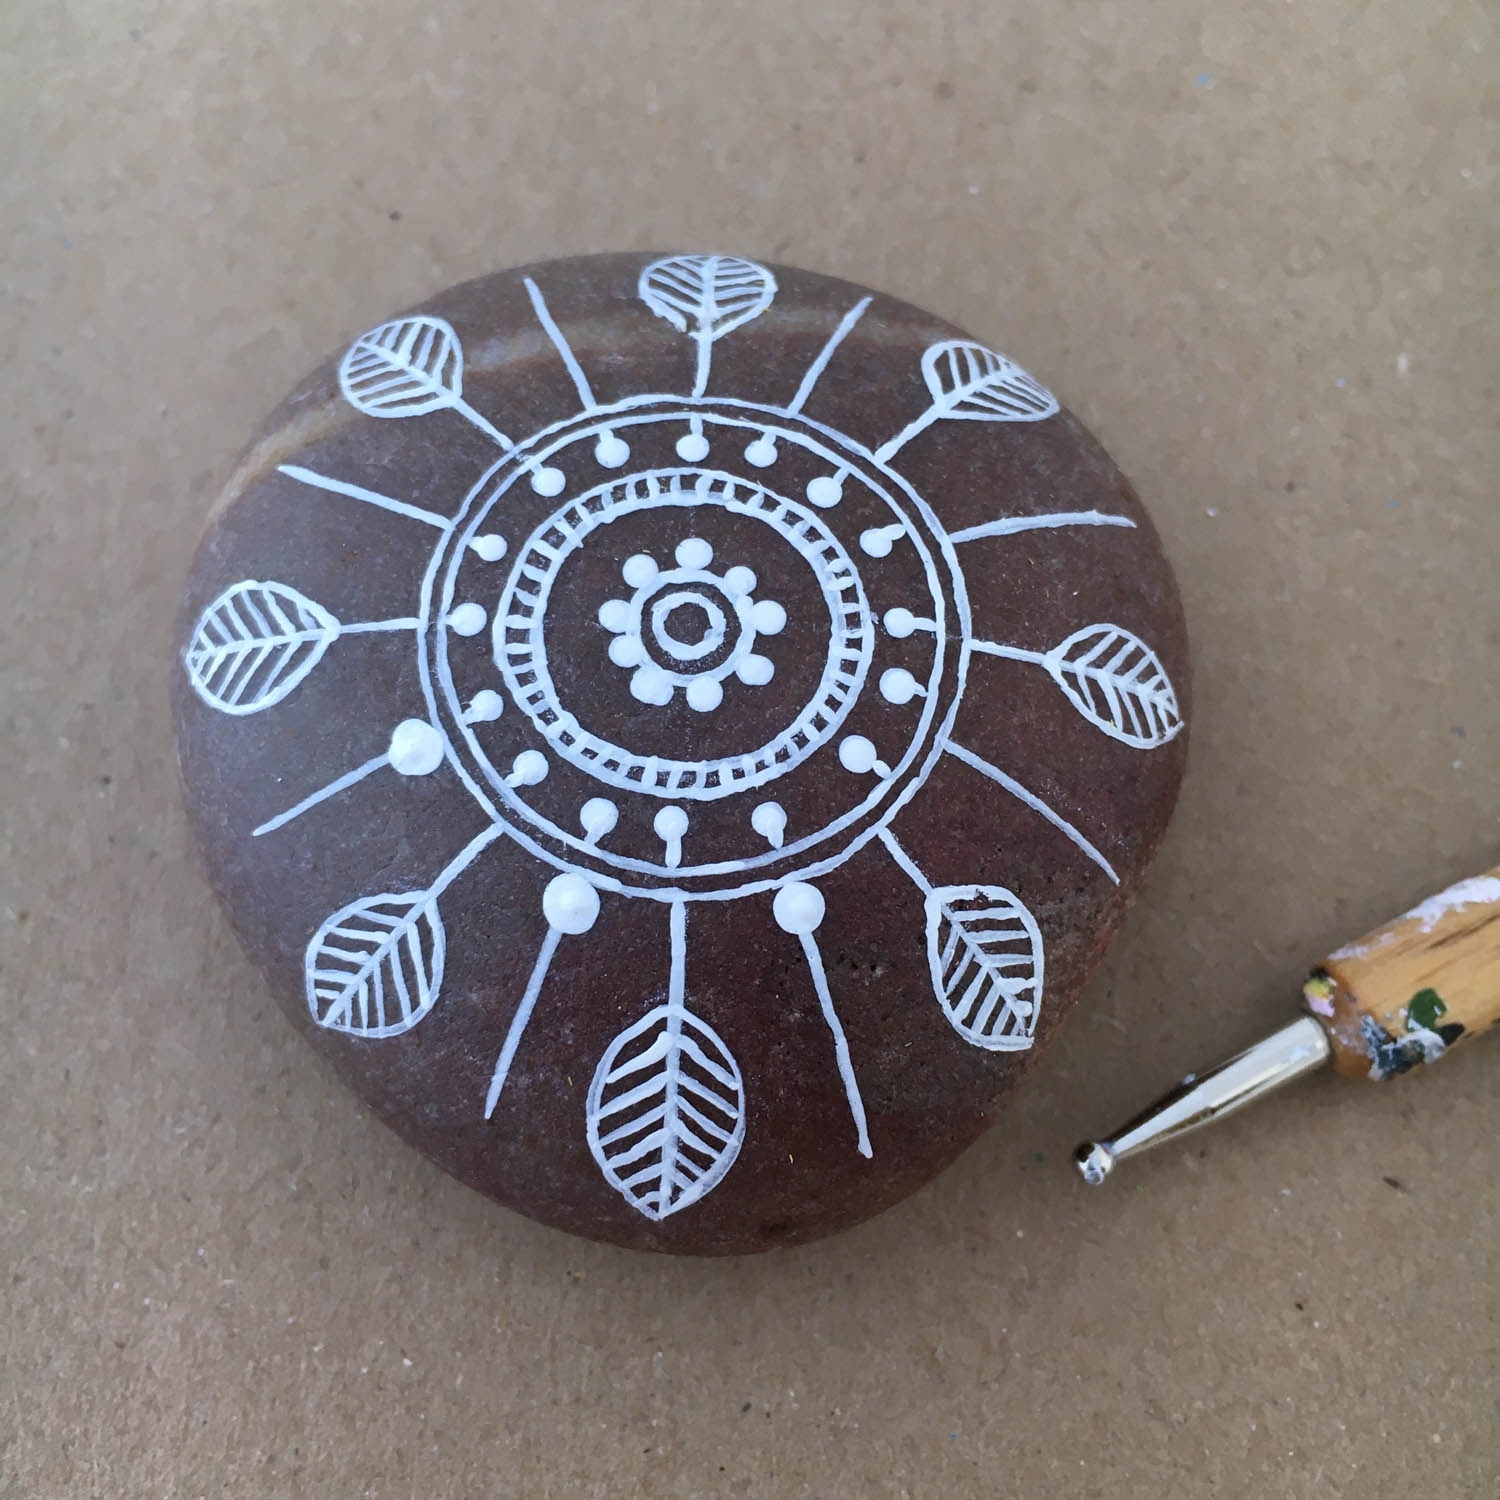
21
Make tiny little lines joining those outer 2 circles. If these tiny lines are difficult, use the dotting tool and make evenly spaced dots instead.
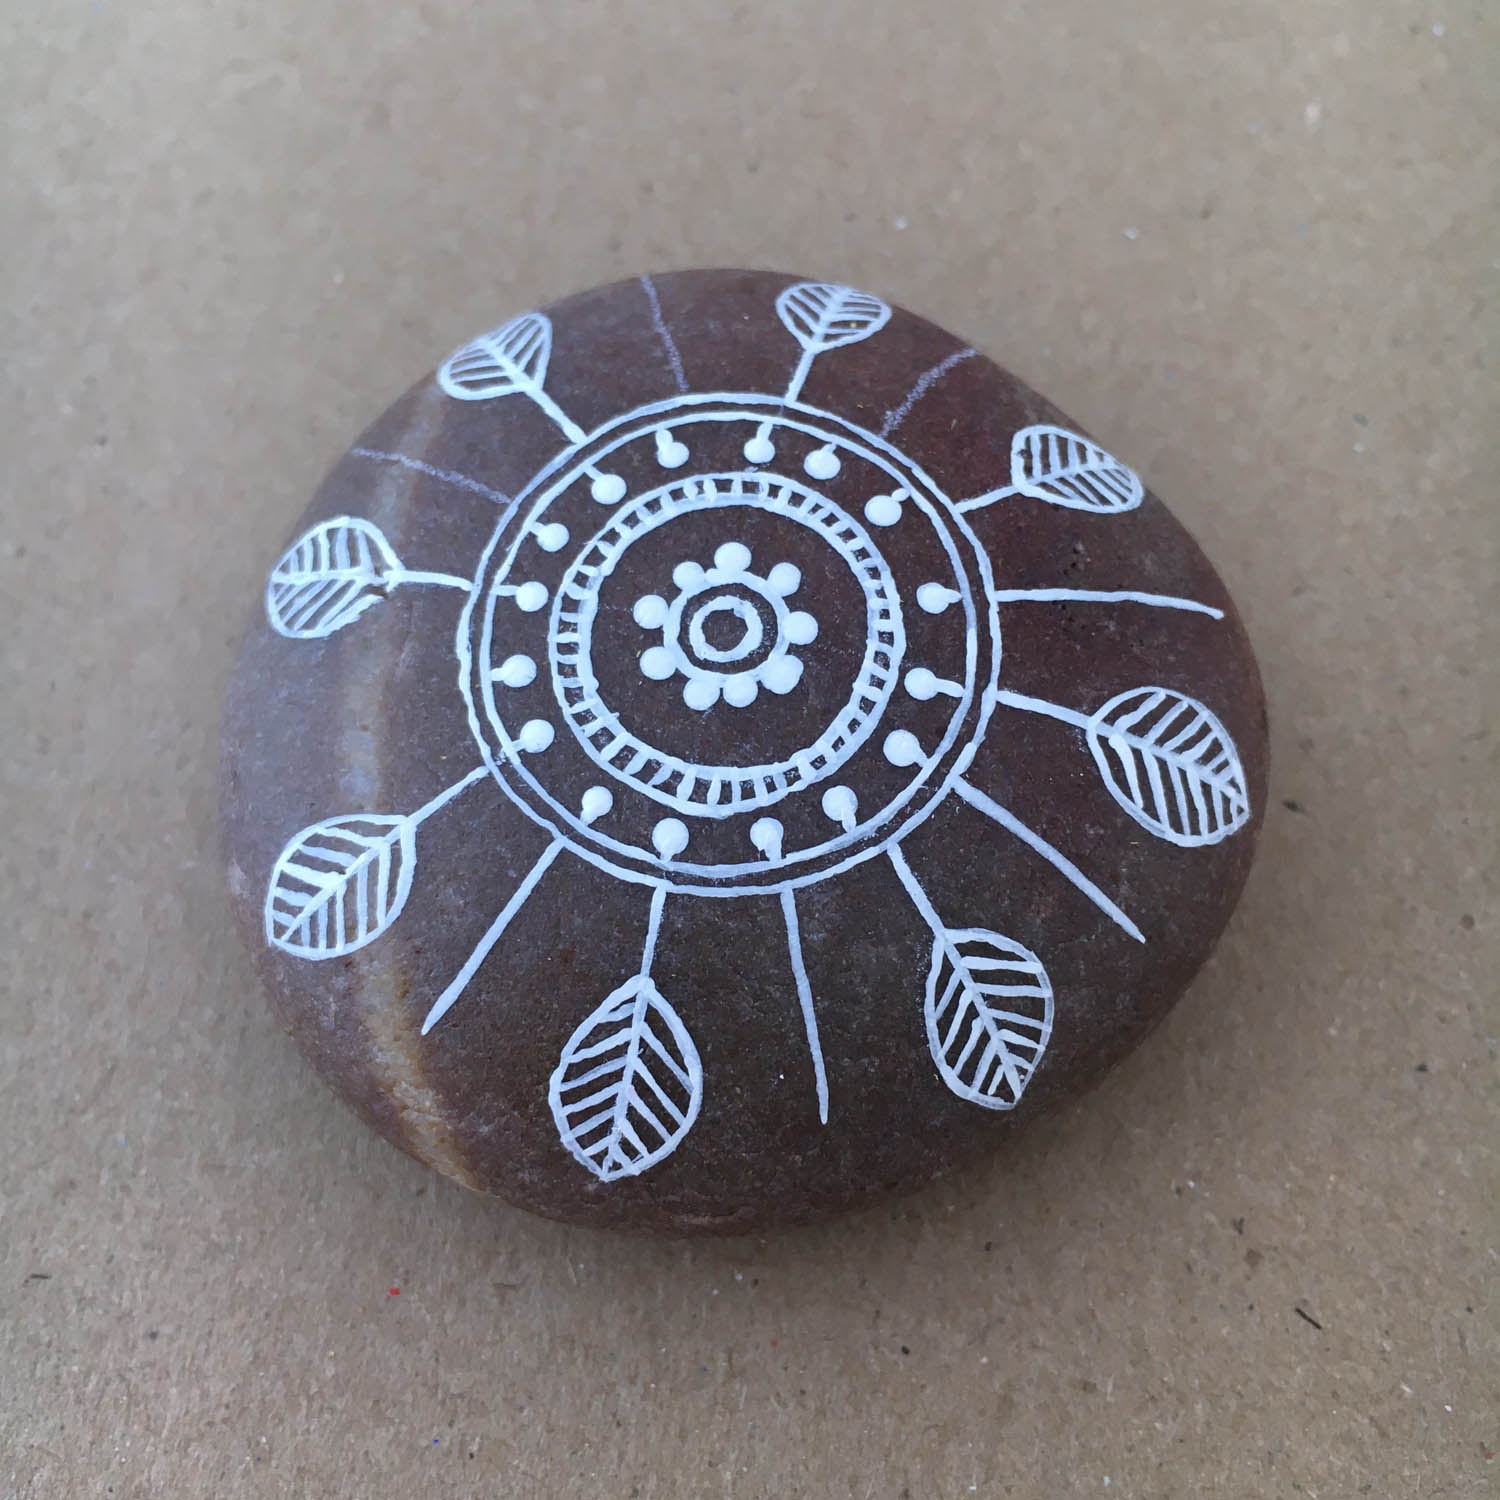
22
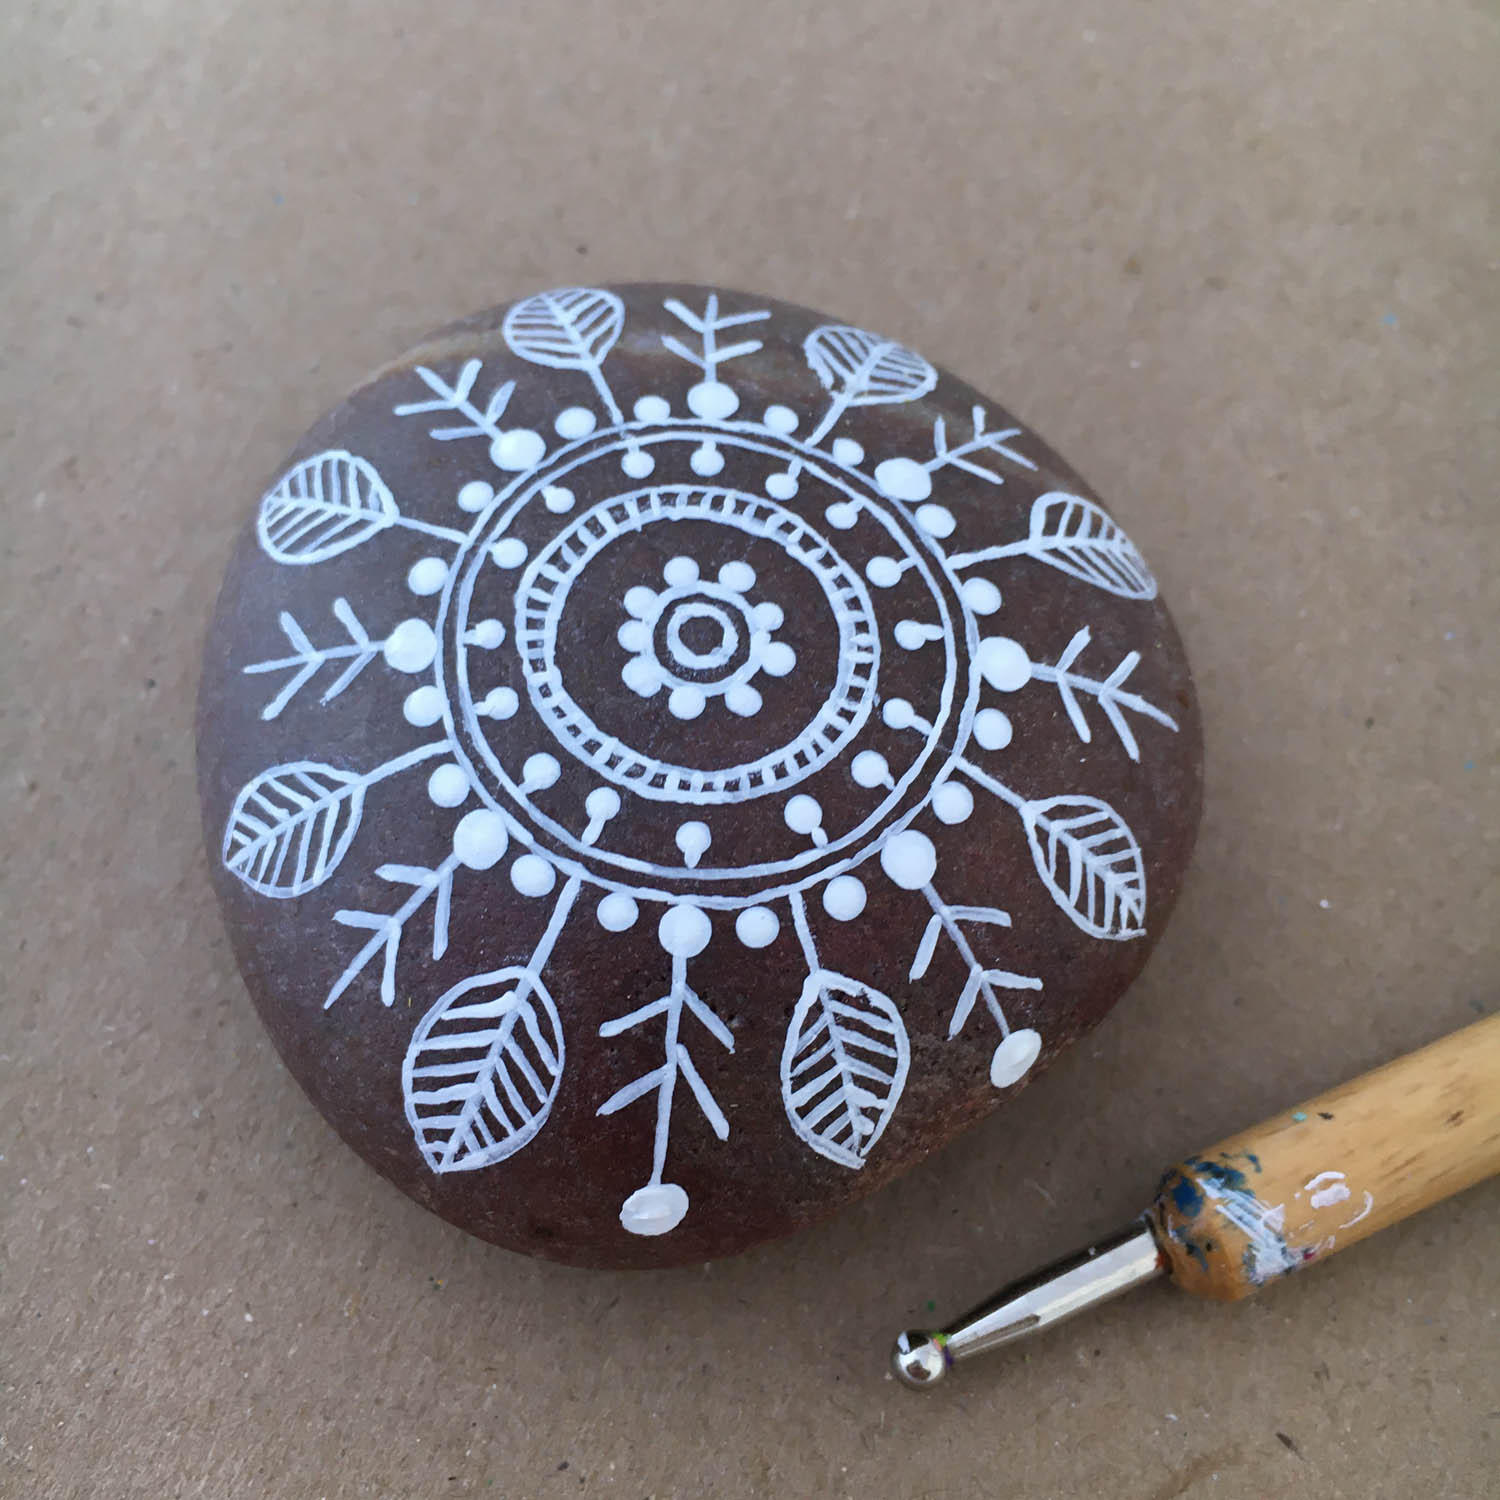
Once complete, paint another thin line along the coin line, all the way around.
23
This slide shows the line complete.
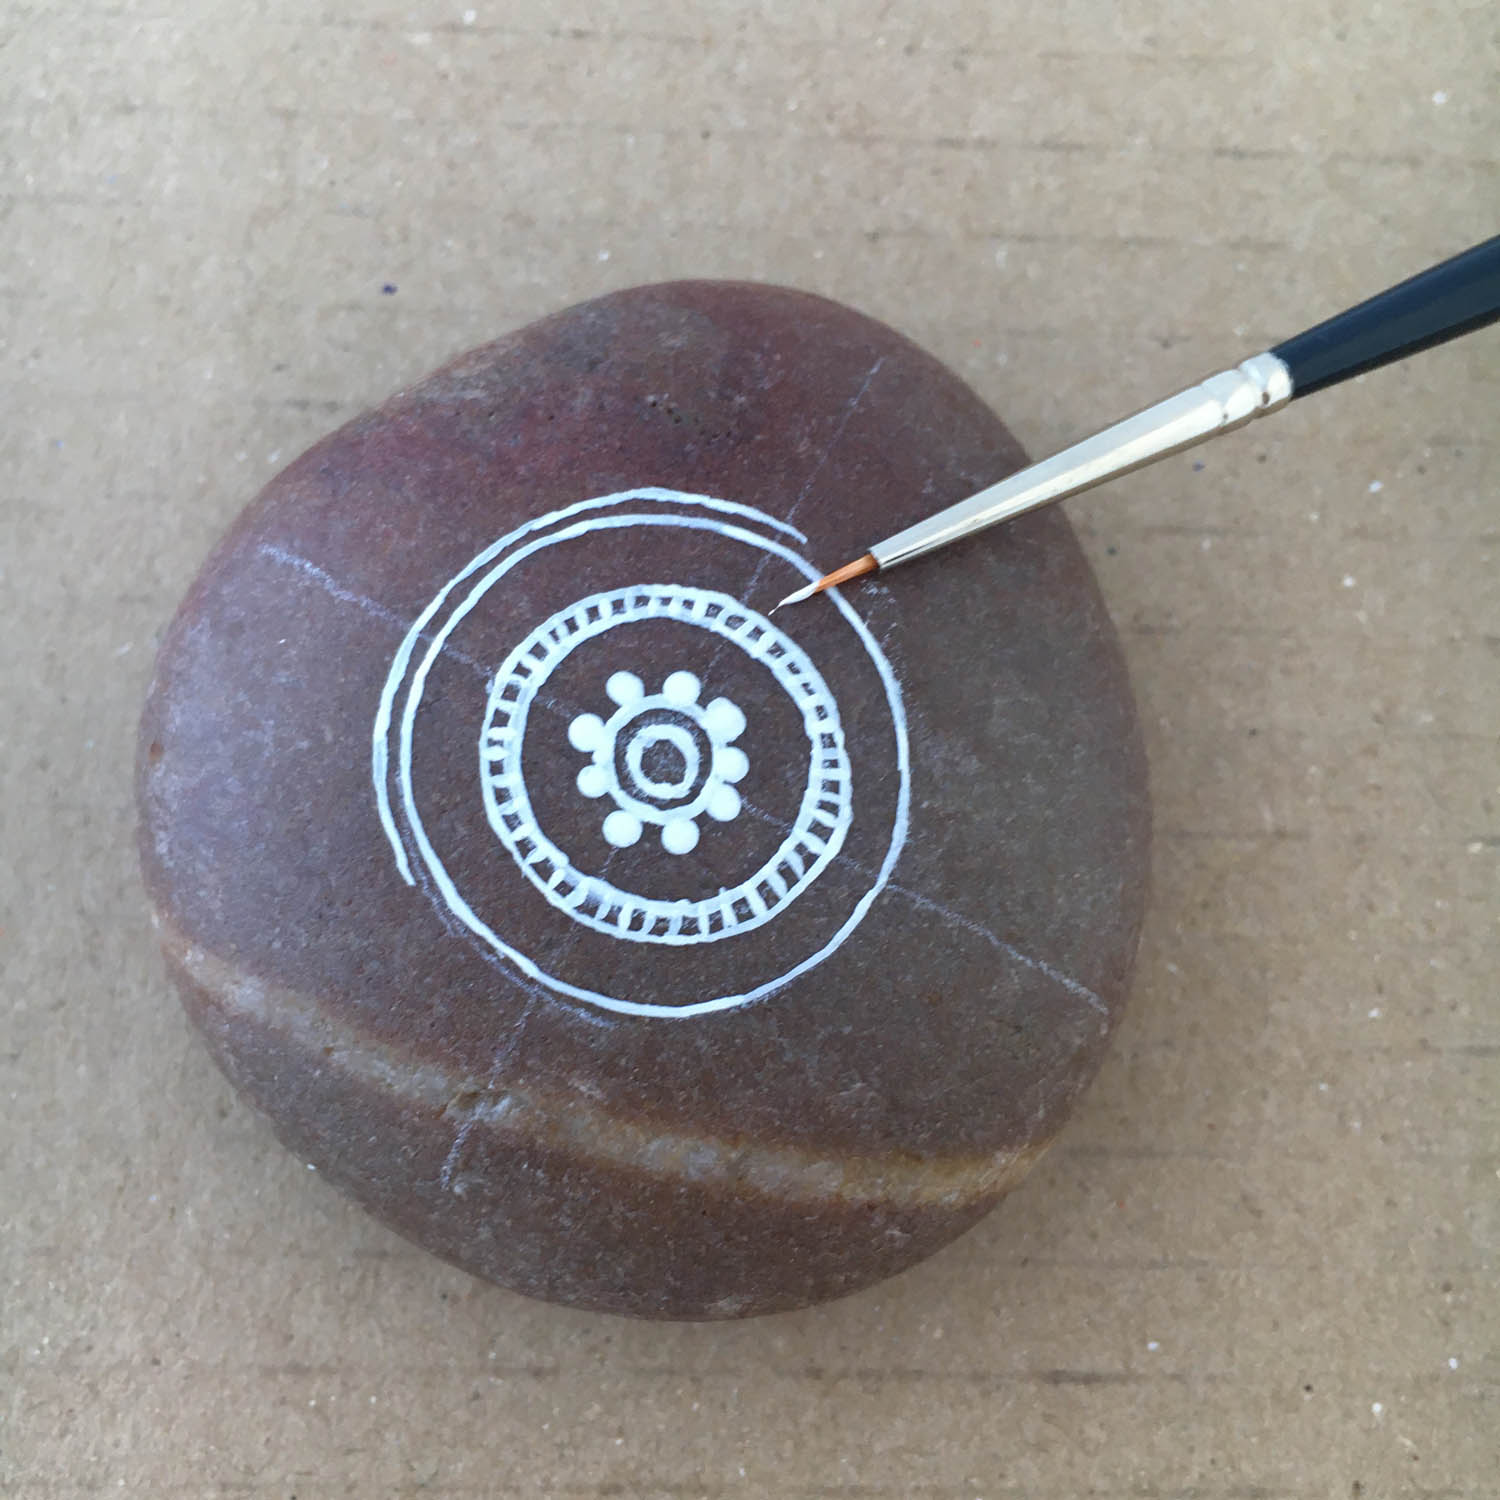
24
Paint another thin line around the outside of the coin line.
25
This slide shows the new line complete.
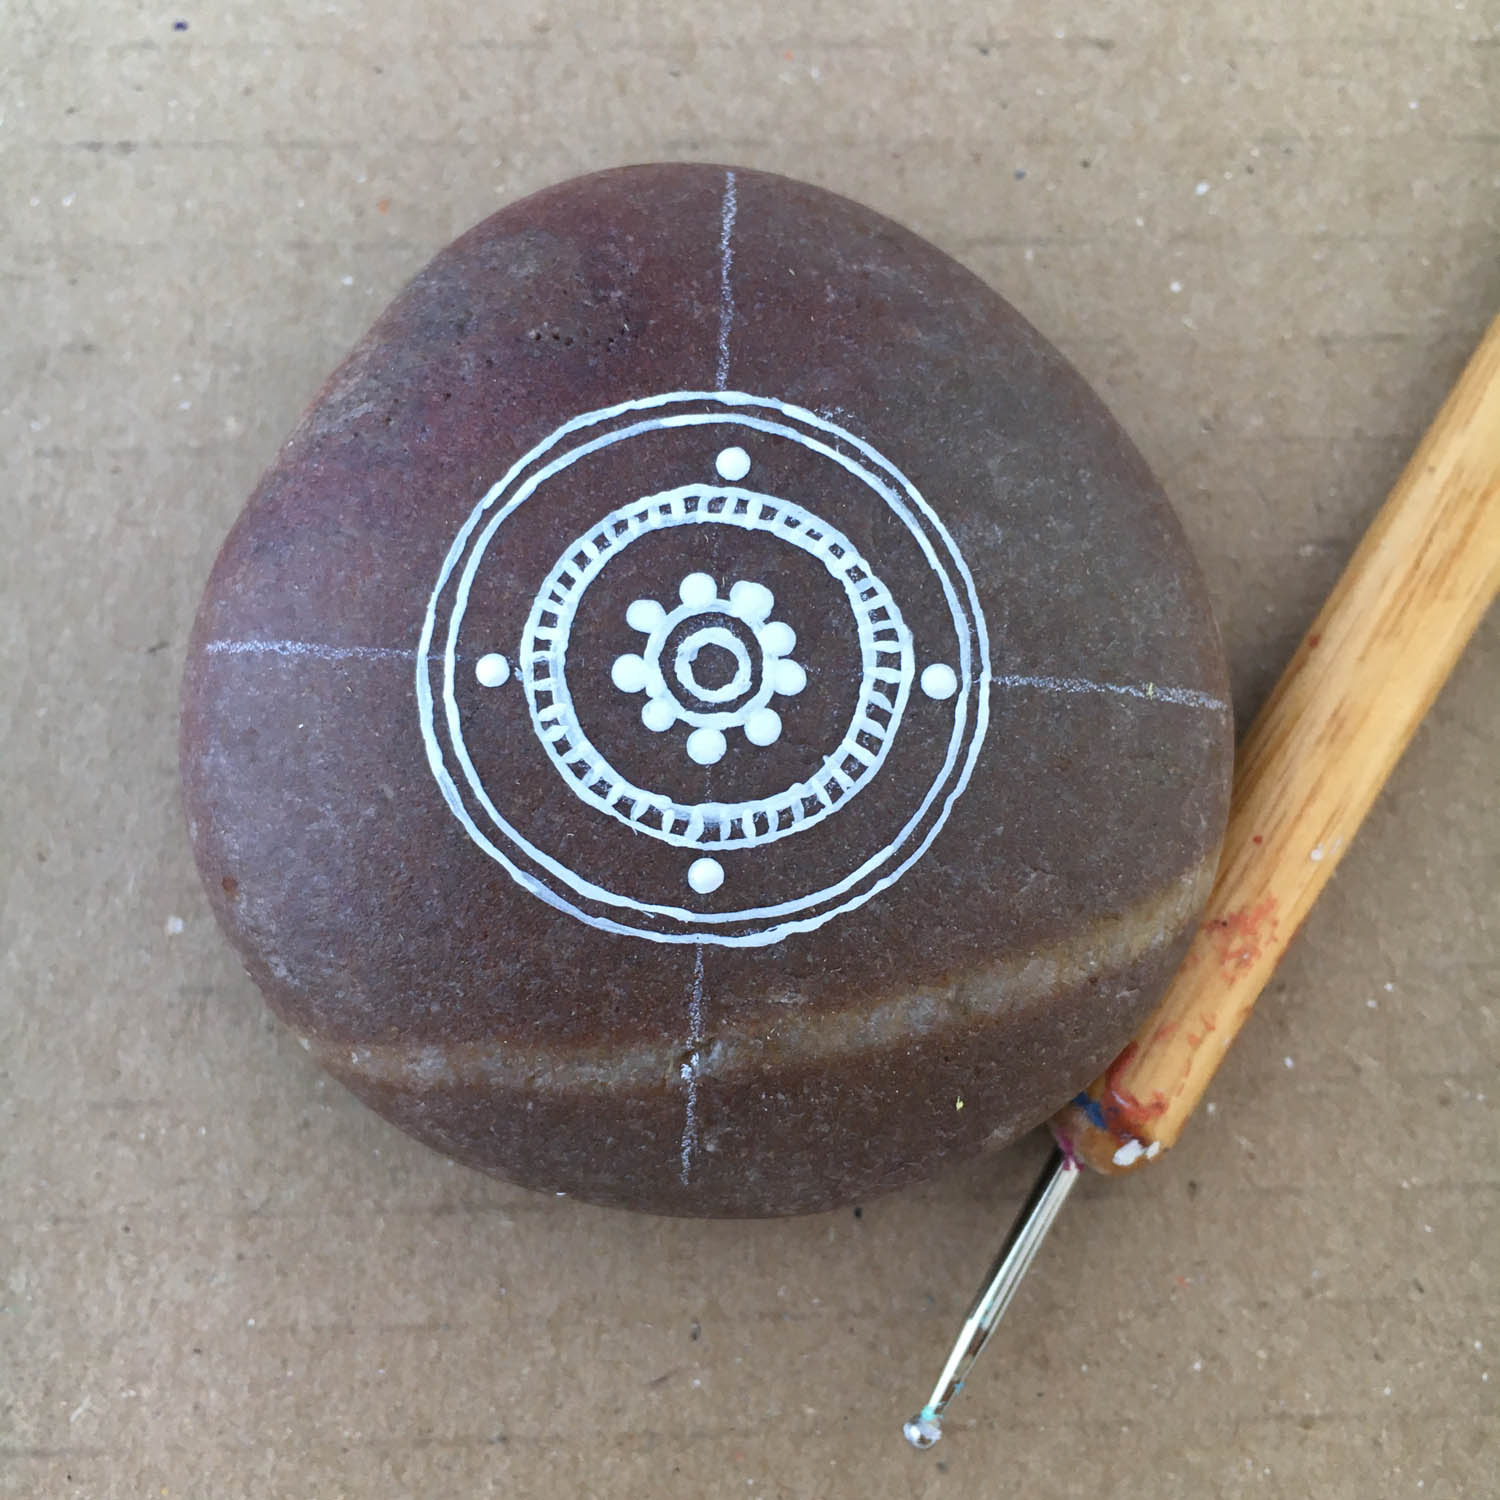
26
Using the dotting tool again, dot little blobs of paint N, S, E and W.
27
Then add additional paint dots between those dots.
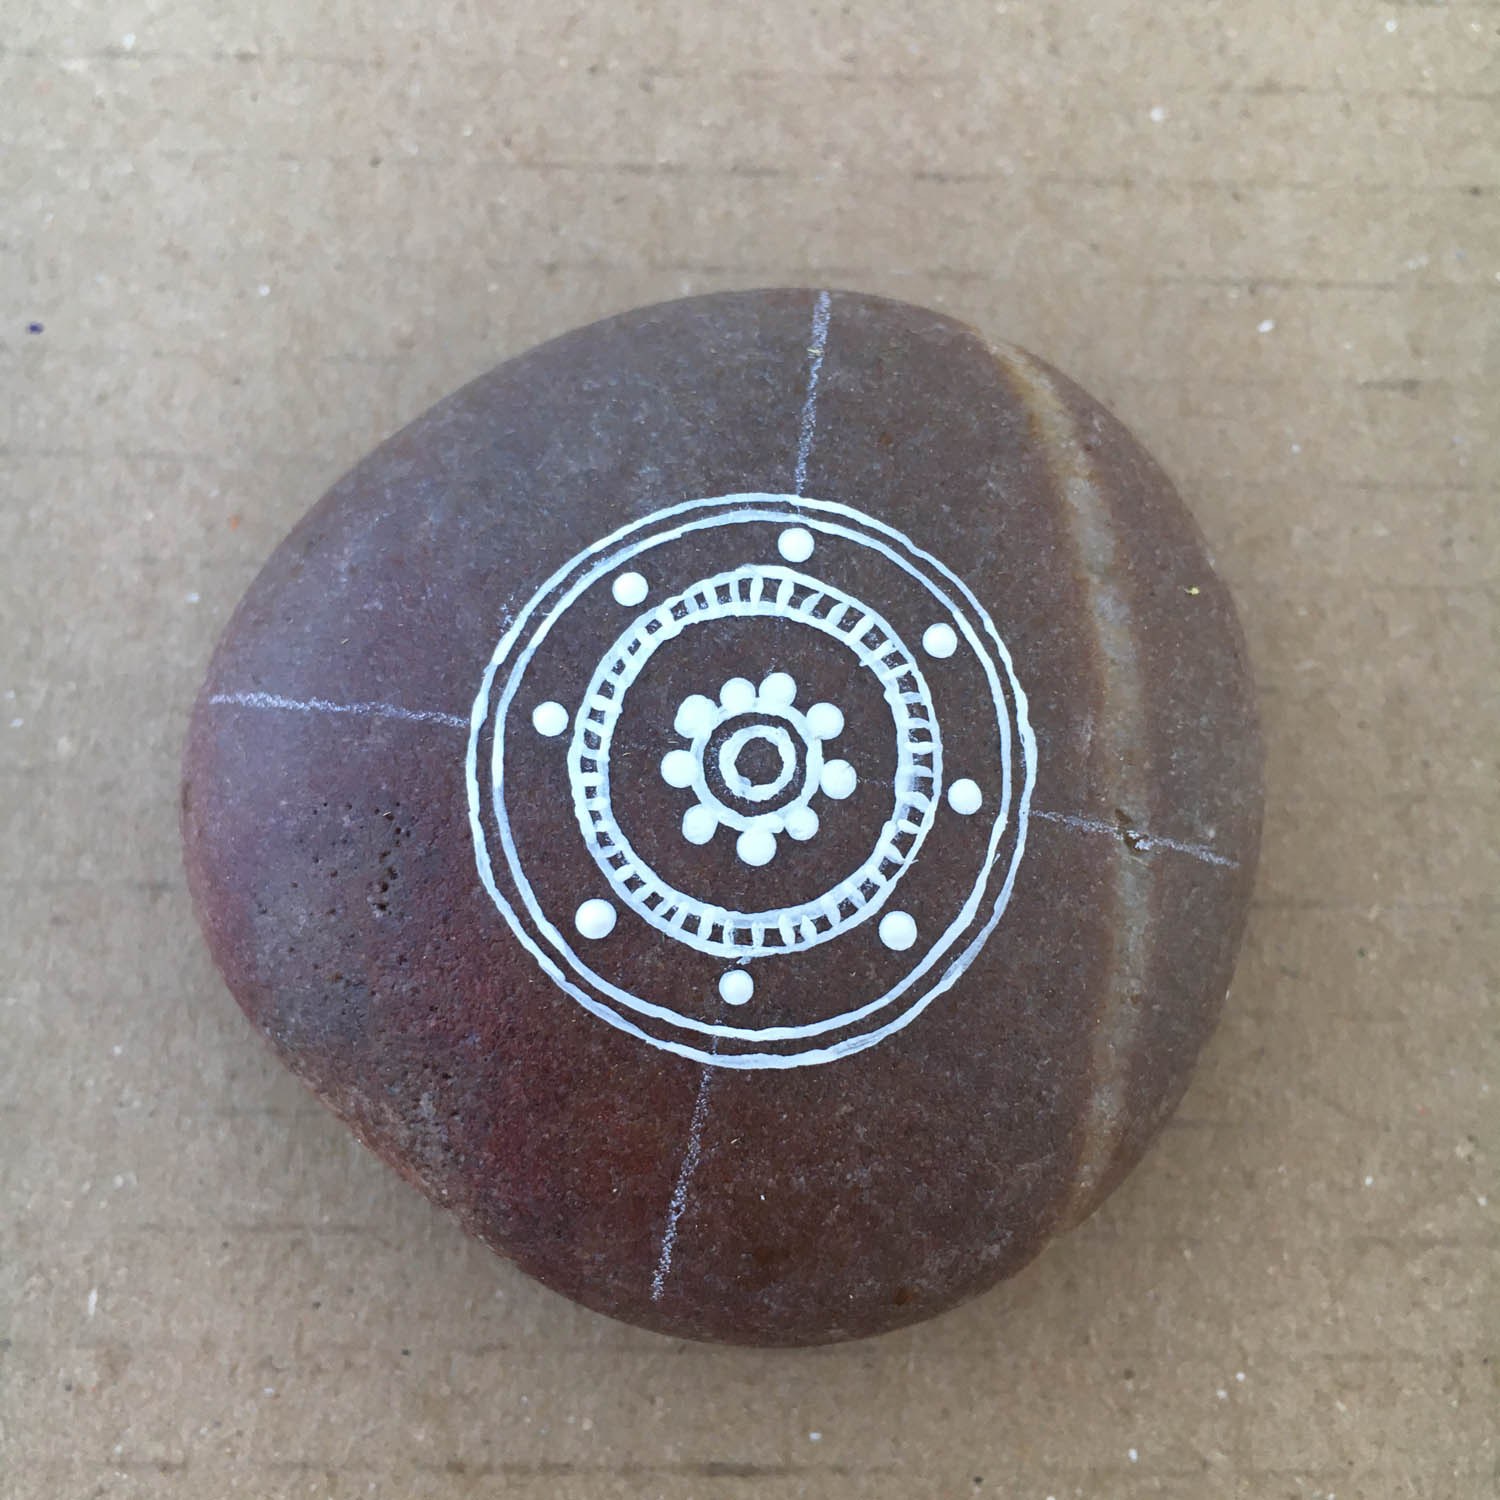
28
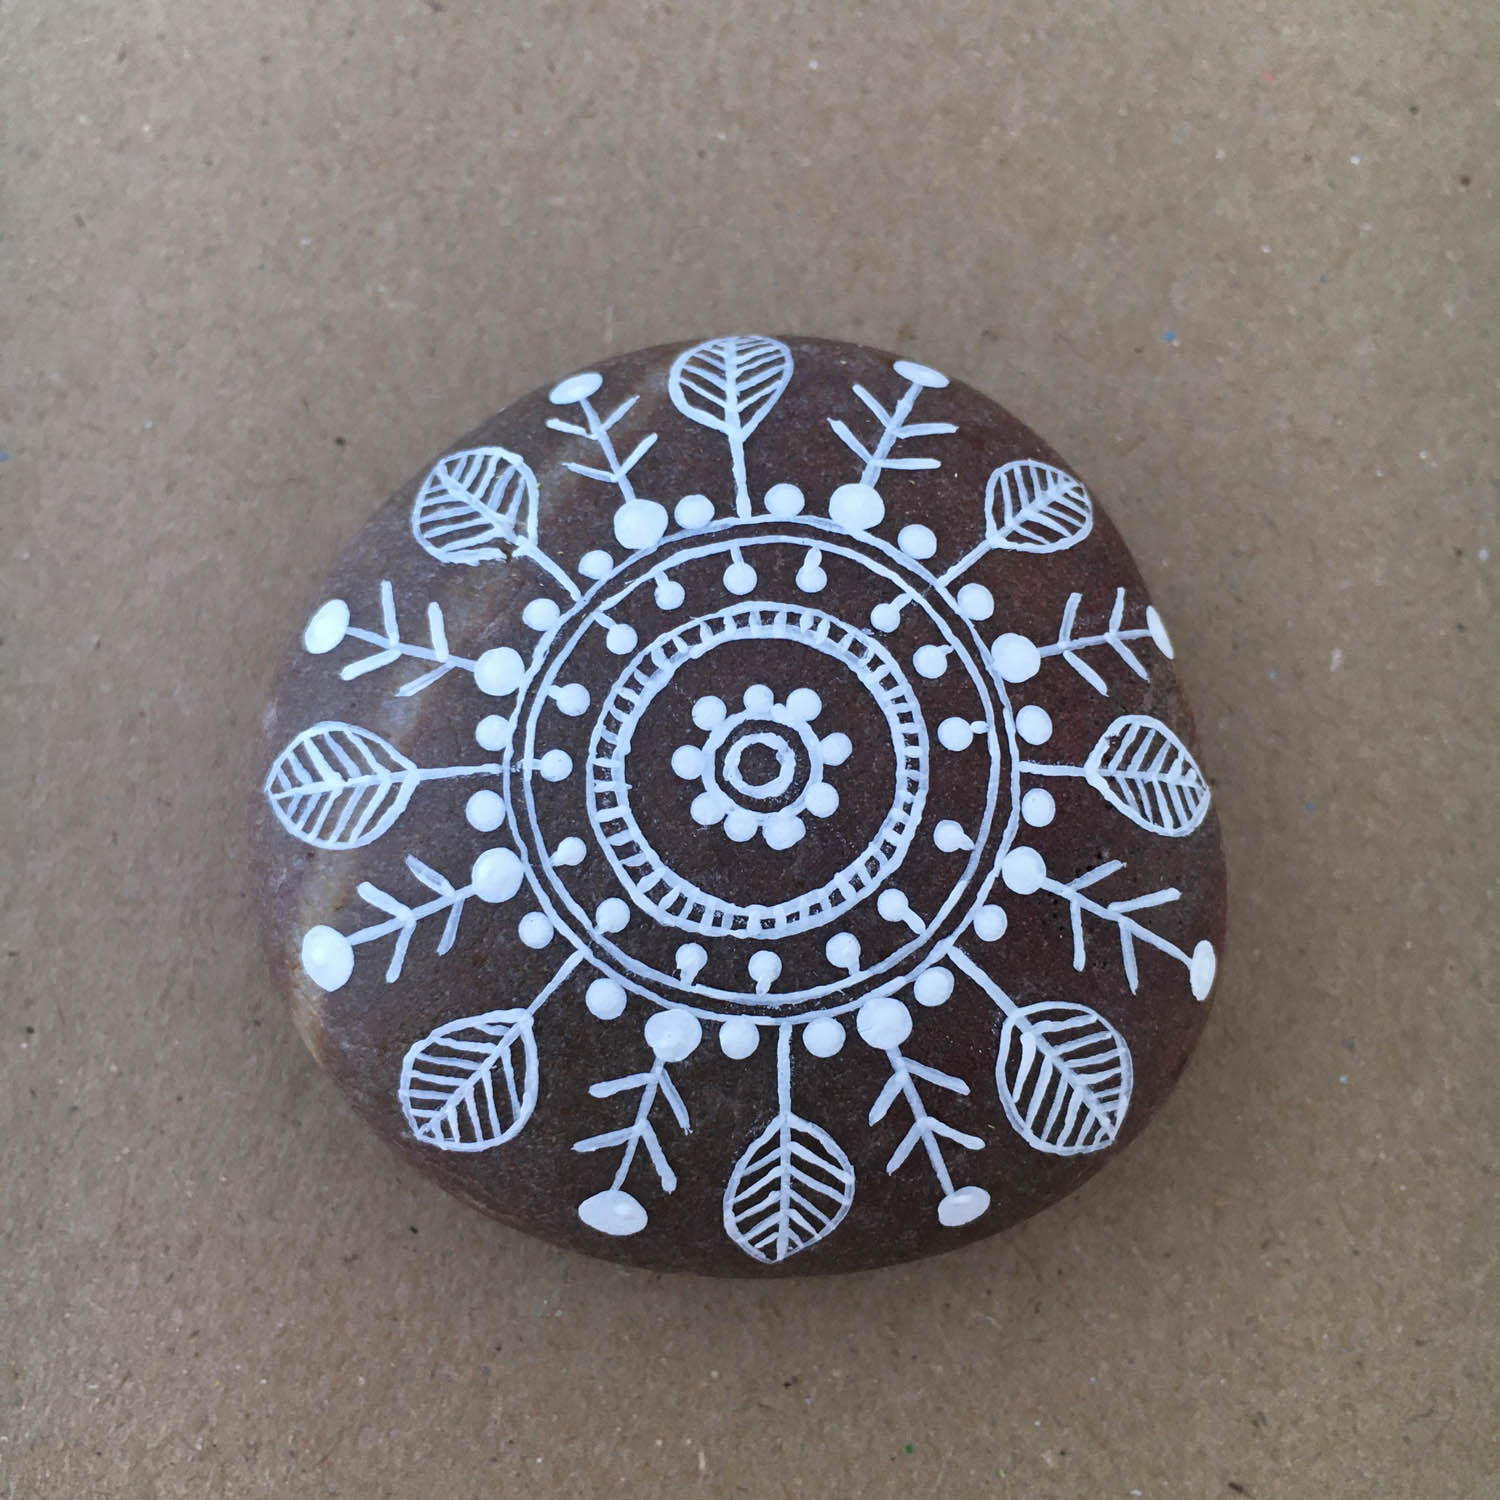
And additional dots between those dots.
29
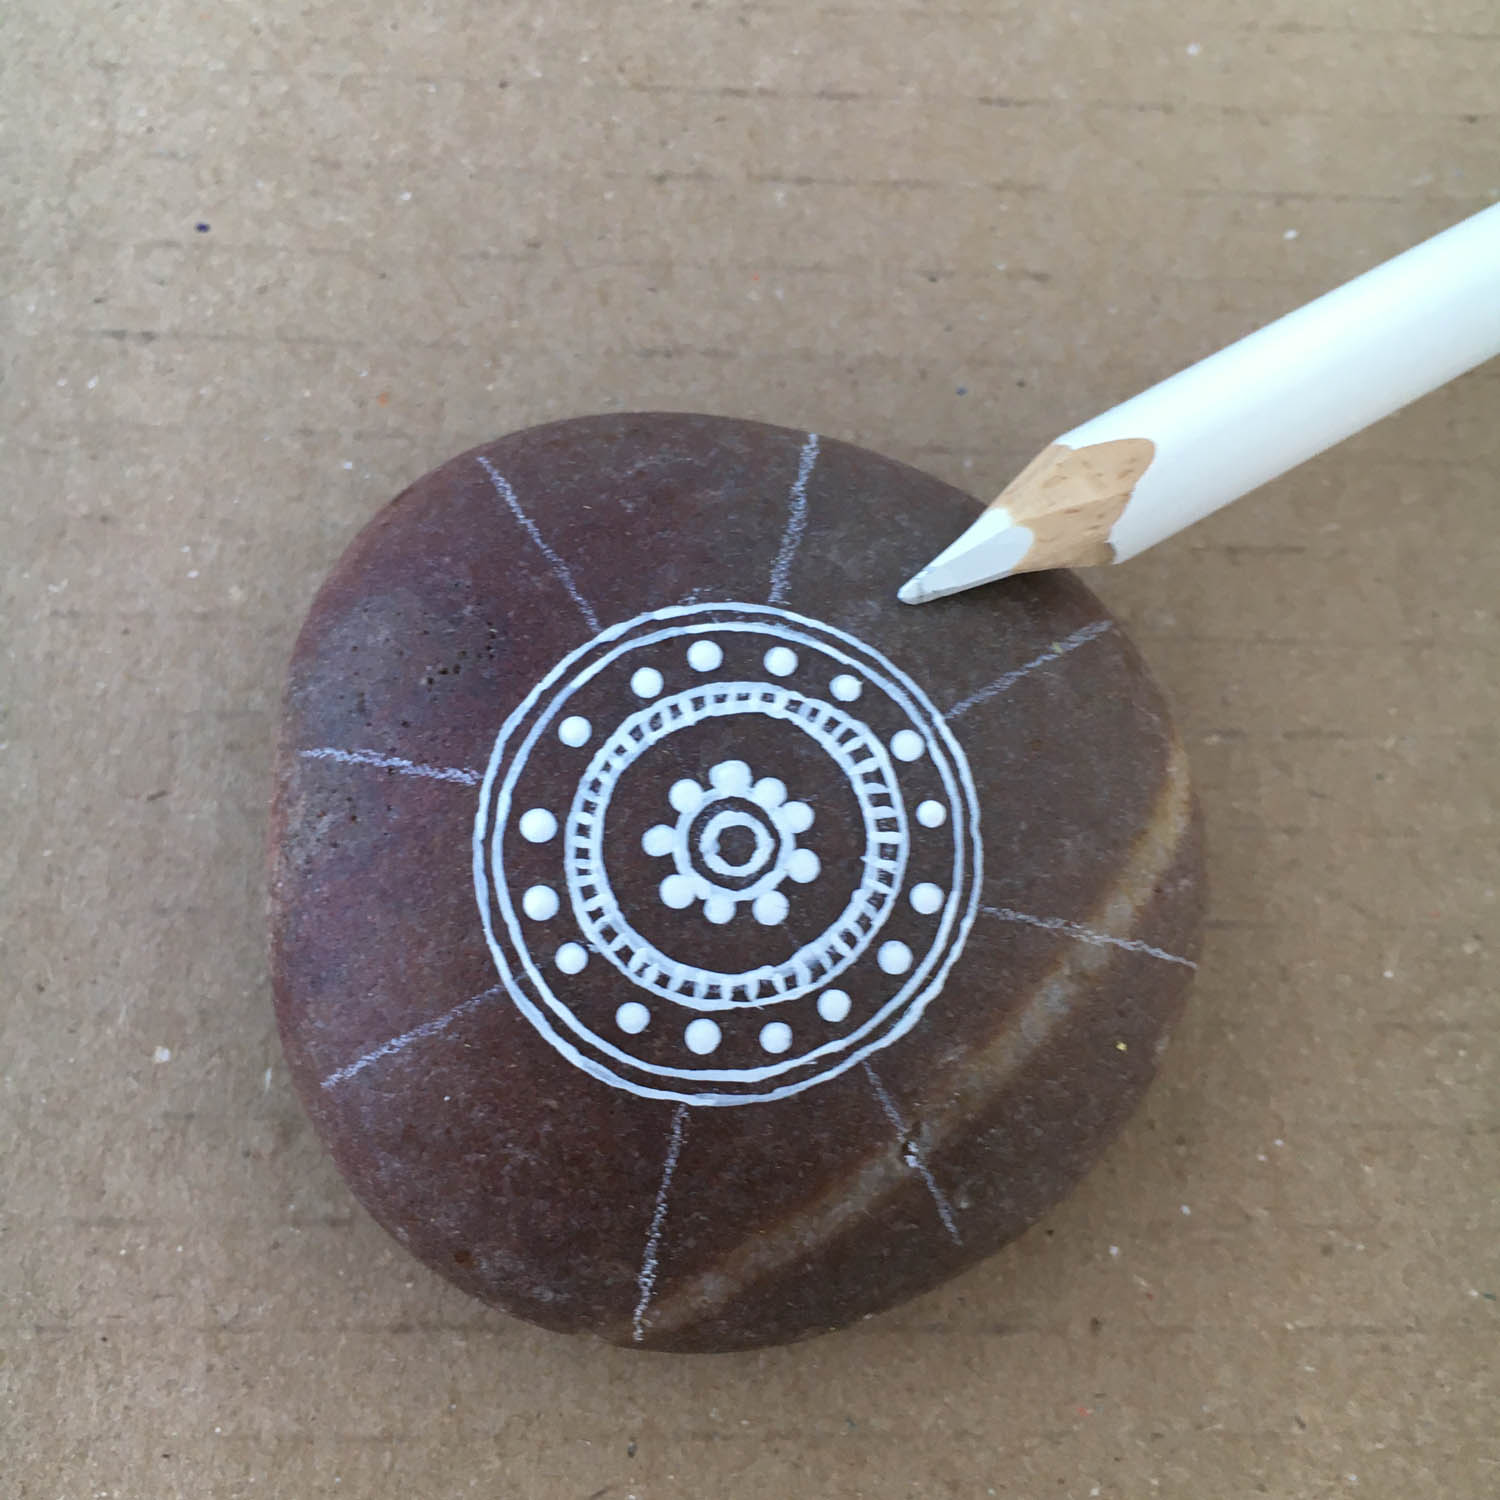
Using your white pencil, extend your four lines to the outer edge of the pebble but not over the edge. Your previous lines may have become faint from rubbing them while working.
30
Draw additional lines between the four lines.
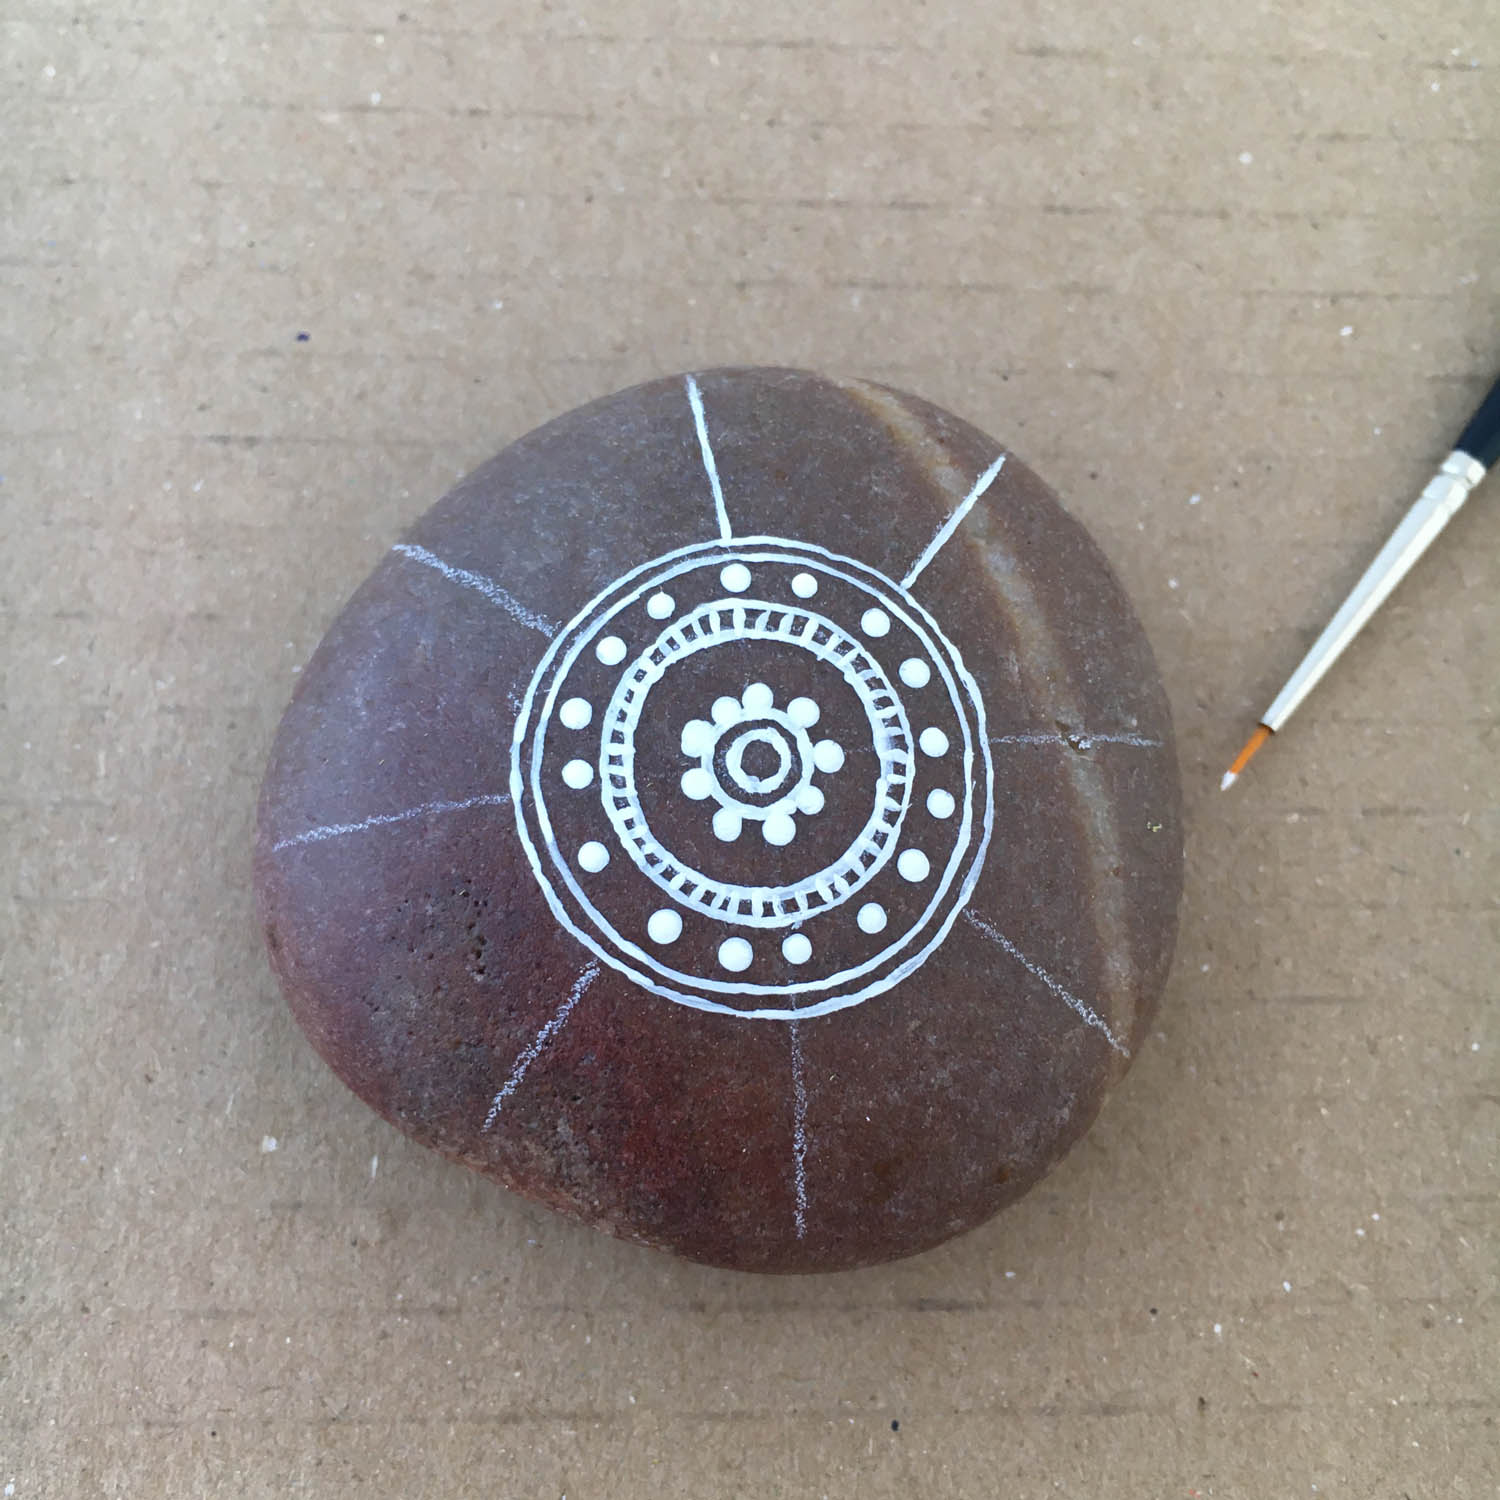
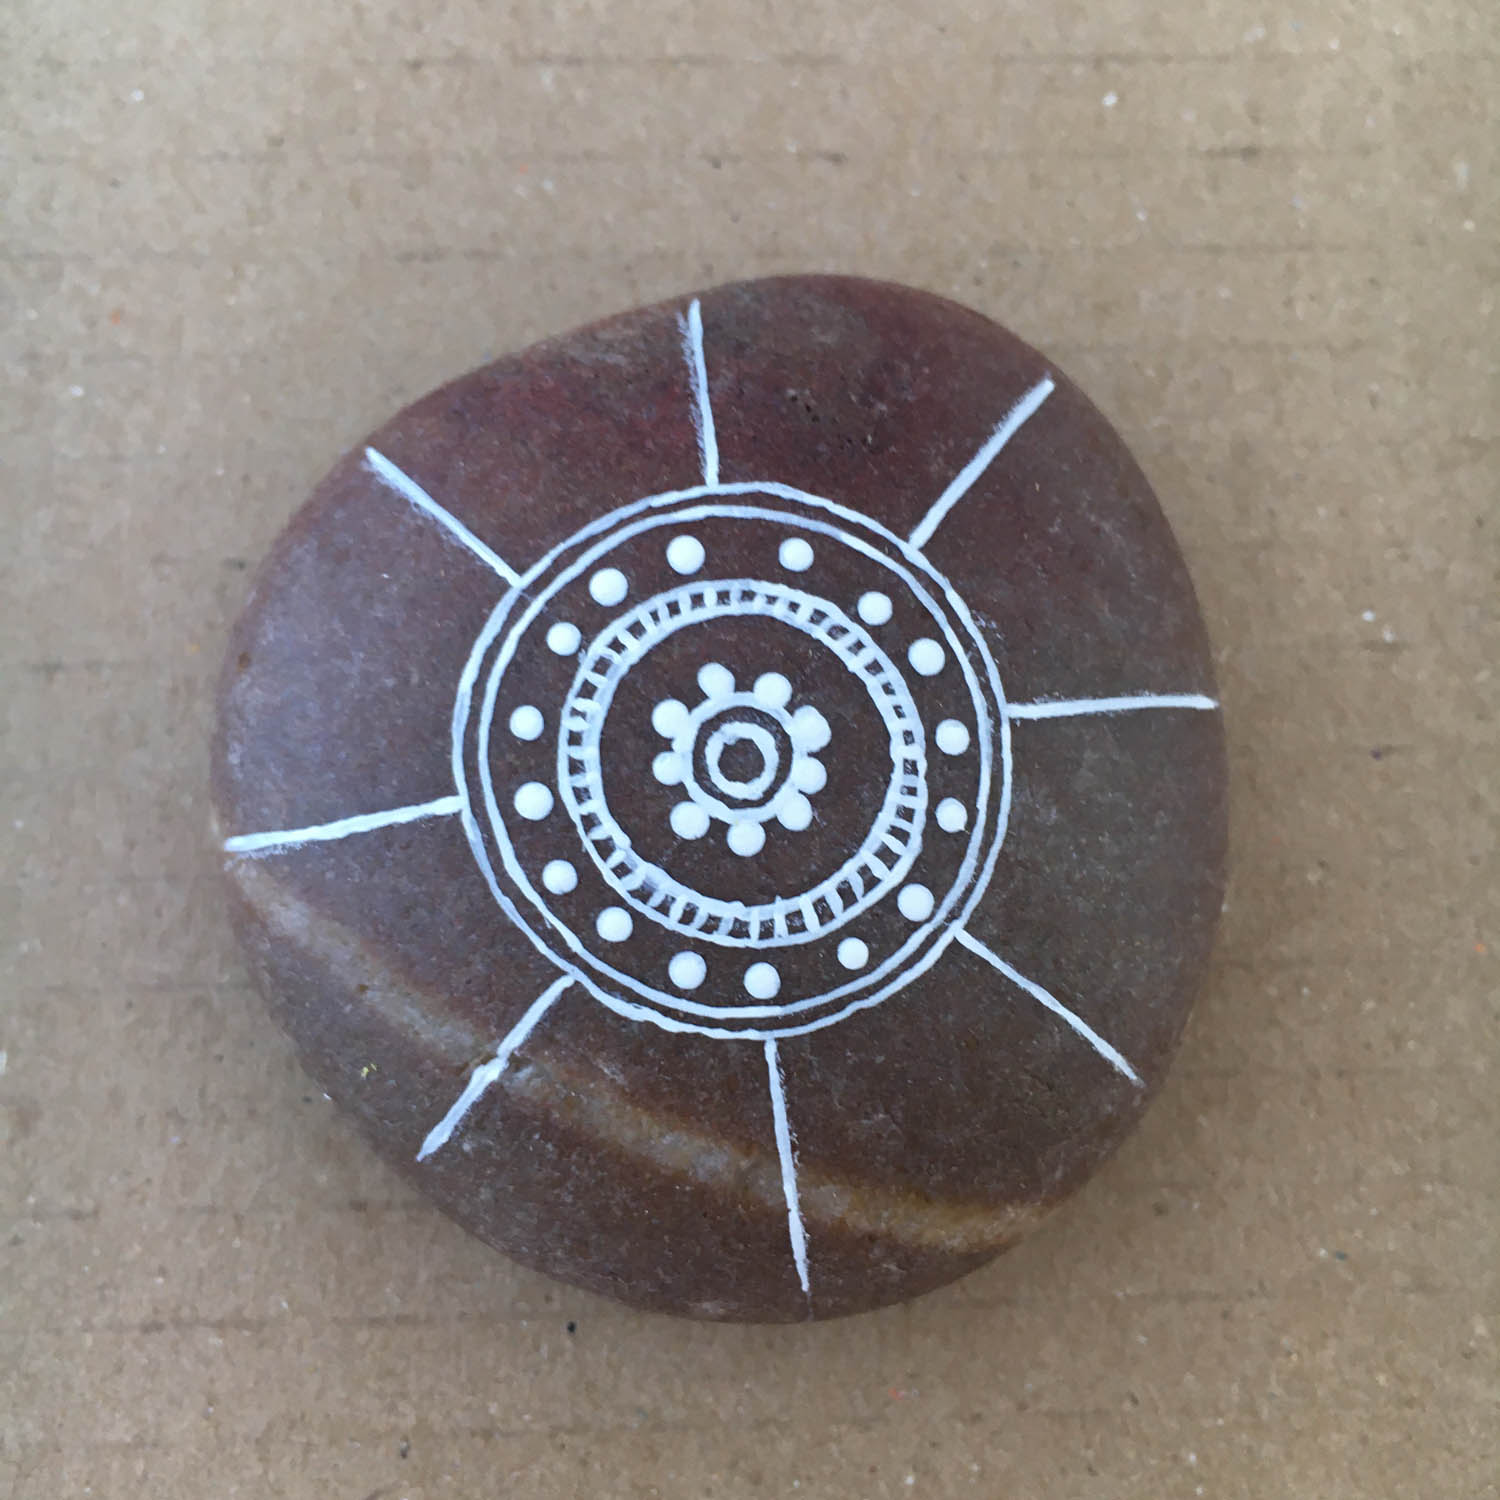
31
Using white paint and your thin brush, paint delicate lines over your pencil marks.
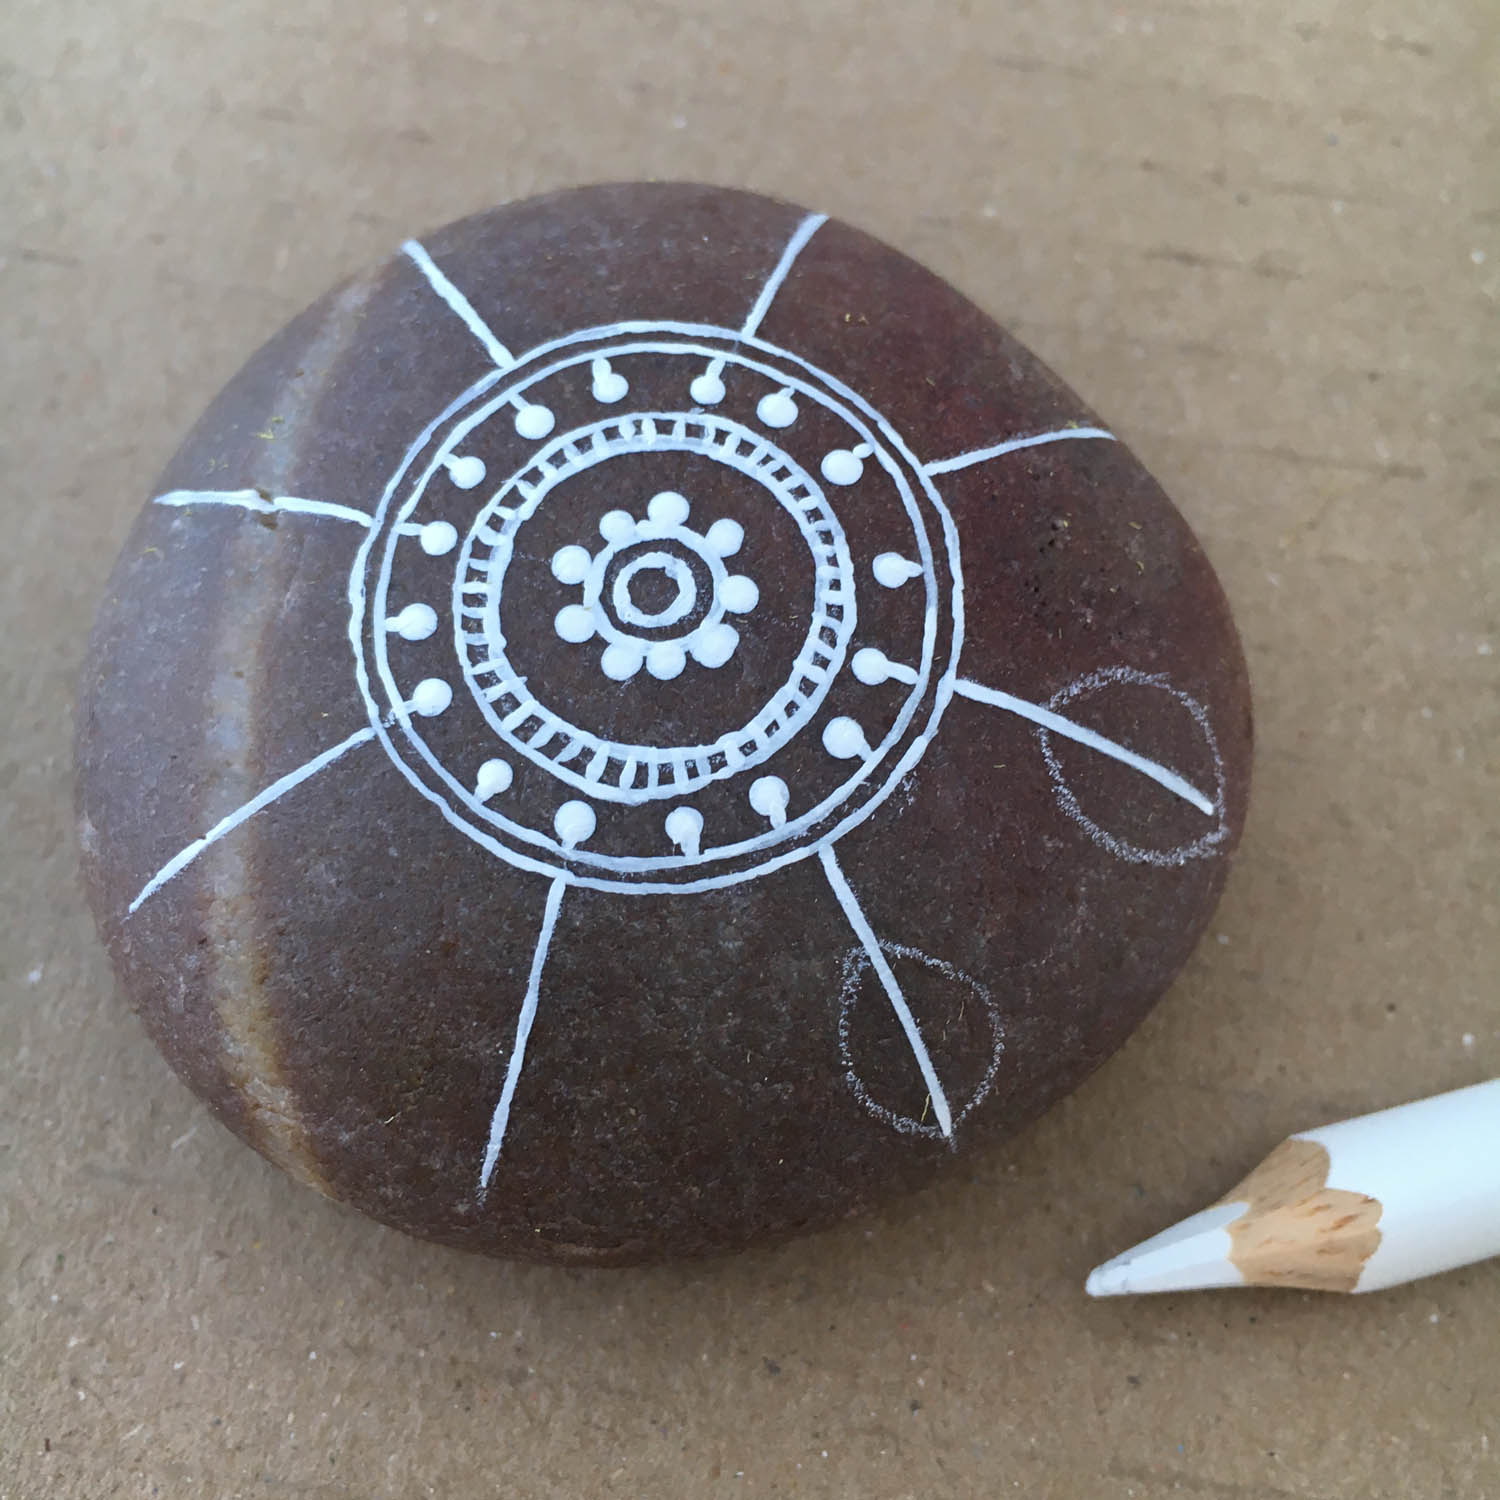
32
Add a tiny line of white paint joining your new dots to the outer circle then draw little leaf shapes on the ends of the lines.
33
Paint fine lines over the leaf shapes, leaving a stem visible. There will be eight leaves.
34
Paint the delicate vein lines on the leaves, remember to keep your brush clean while in use.
35
35. This slide shows one completed leaf.
36
This slide shows all the leaves completed.
37
With your white pencil, draw lines in between each leaf stem.
38
Paint the thin lines in between each leaf stem.
39
If your tool has a bigger dot, use it to paint dots at the base of each of the new lines. You can also use a toothpick or almost anything to make different sized dots.
40
This slide shows the bigger dots at the base of each of the new lines.
41
Add more dots on either side of the big dots.
42
This slide shows the bigger dots complete all the way around.
43
The new lines painted between each leaf can now get little lines coming out of them on either side so you're creating little twigs.
44
This slide shows one completed twig.
45
Carry on creating twigs all around on your new lines.
46
Each twig can now get a big dot on the end.
47
This slide shows all twigs with big dots on them.
48
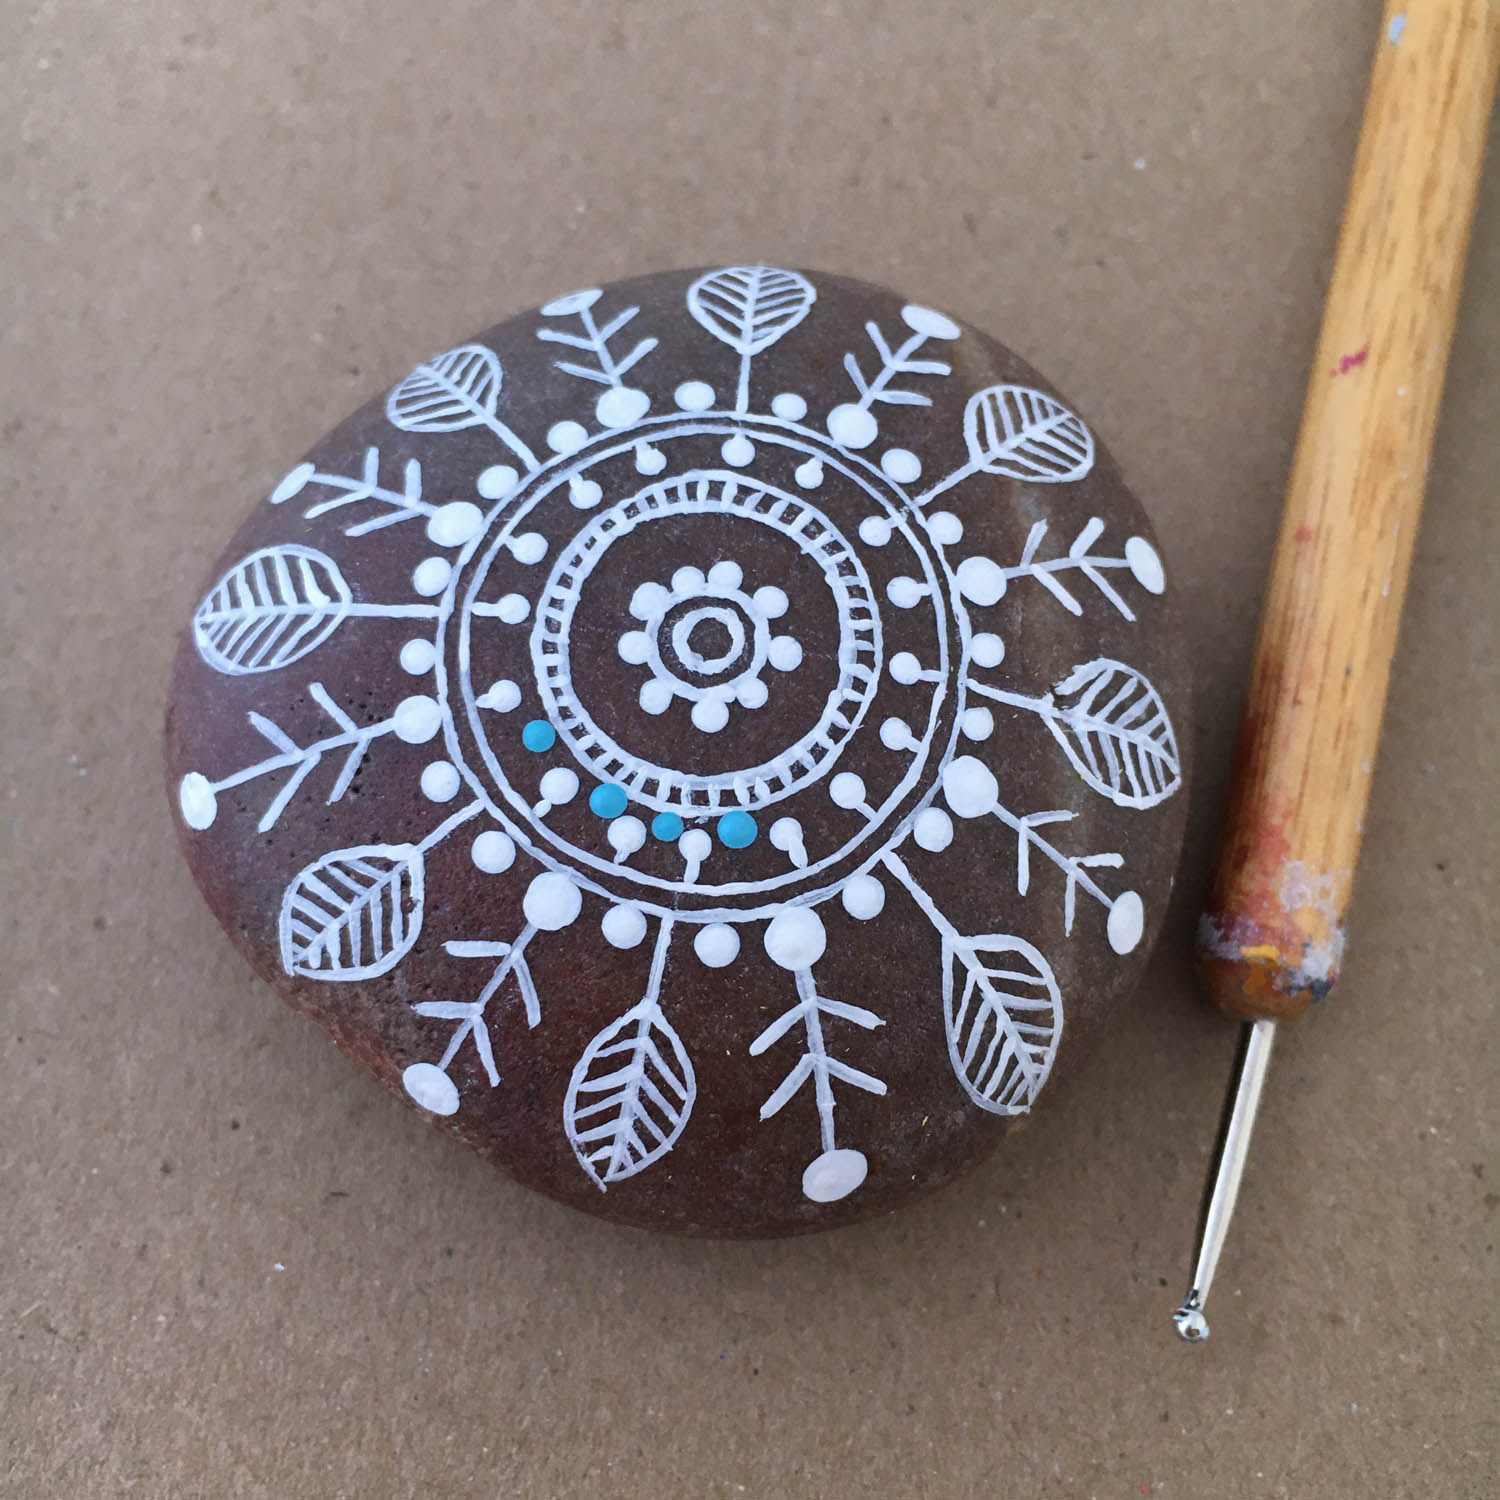
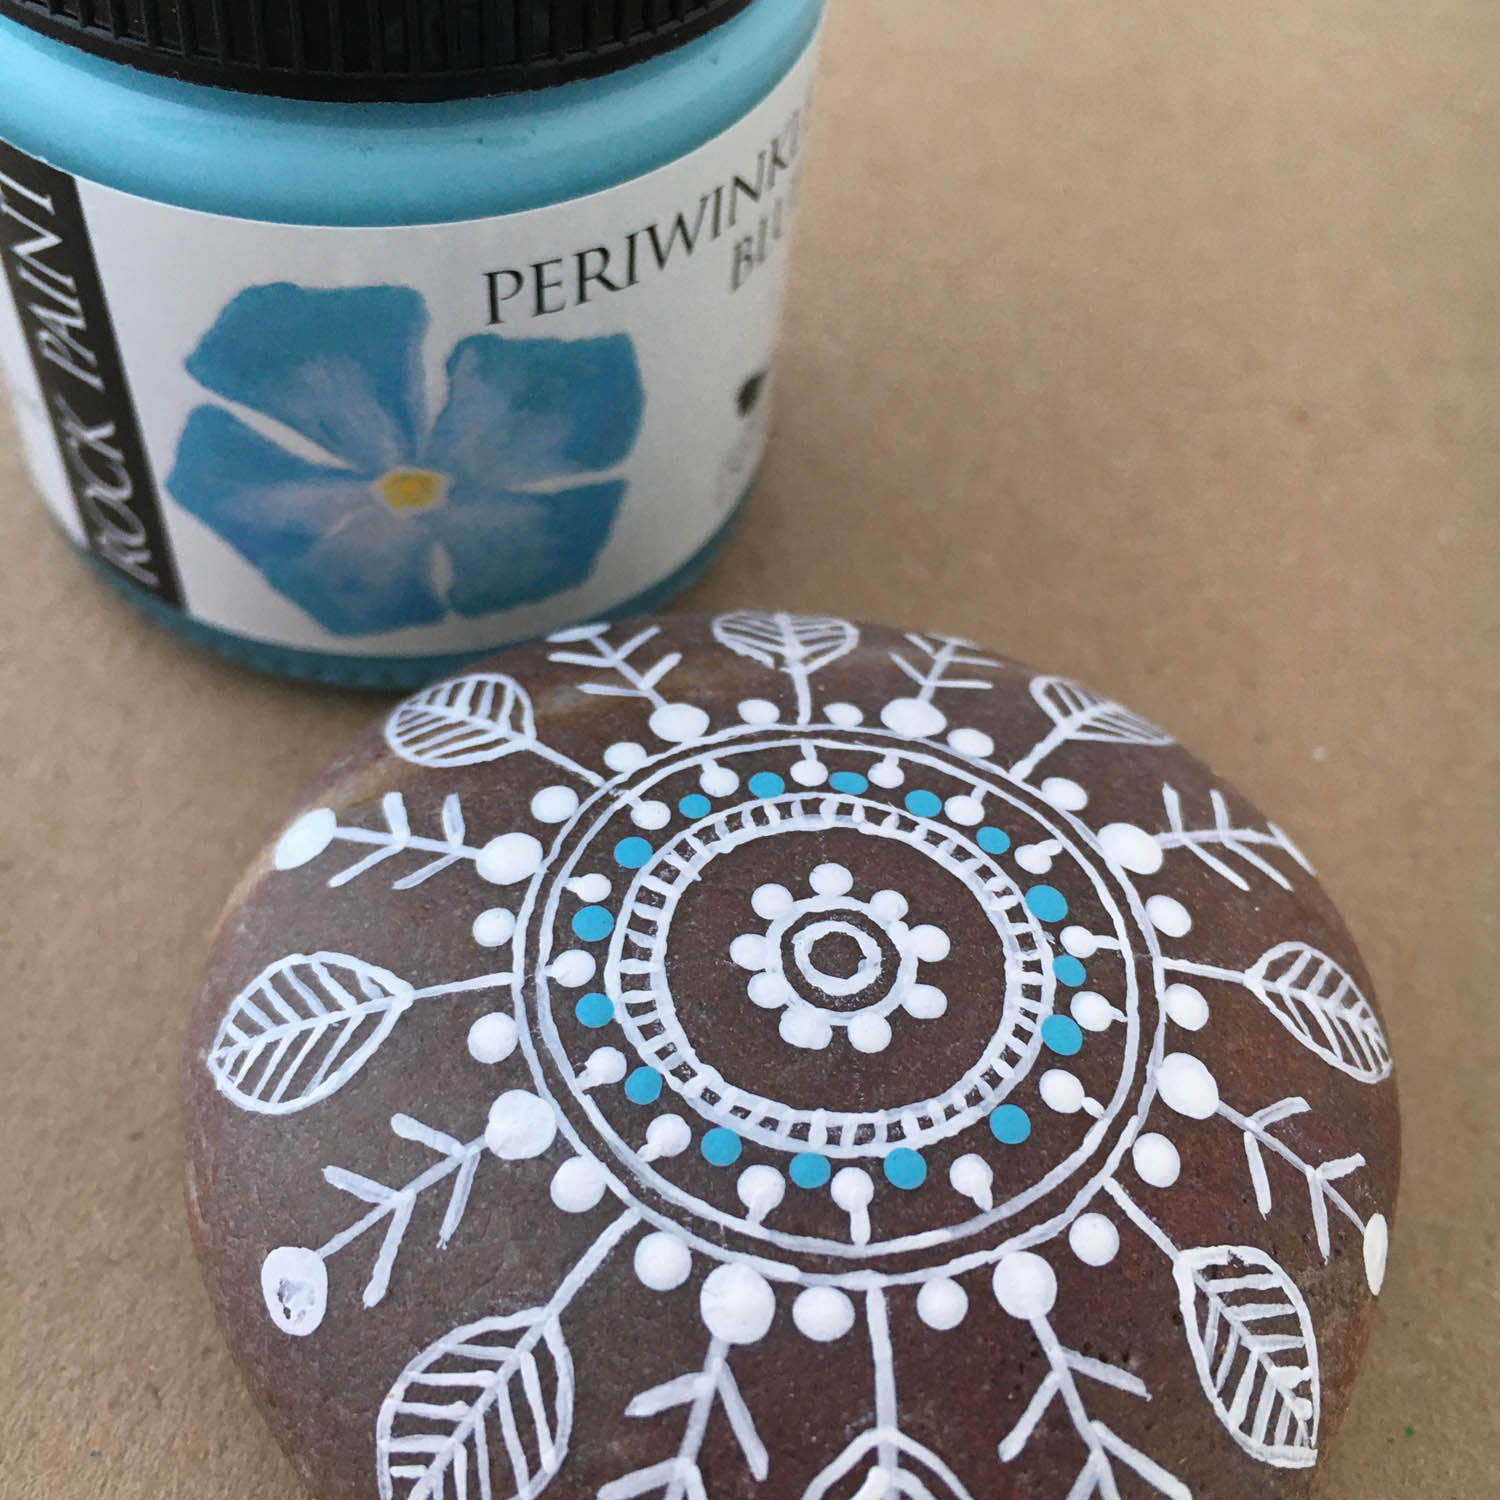
Now to add some colour. Using your dotting tool, add blue (Periwinkle Blue) dots in between your smaller white dots, touching one of the inner circles as shown in this slide.
49
This slide shows the blue dots completed.
50
Now add lighter green (Vespa Green) paint dots with your dotting tool, to the twig branches.
51
Add the same green smaller dot to the middle of the big twig dot. This slide shows the twig branches complete.
52
Now add green dots to the centre area N, S E and W
53
Add more green dots between those dots.
54
Add tiny white dots between the green dots.
55
Add blue dots to the base of the twigs.
56
Add tiny white dots around the twig tops
57
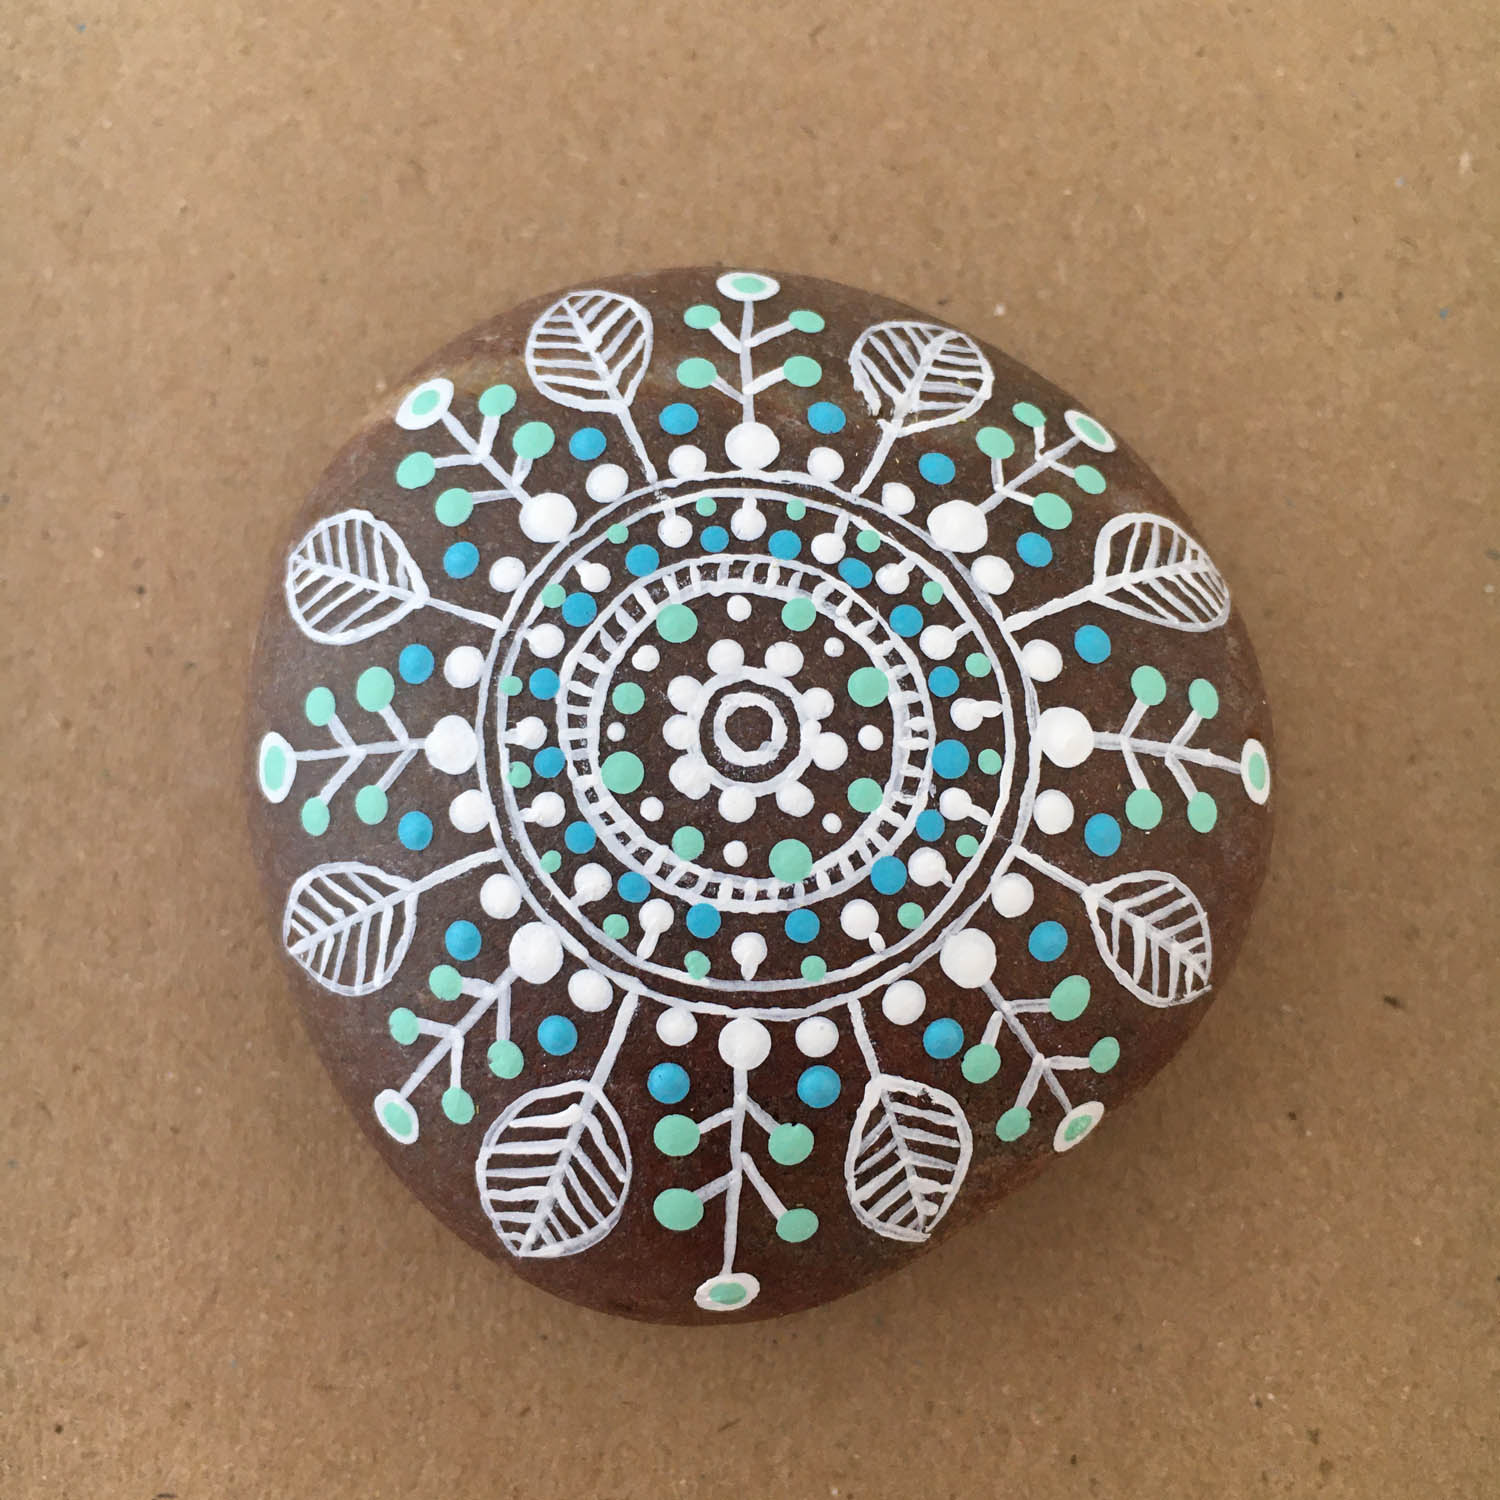
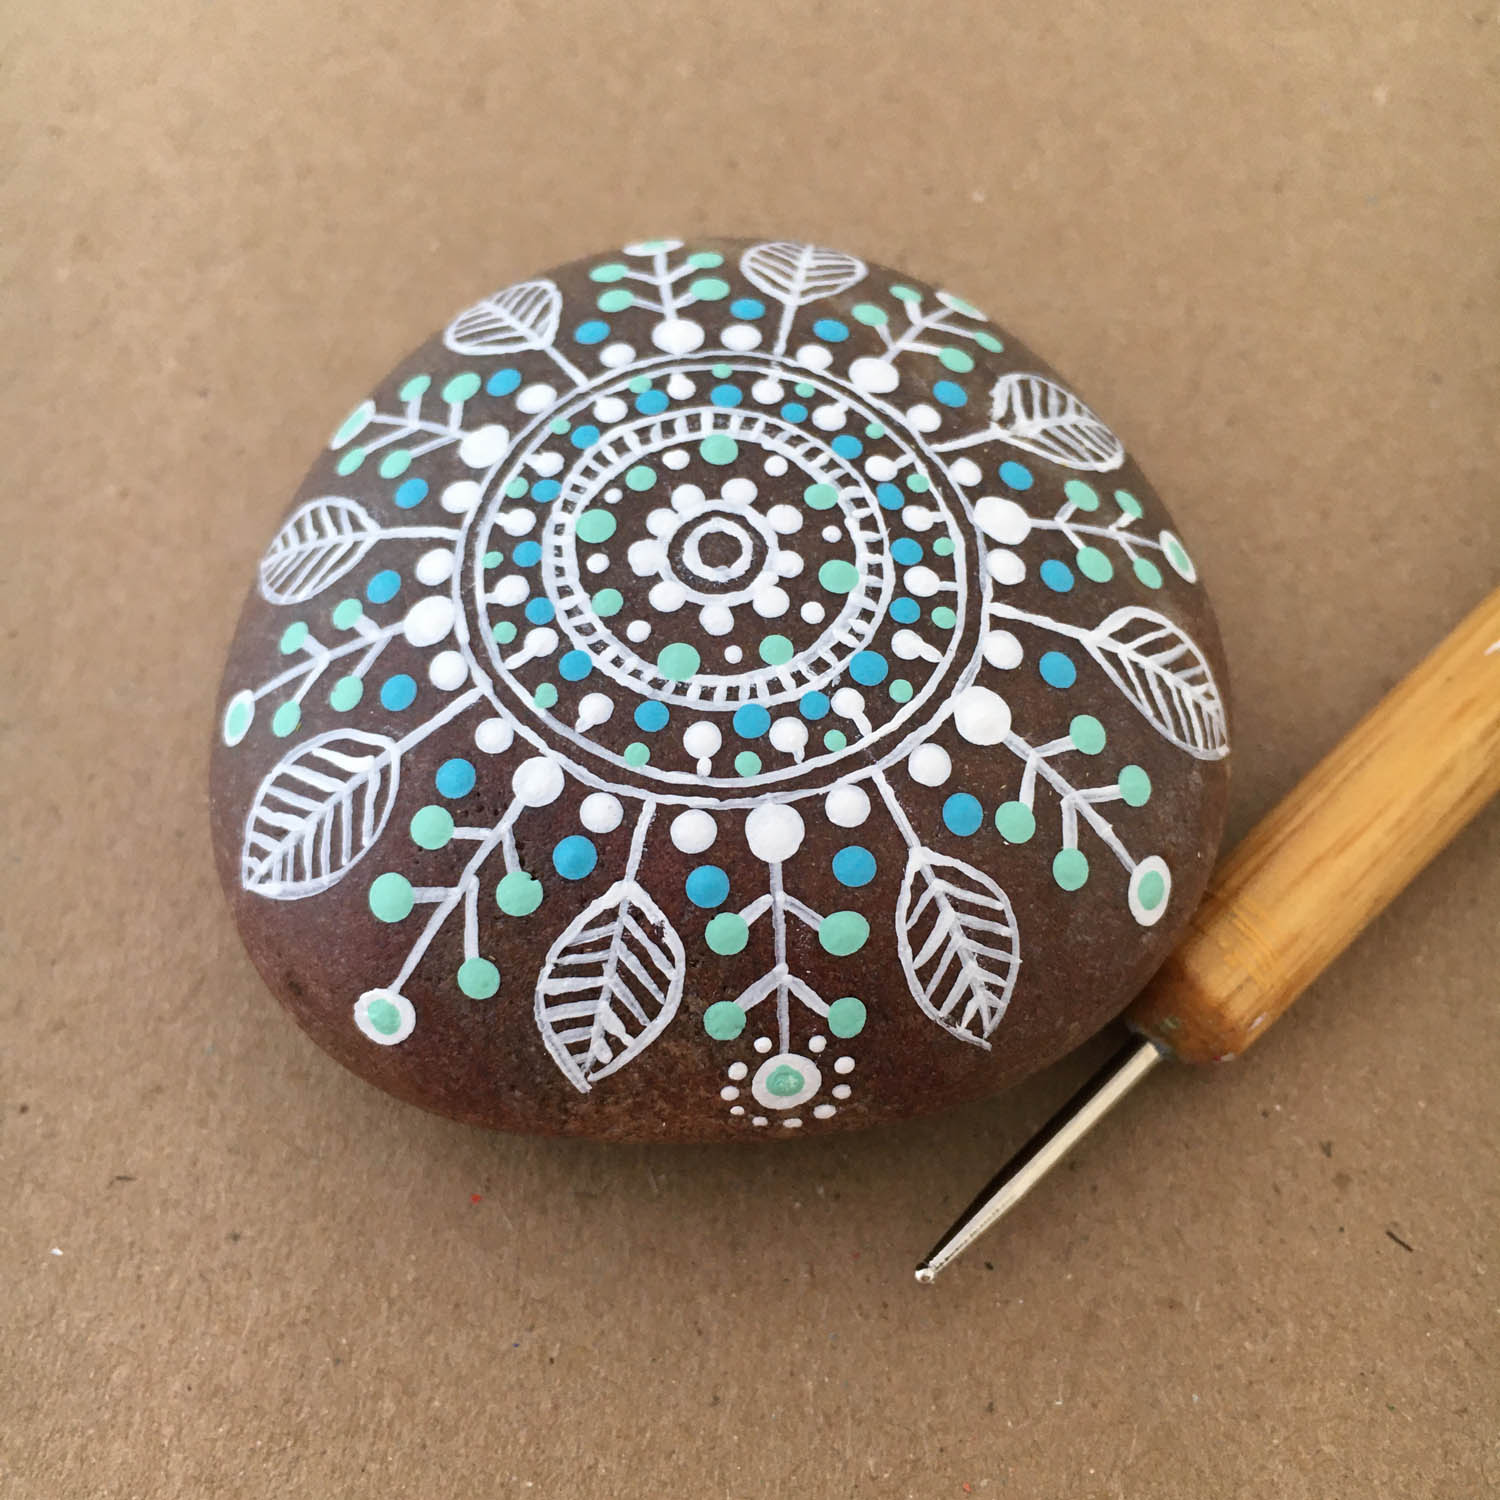
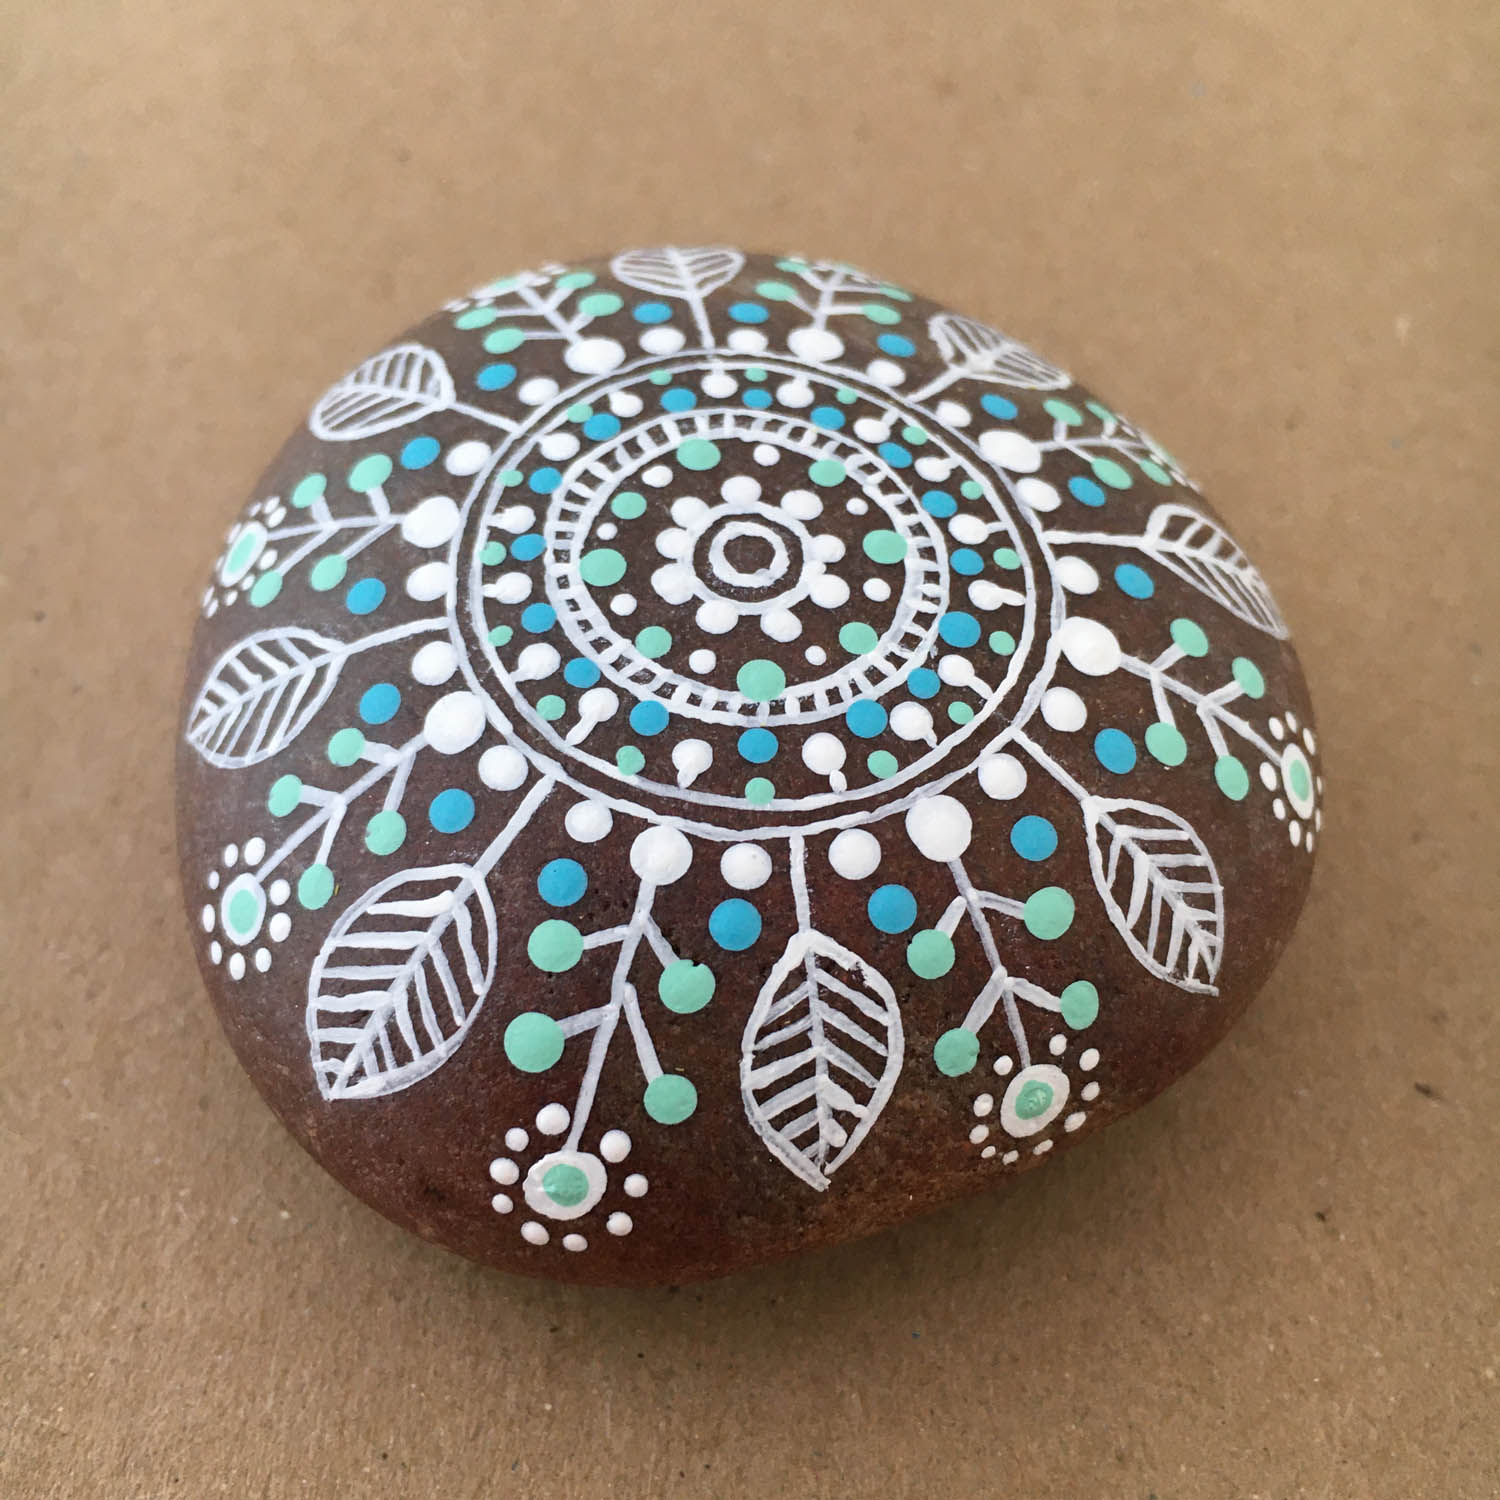
The mandala is complete.
58
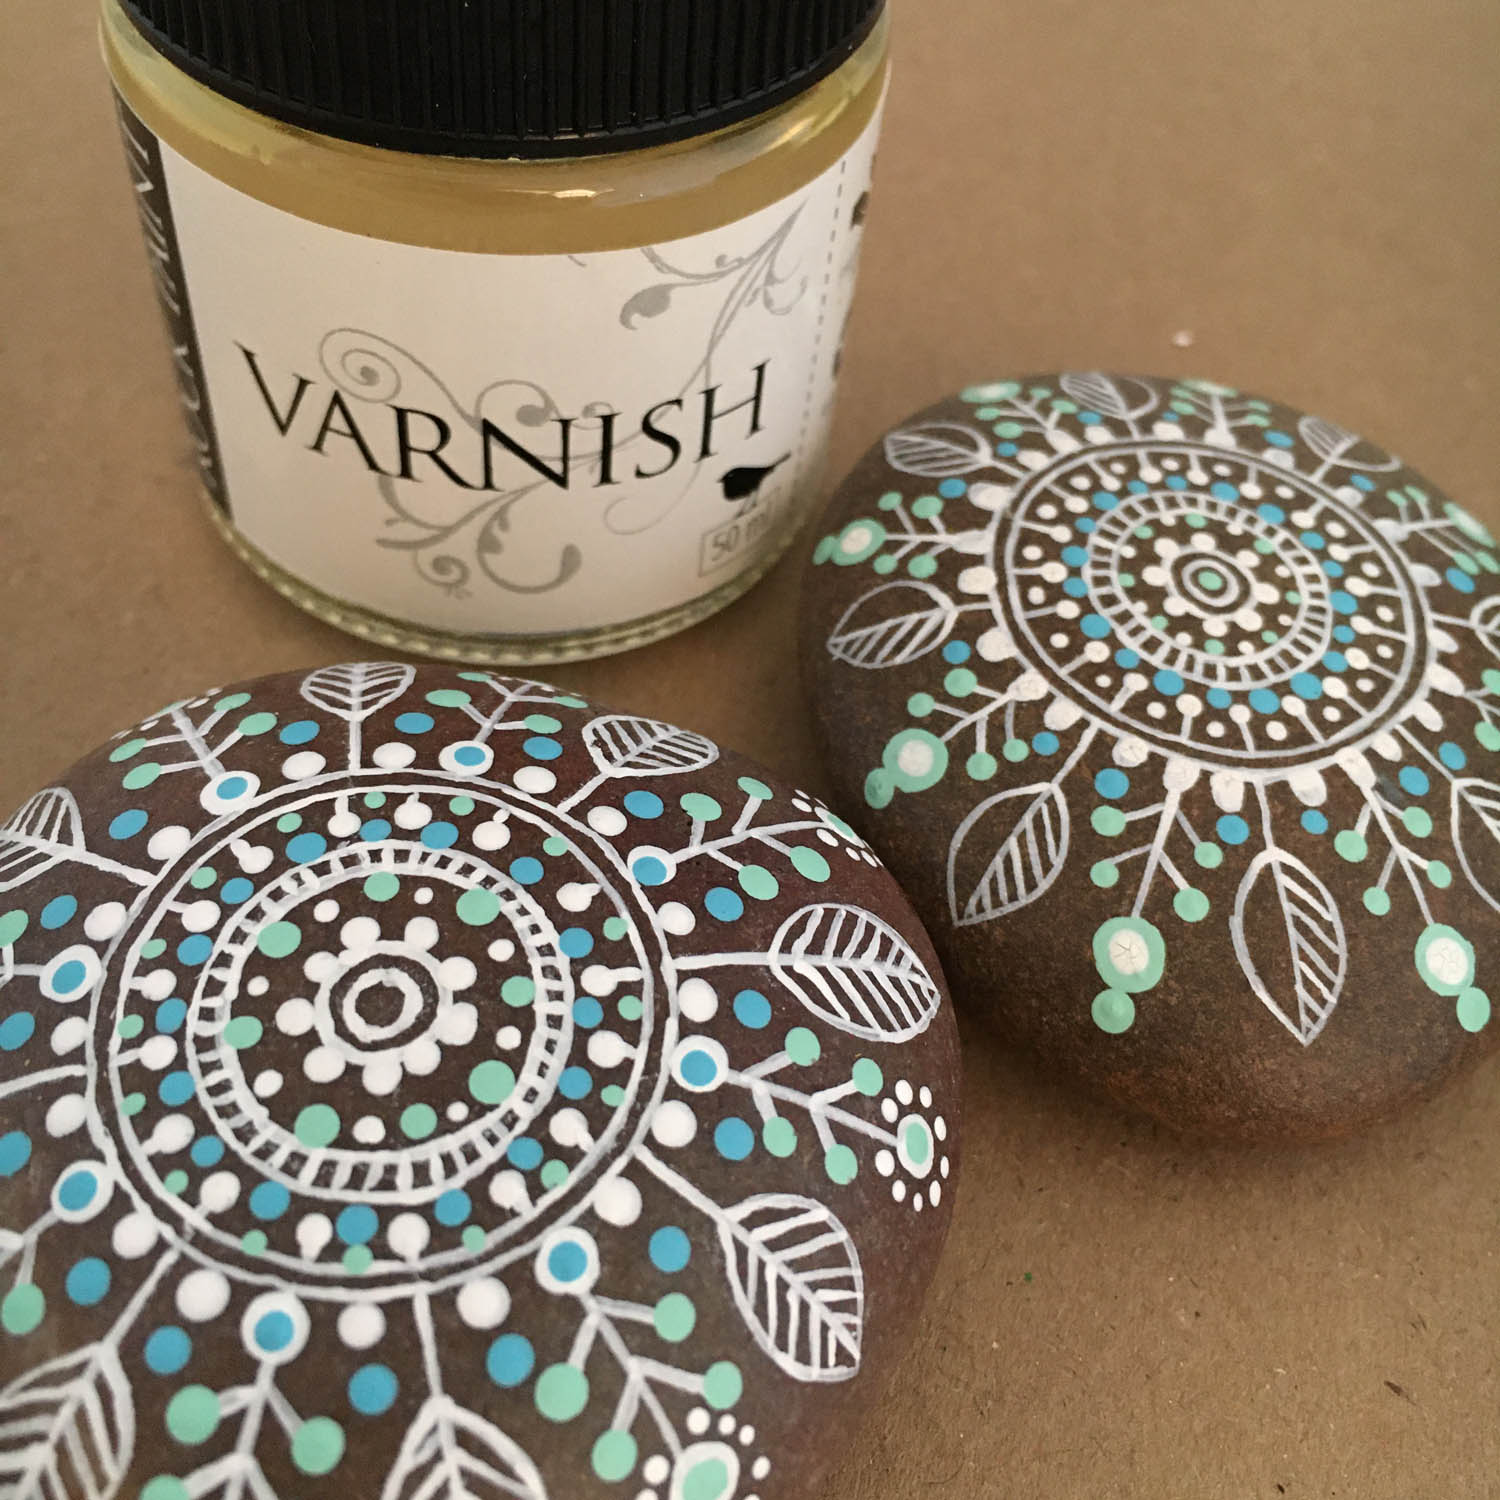
Once all paint is dry (leave for 24 hours to be sure), erase all your pencil lines then give the rock a couple of coats of varnish.
59
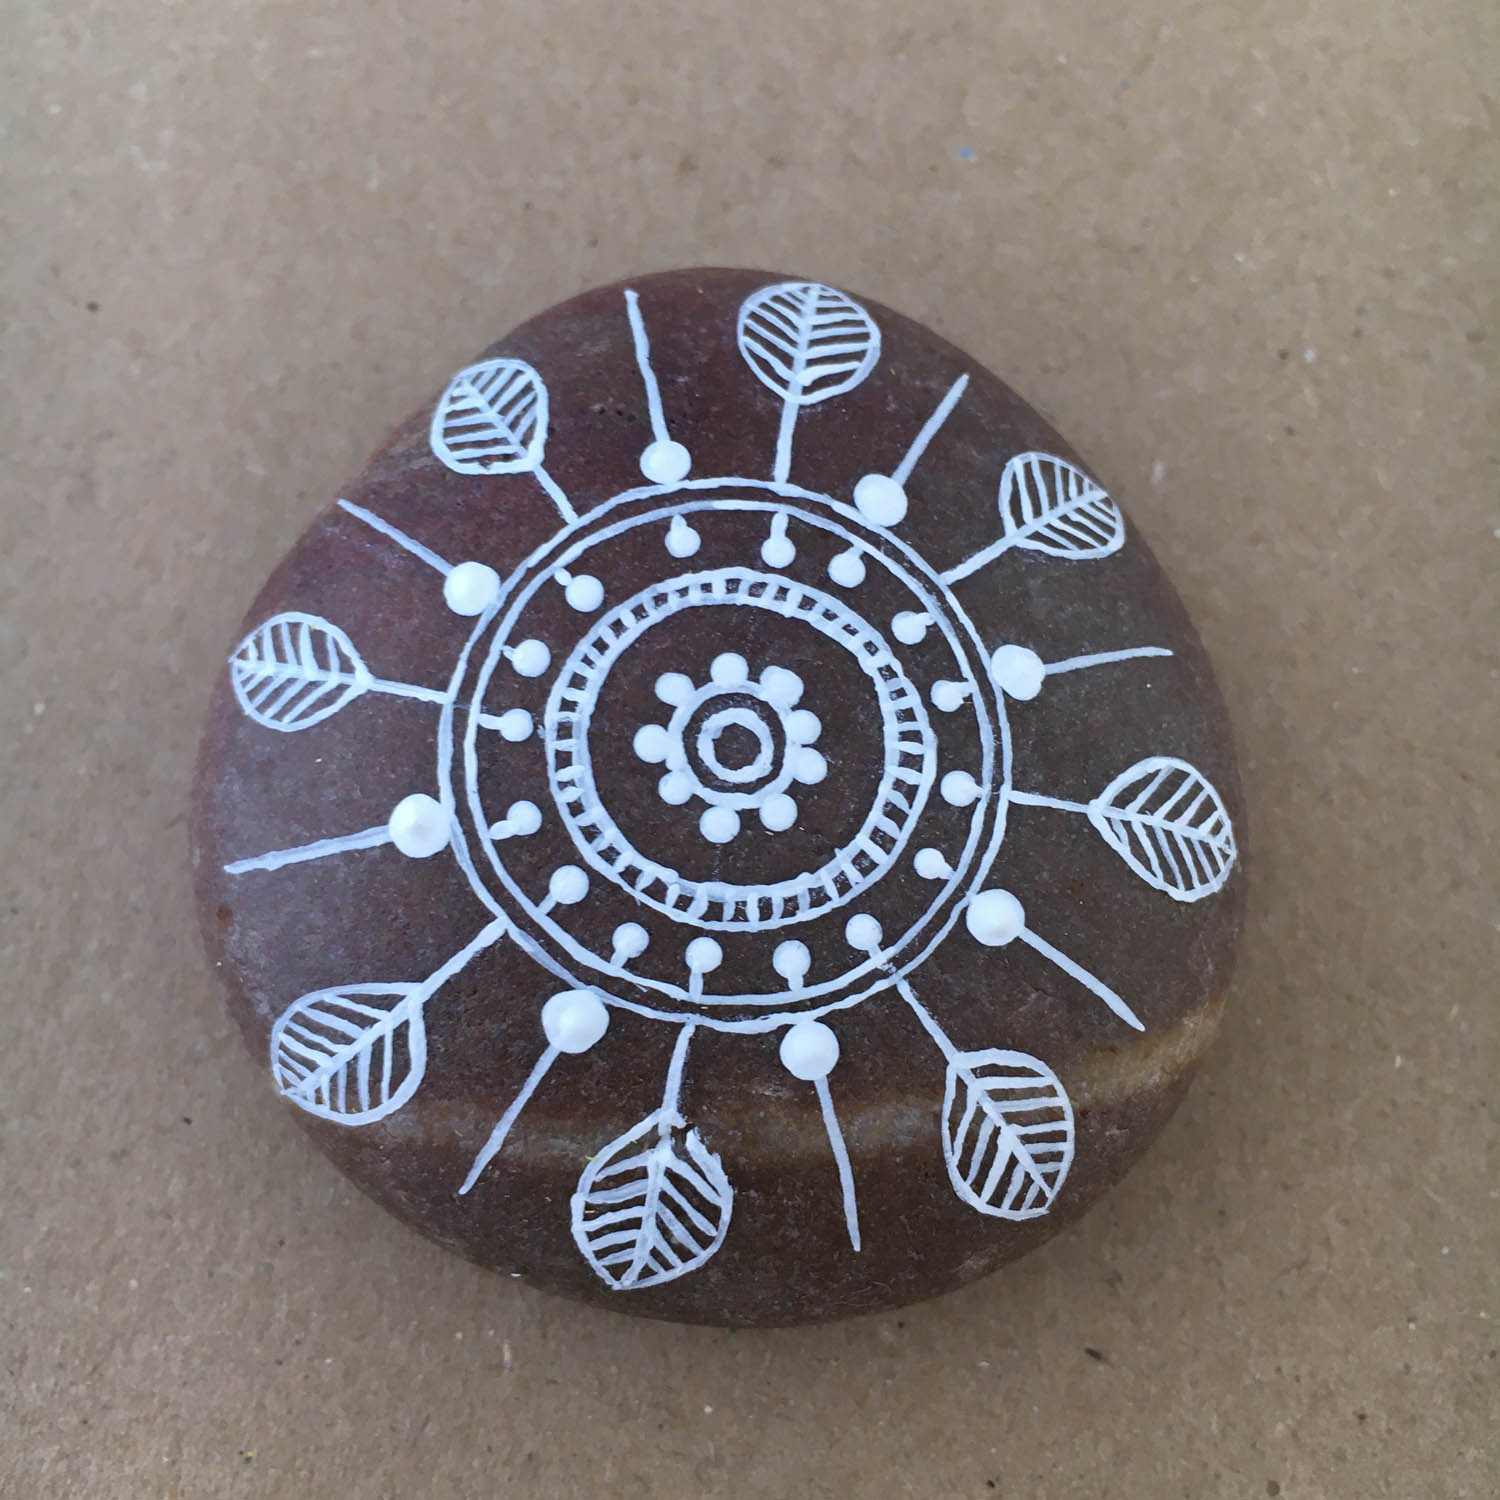
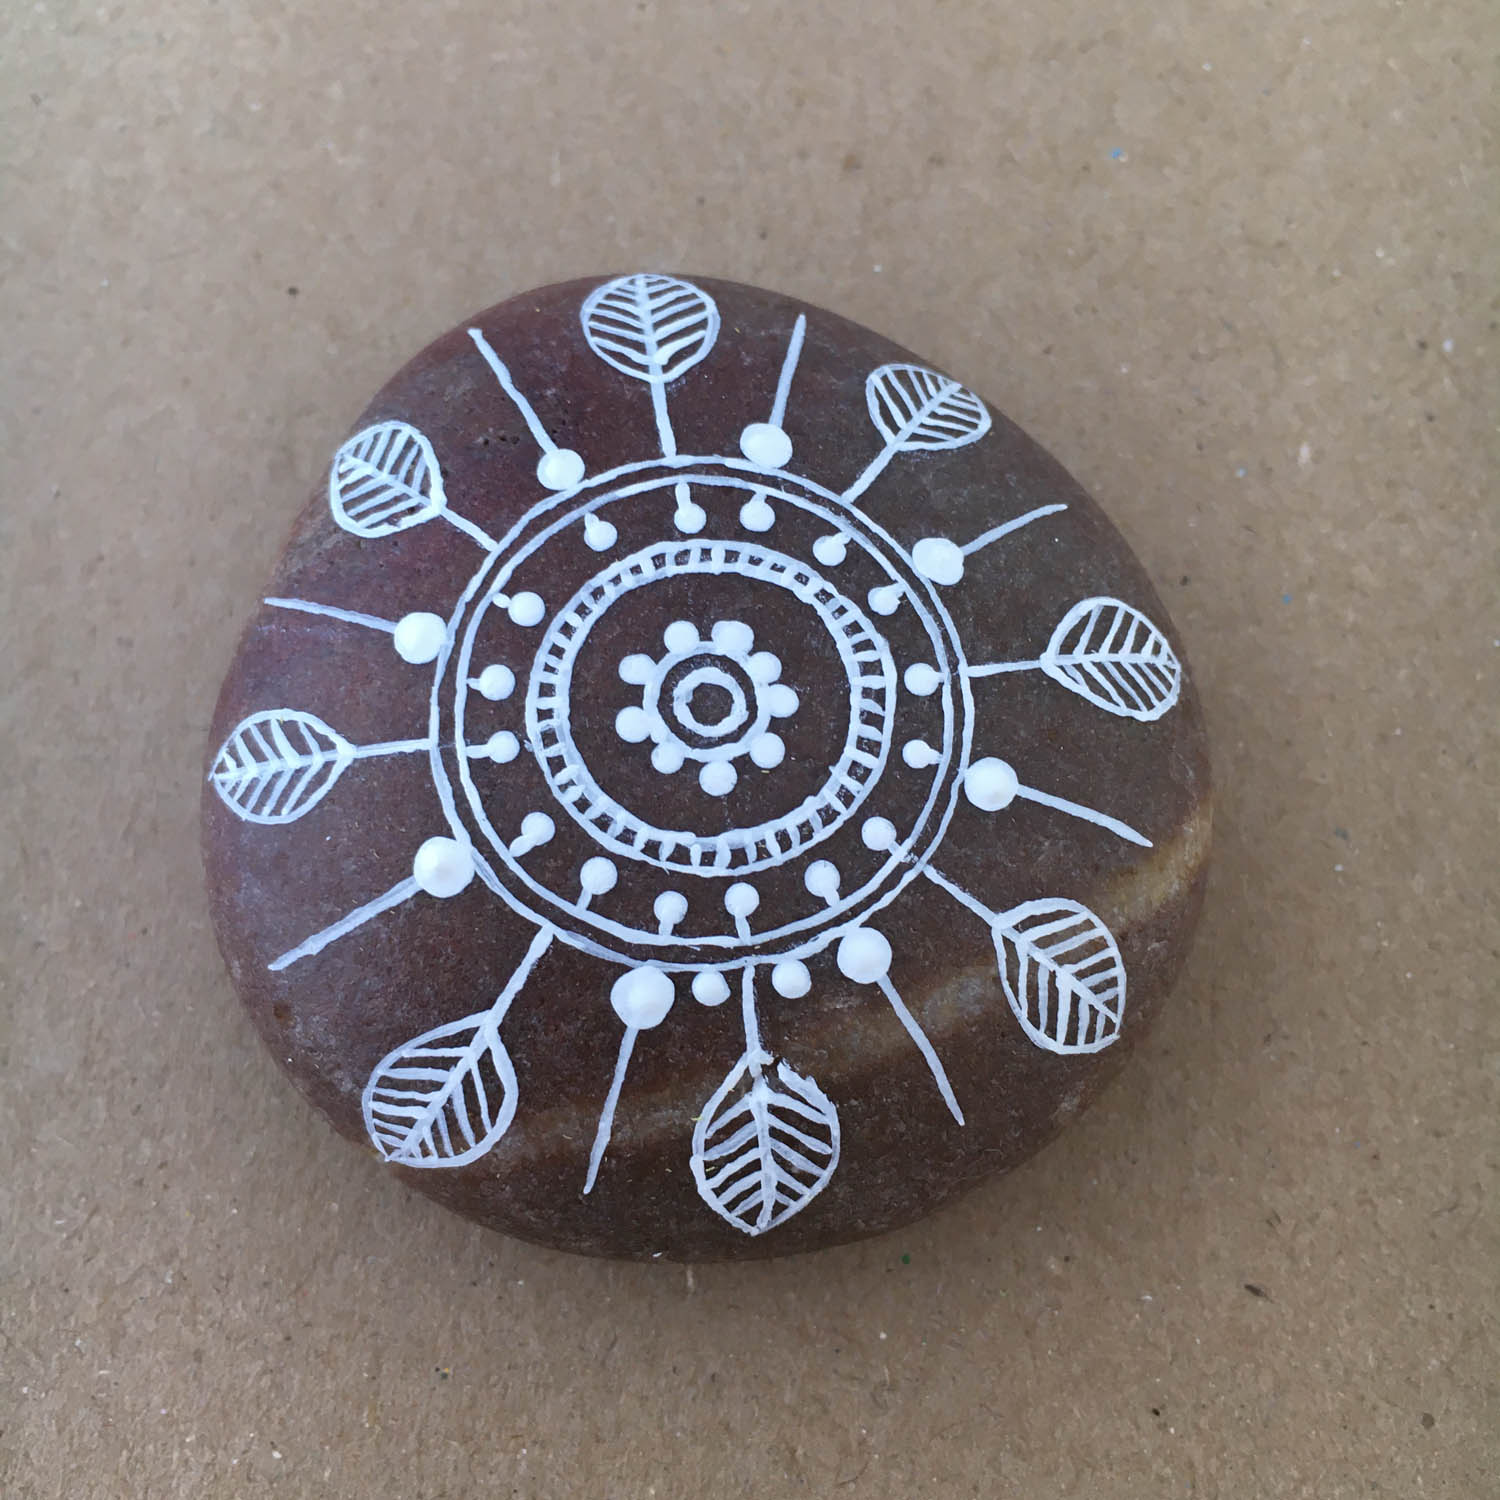
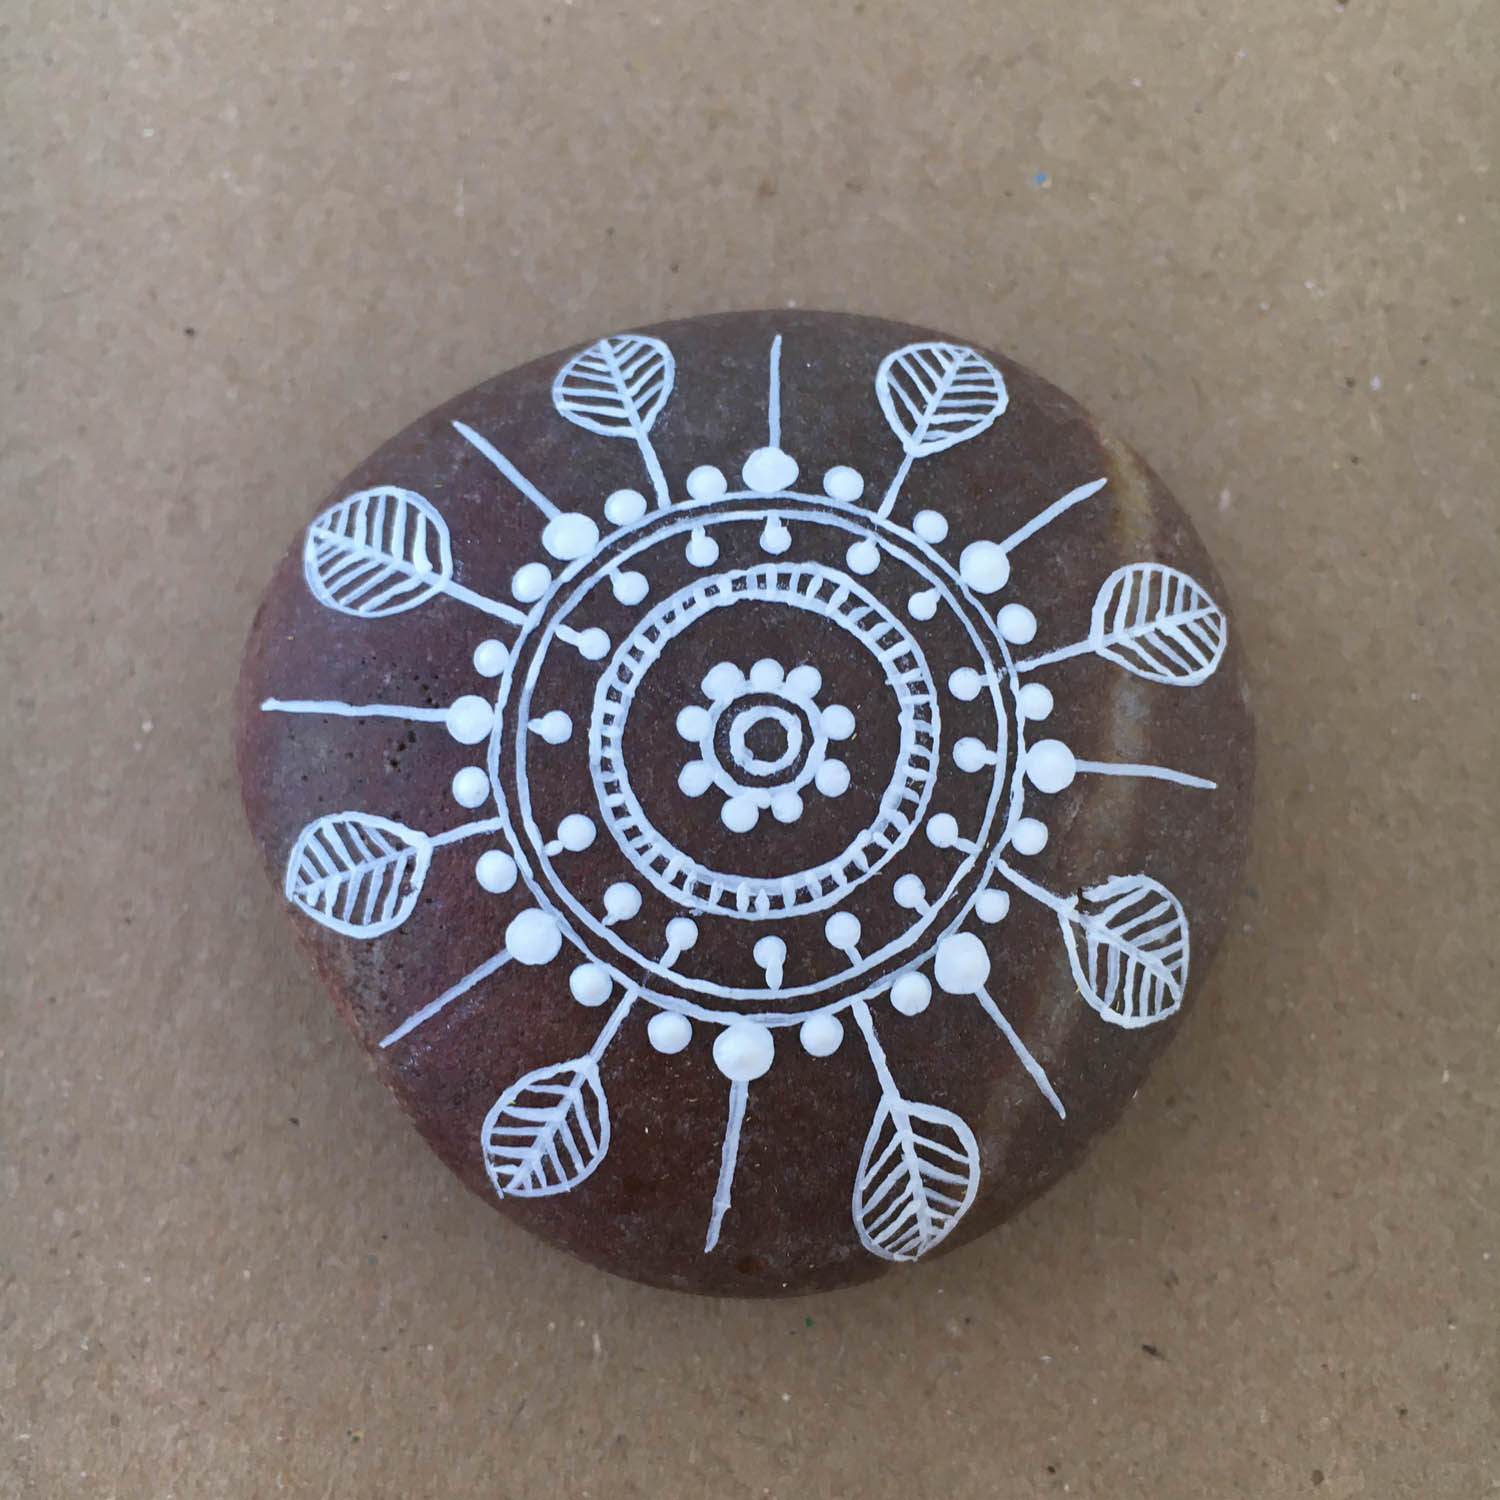
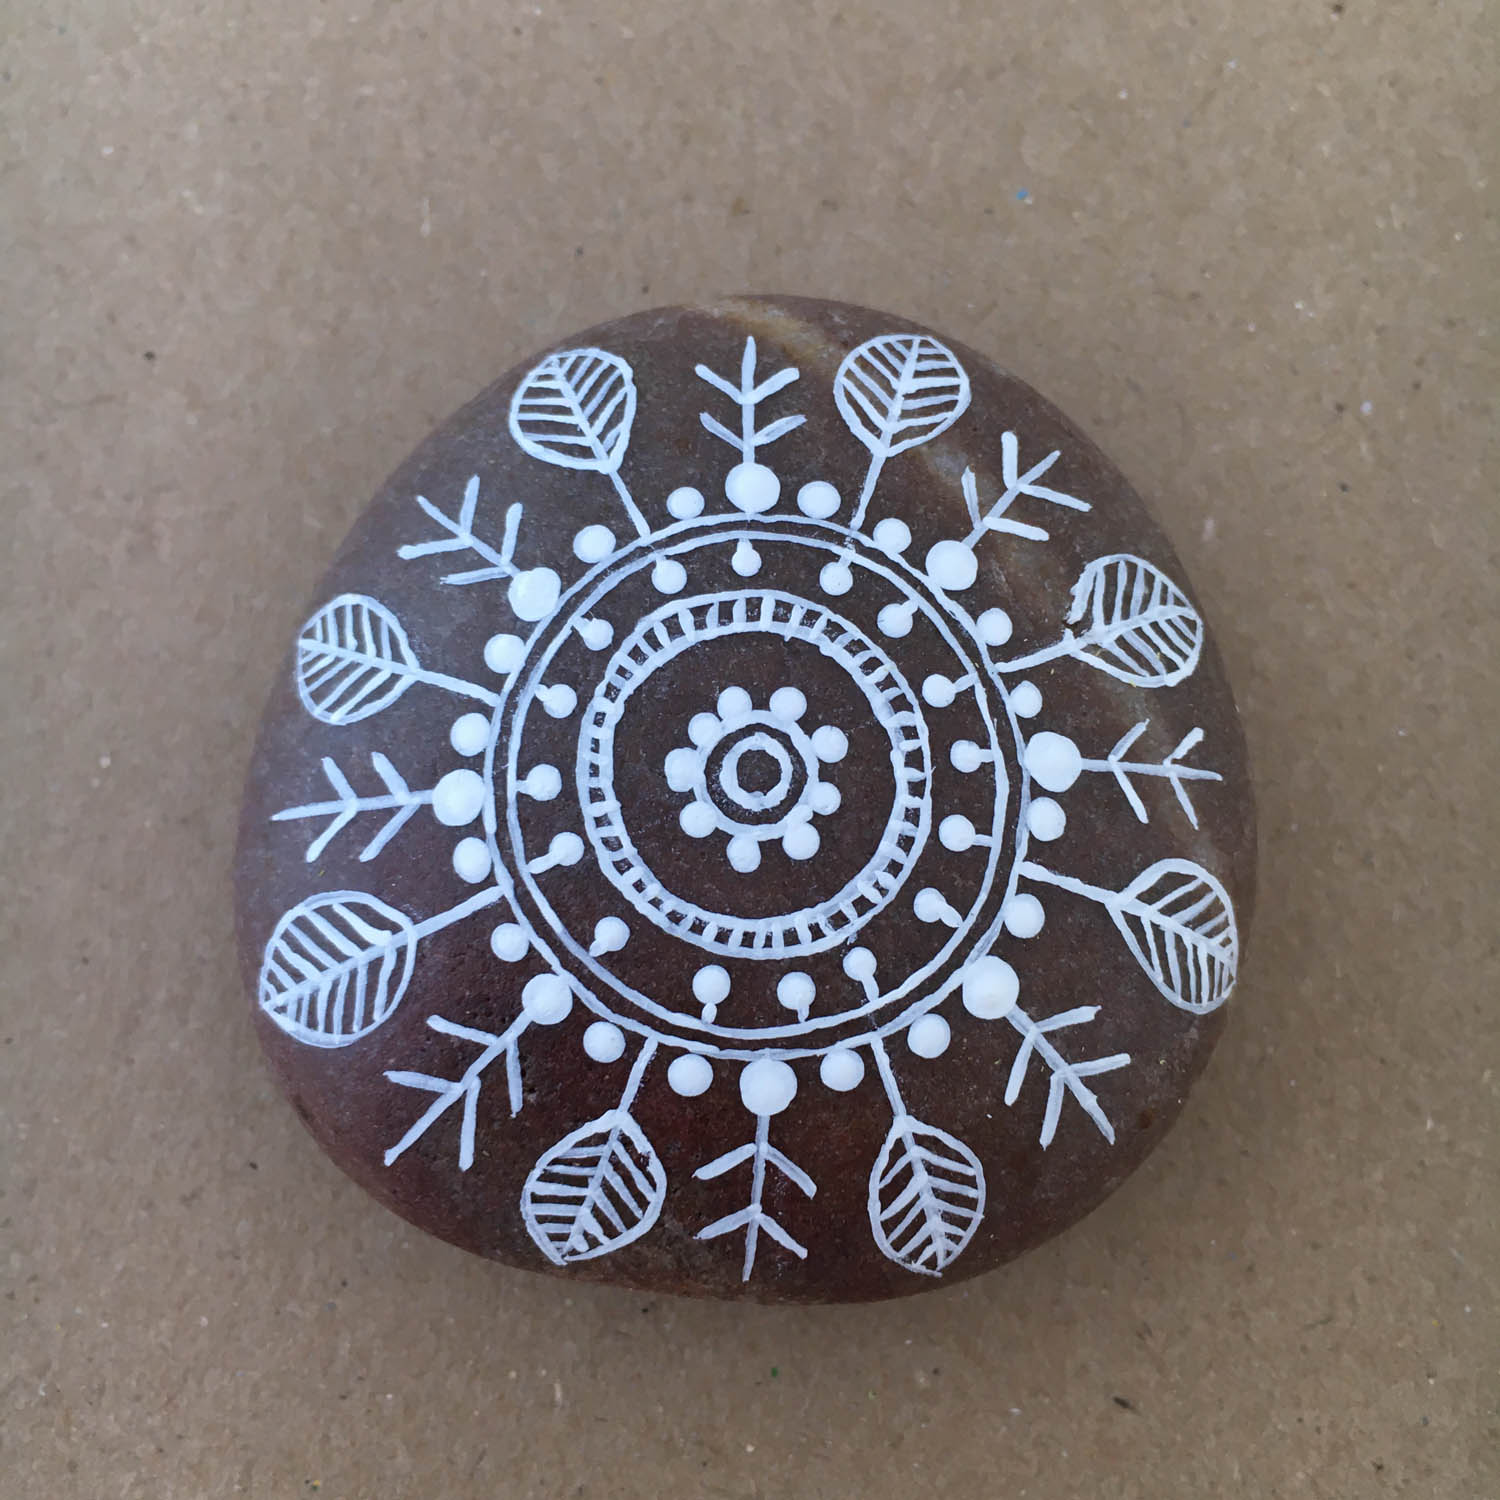
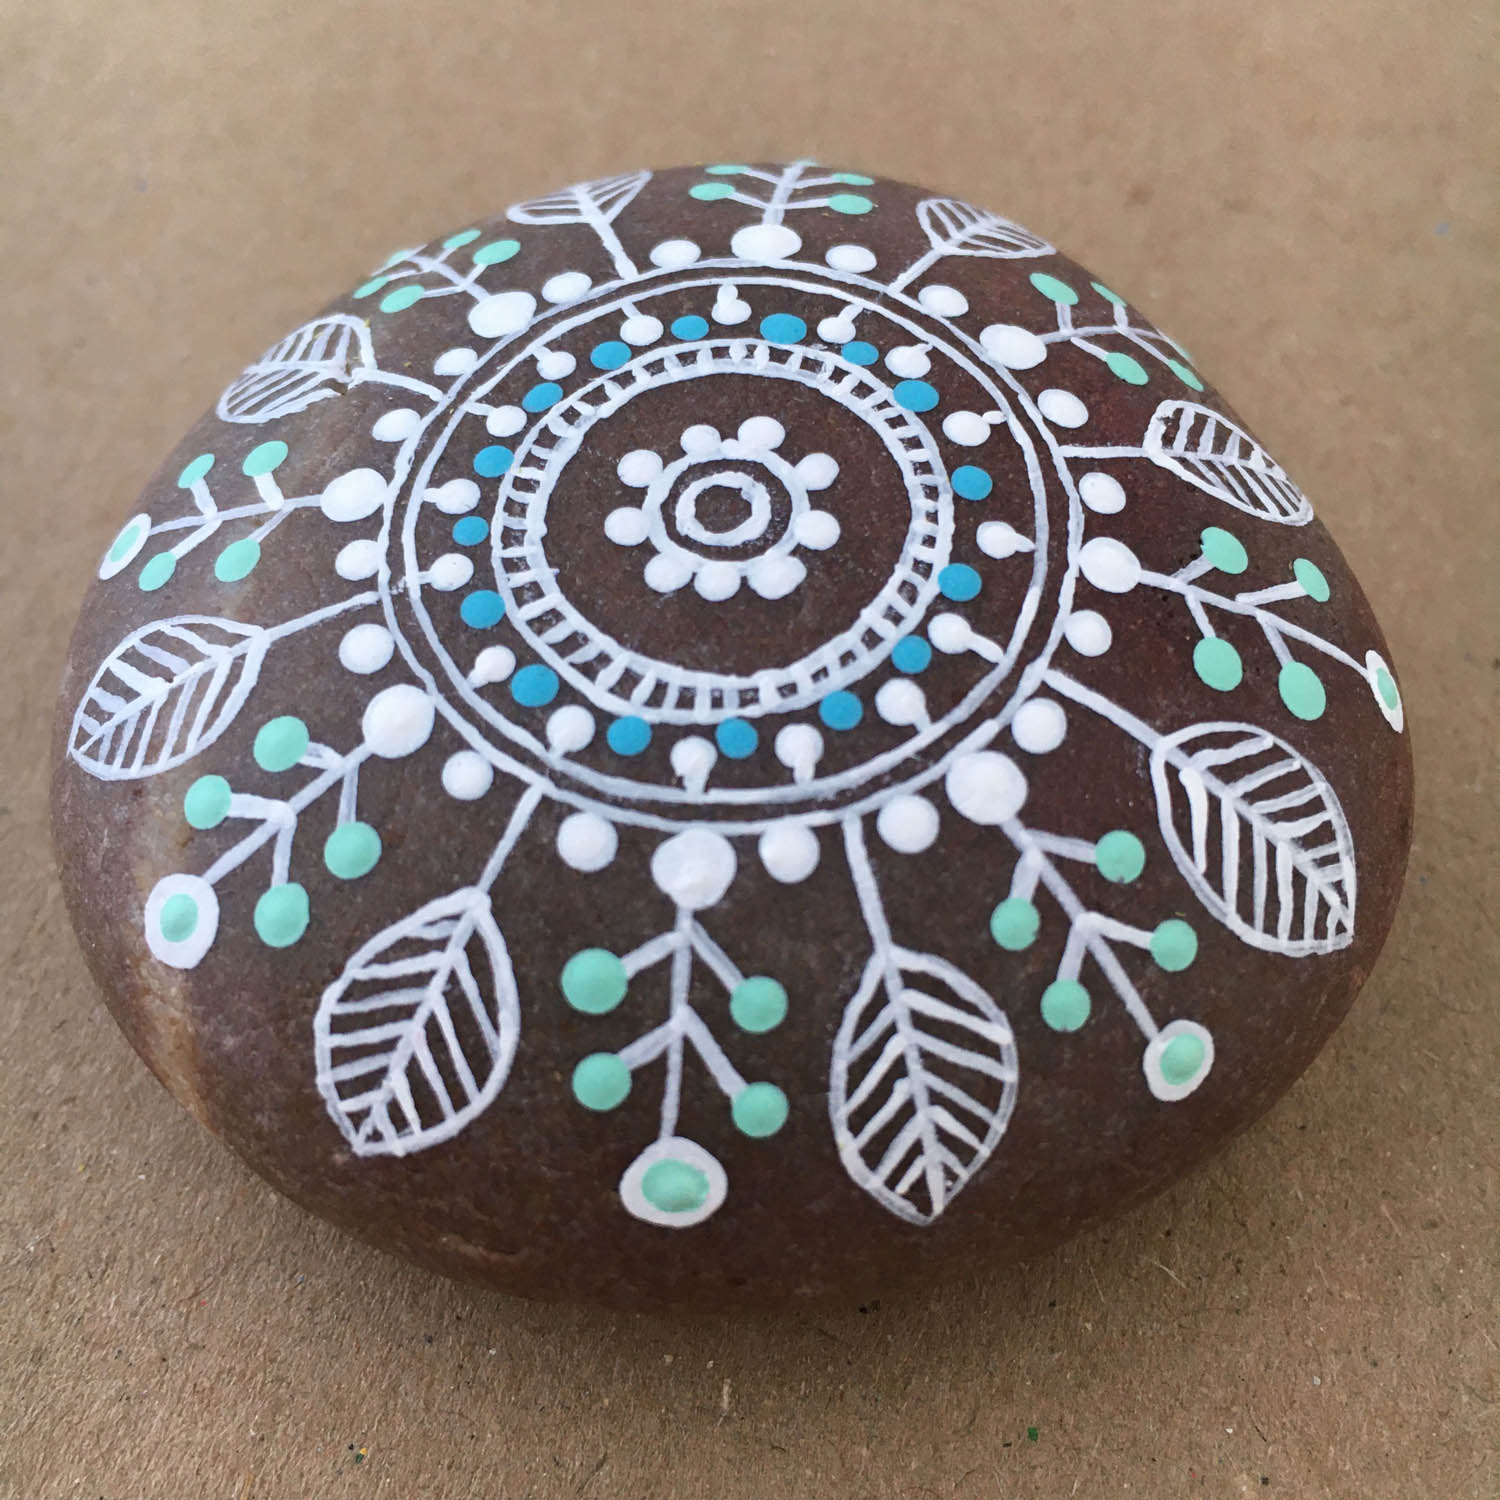
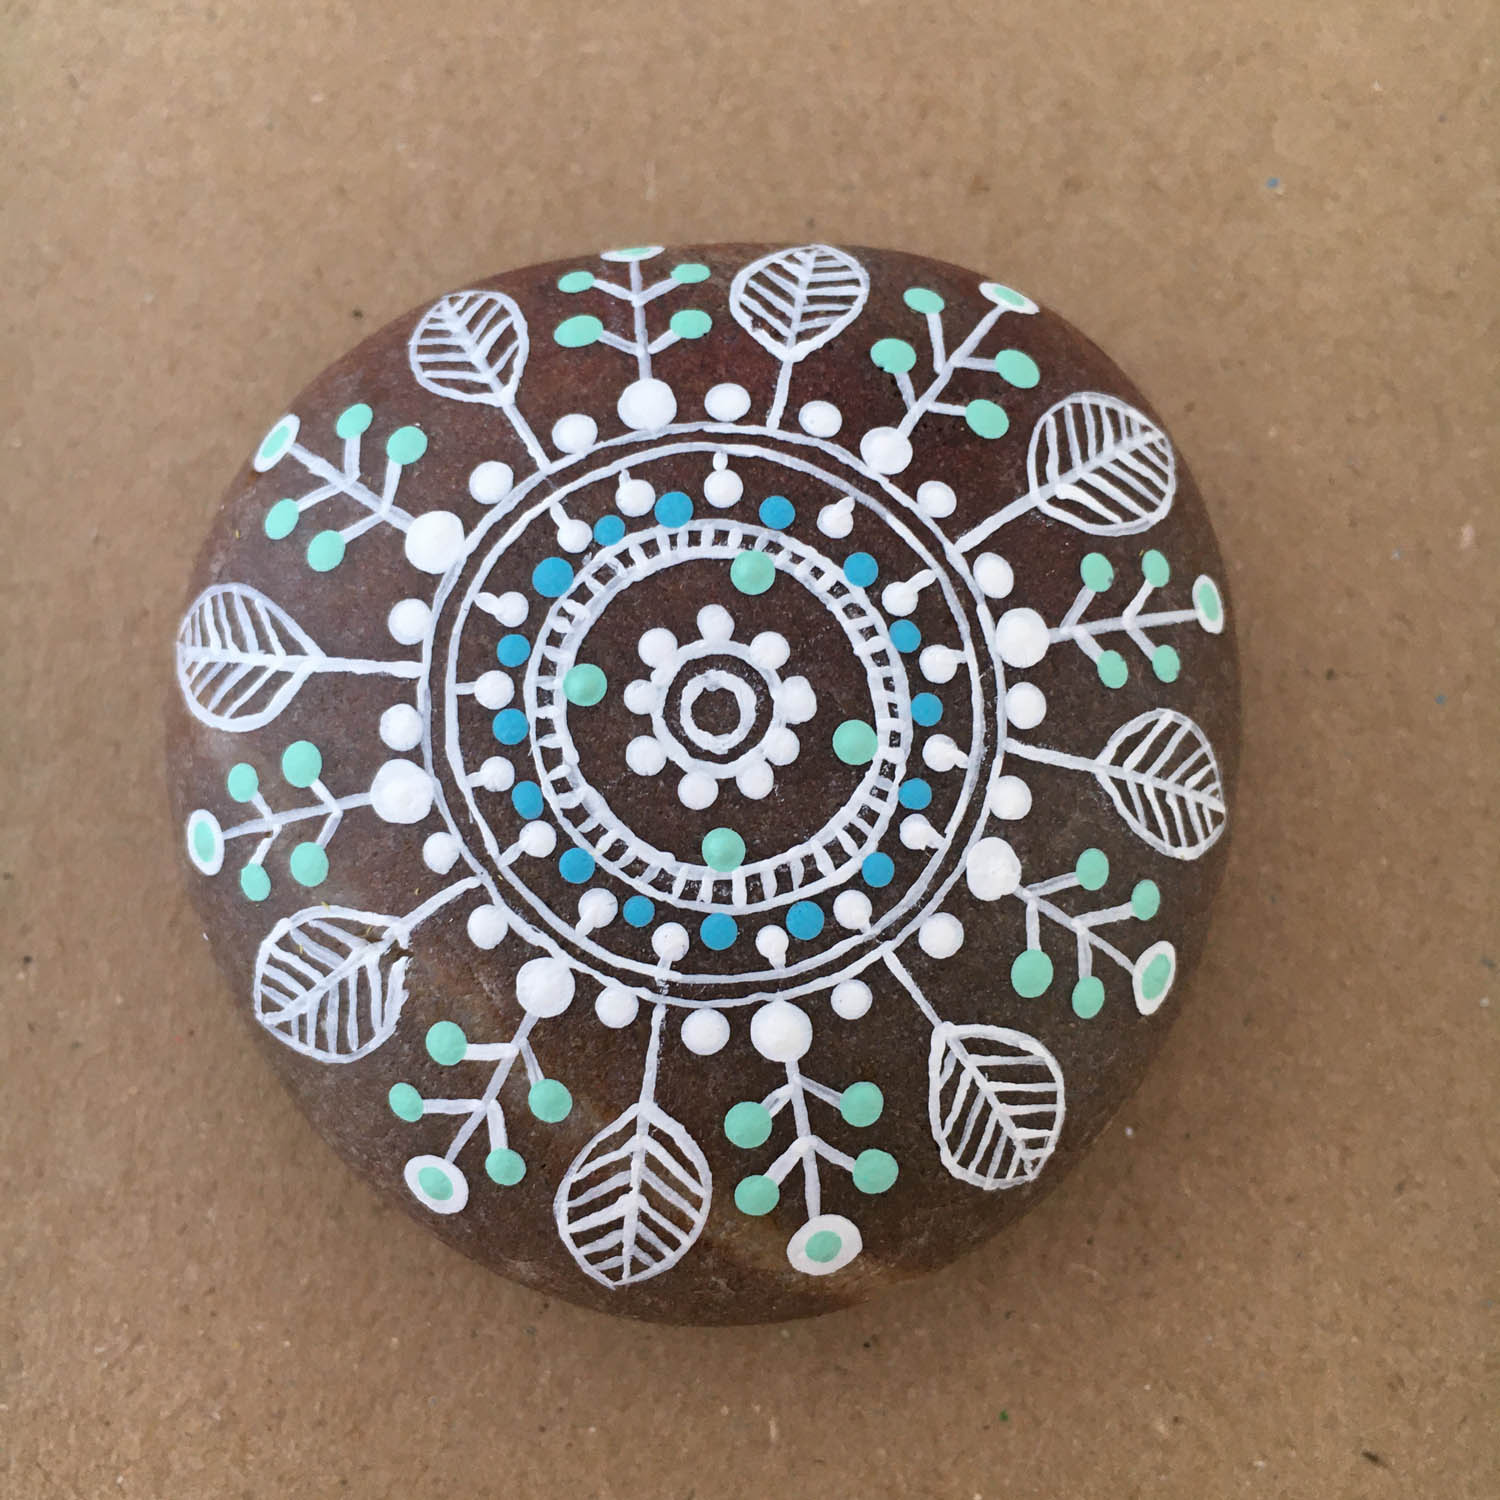
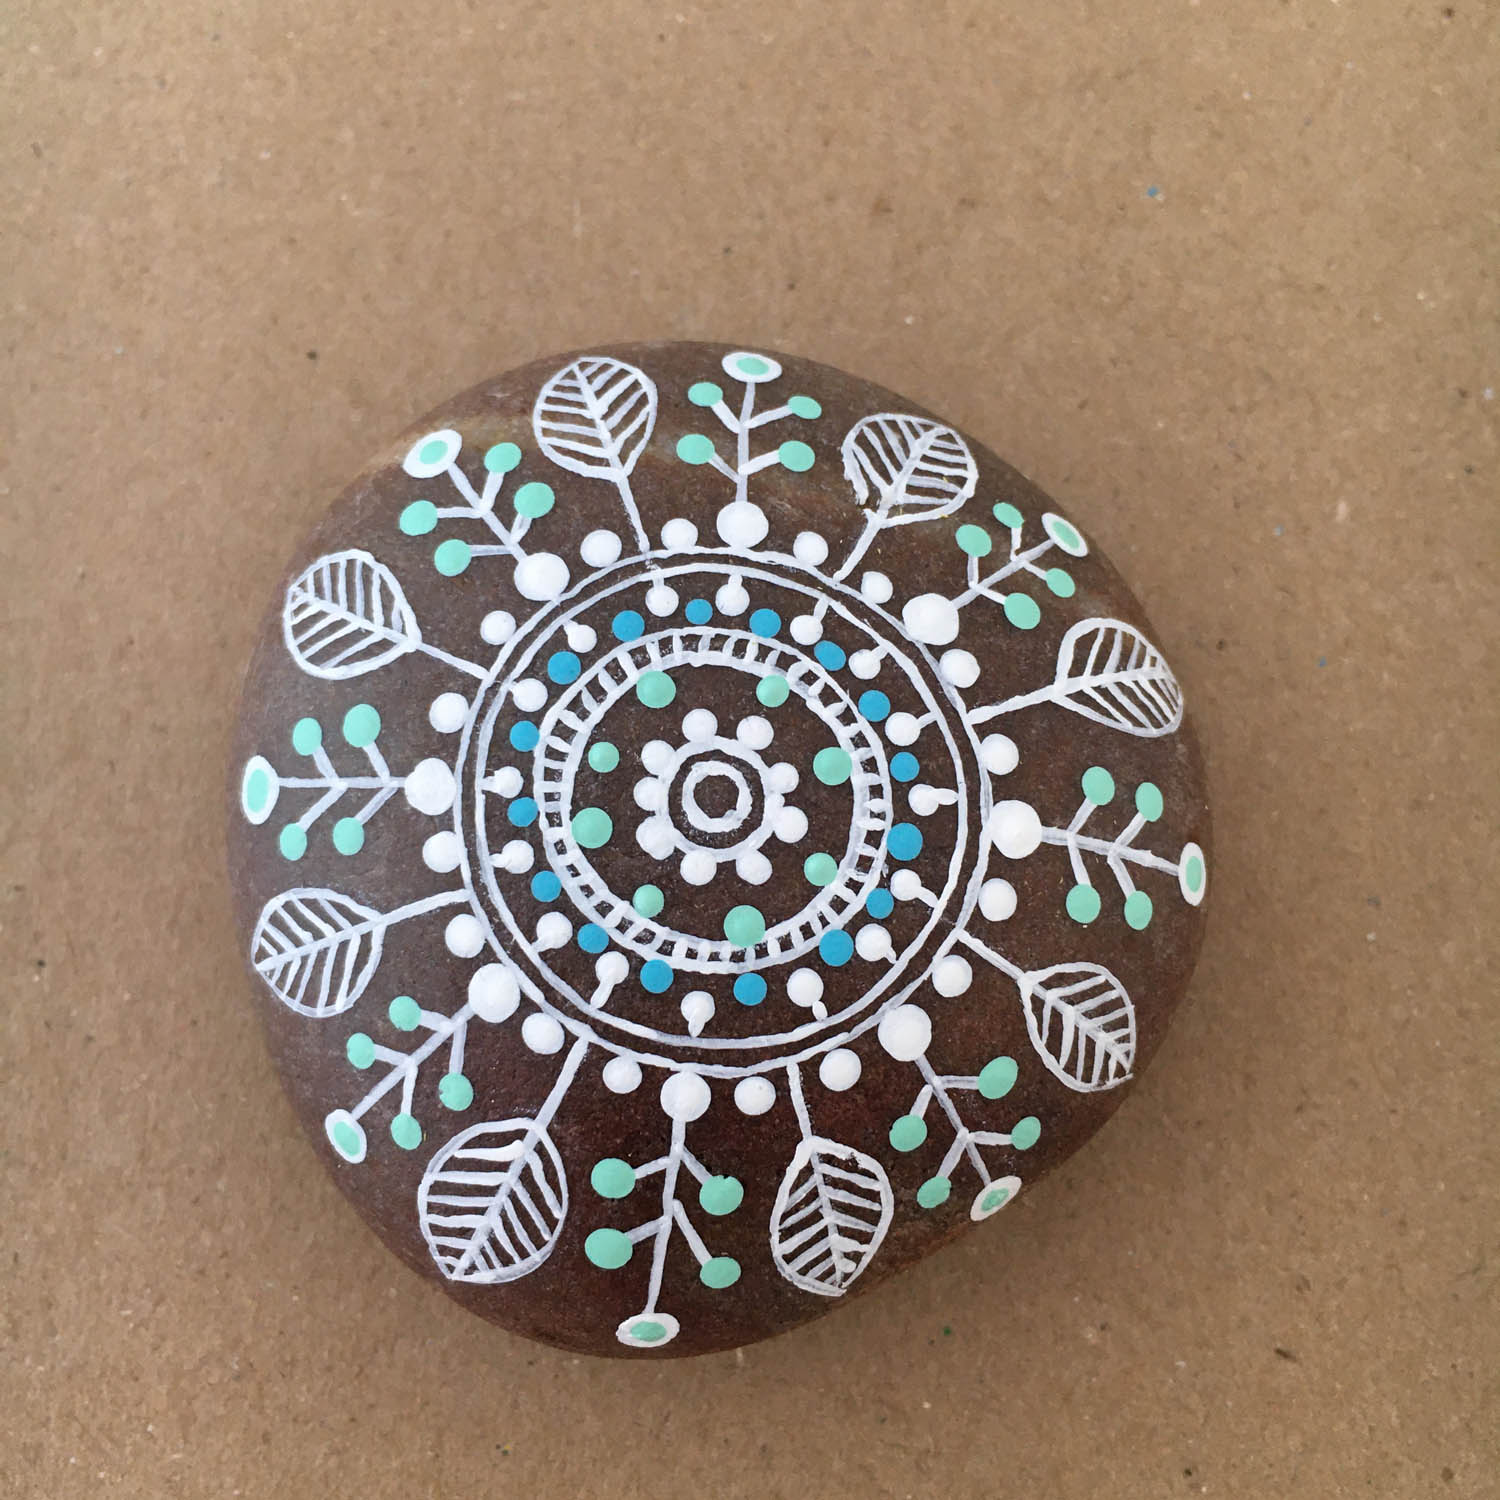
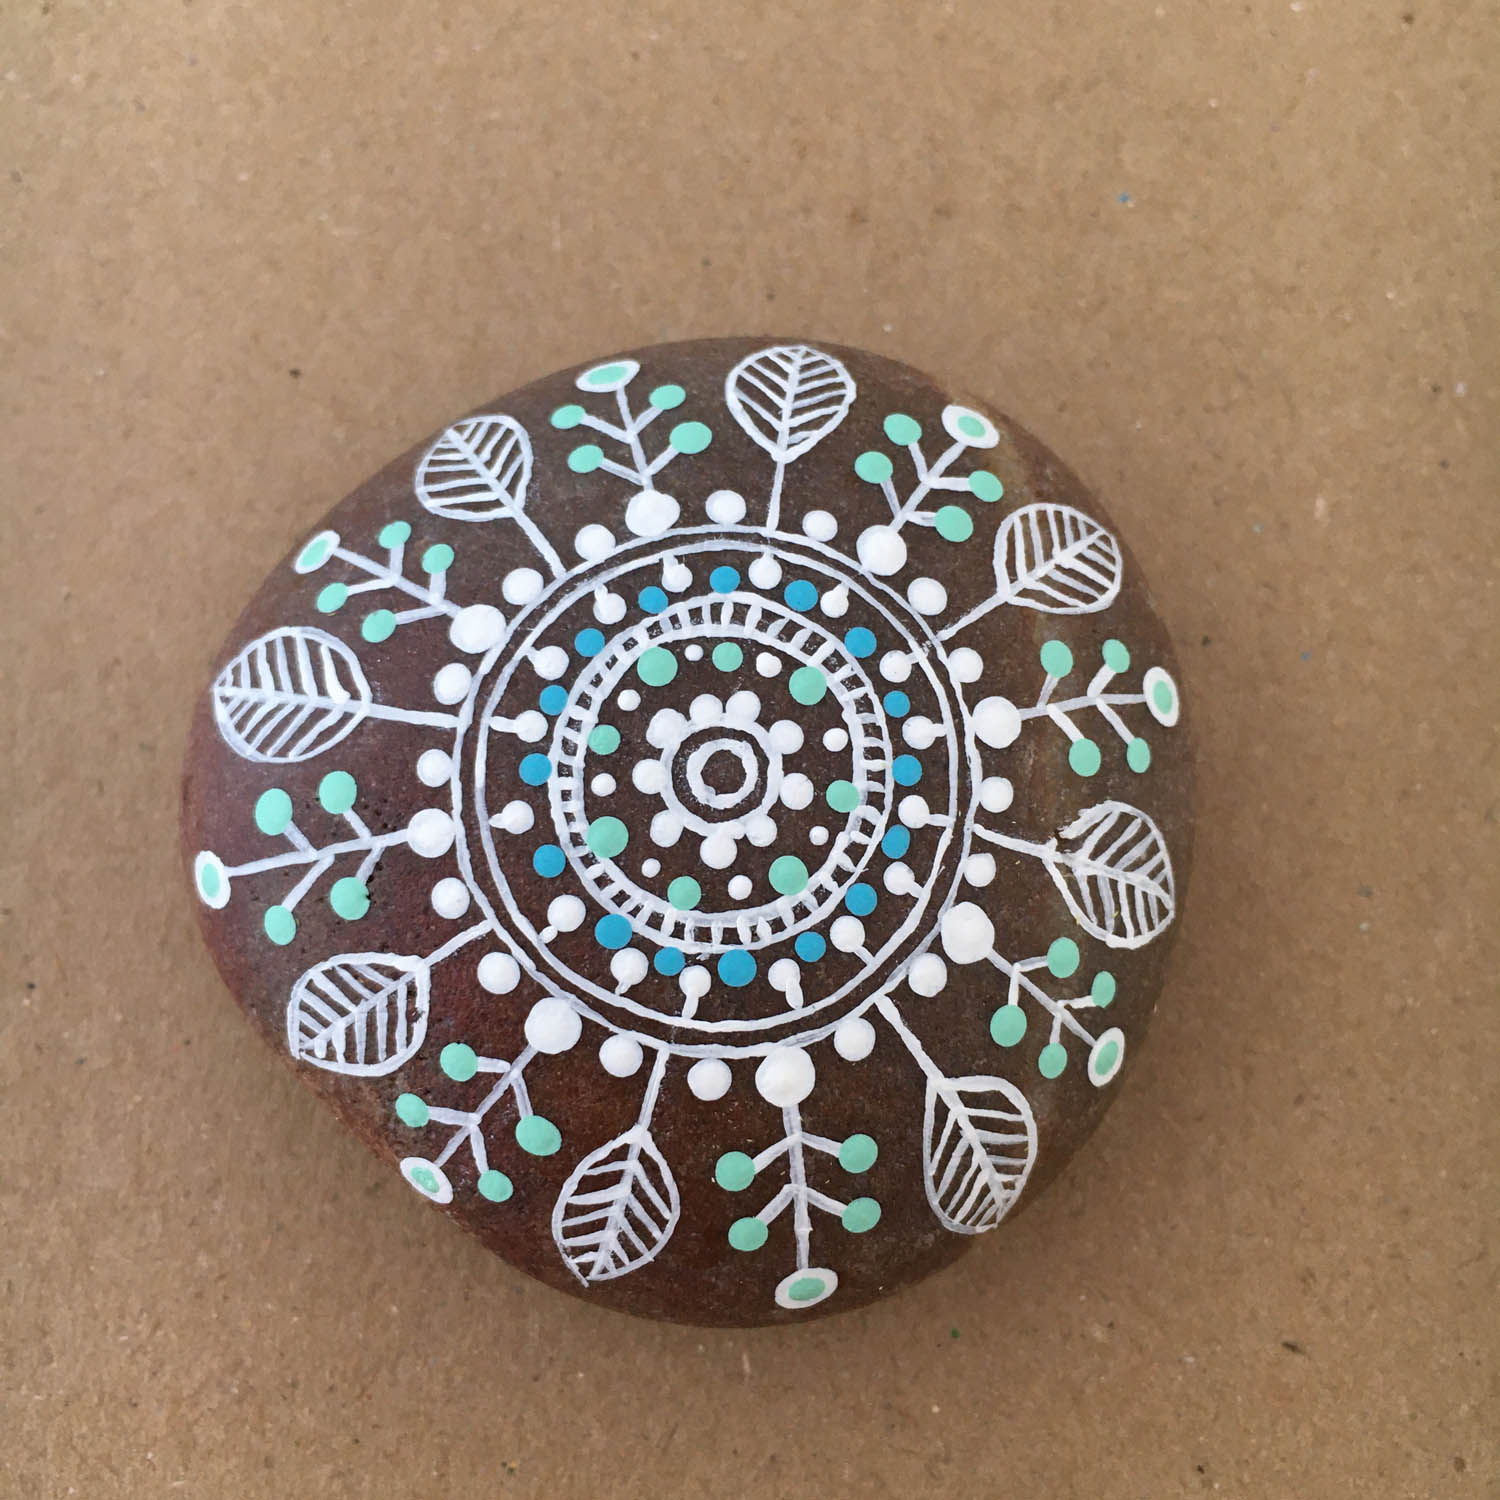
Complete mandala, top view. When you paint a mandala, you can use any combination of lines, double lines, leaves and dots and it will look great.


