

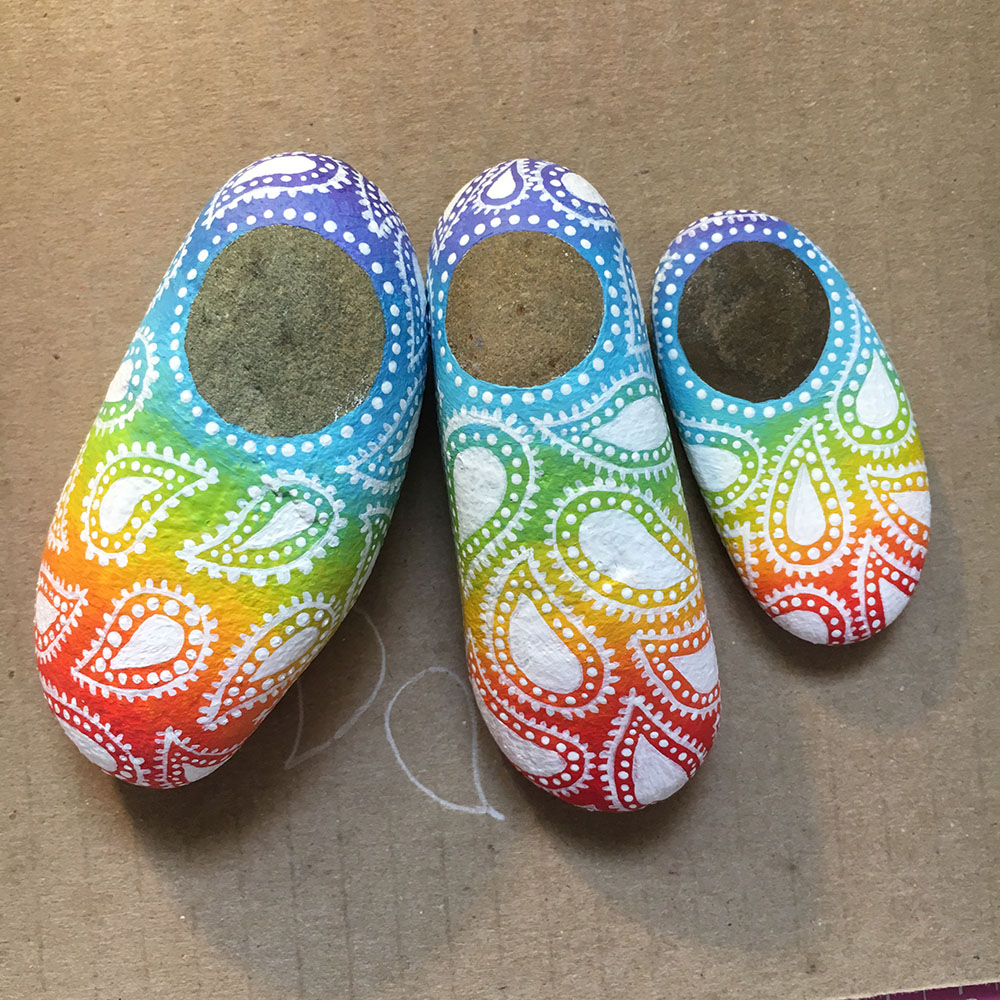
Step-by-step photos and instructions on how to paint a delicate, fine detailed Paisley design onto a Blended Rainbow coloured painted rock. (Hover over the pictures for instructions).
Stones
If you have some long, smooth, rounded rocks, you're pretty lucky and we'll show you how to paint a Rainbow Paisley Baby.
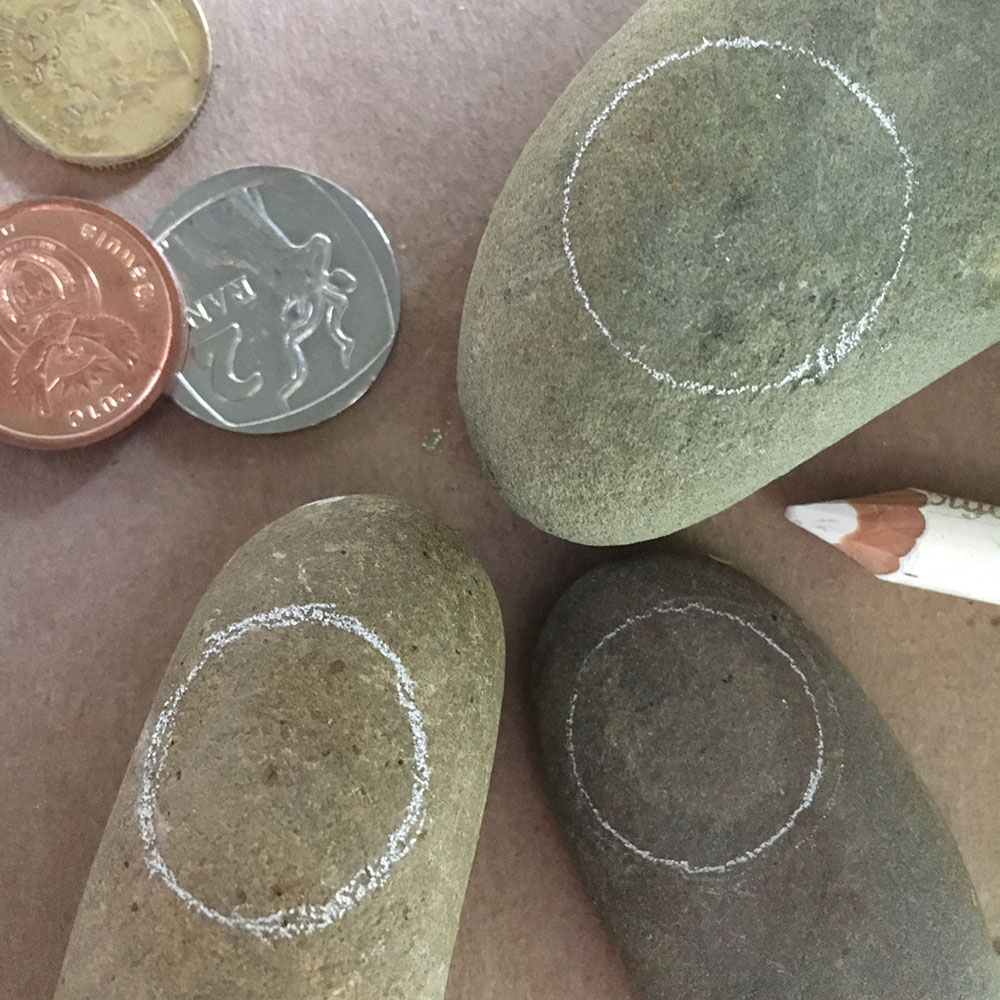
Step 1
Using a coin and a white pencil, mark the face area on the rock, where the head would bee, this area will be left the natural stone colour.
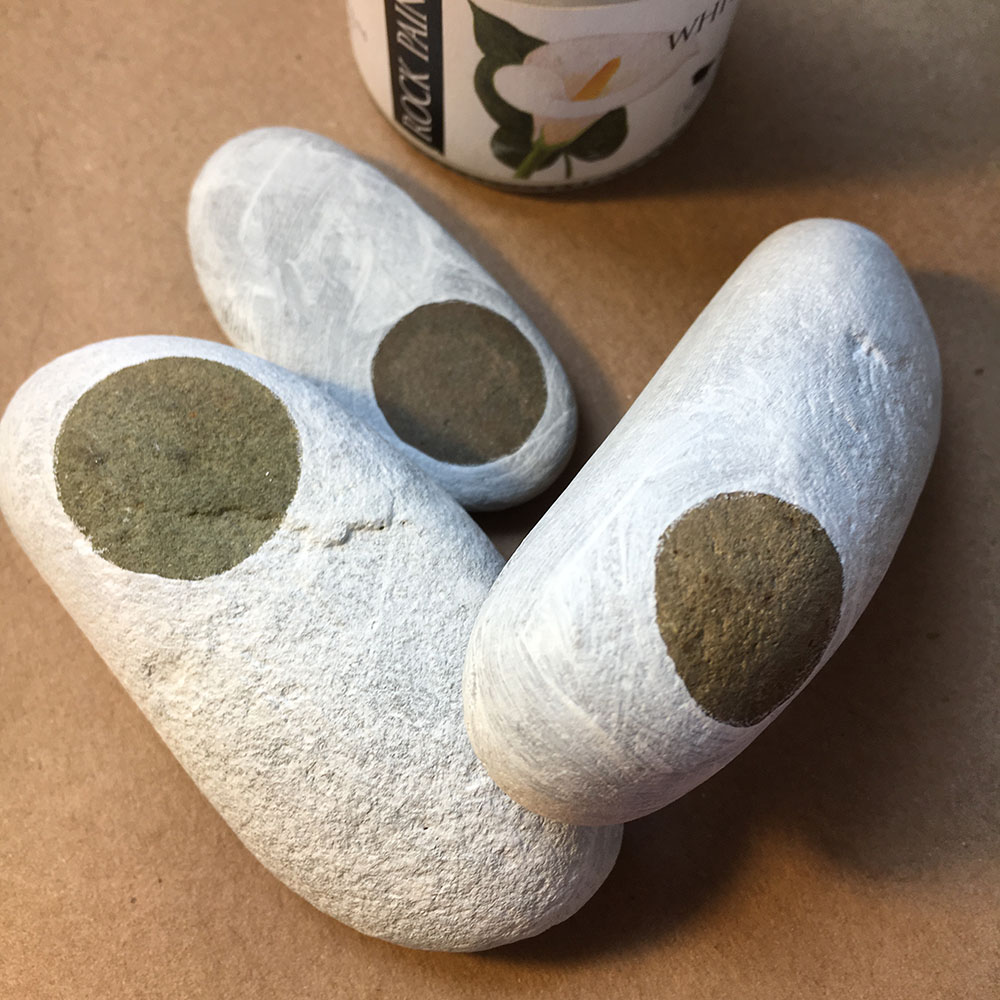
Step 2
Paint the whole rock, front and back, leaving only the circle unpainted.
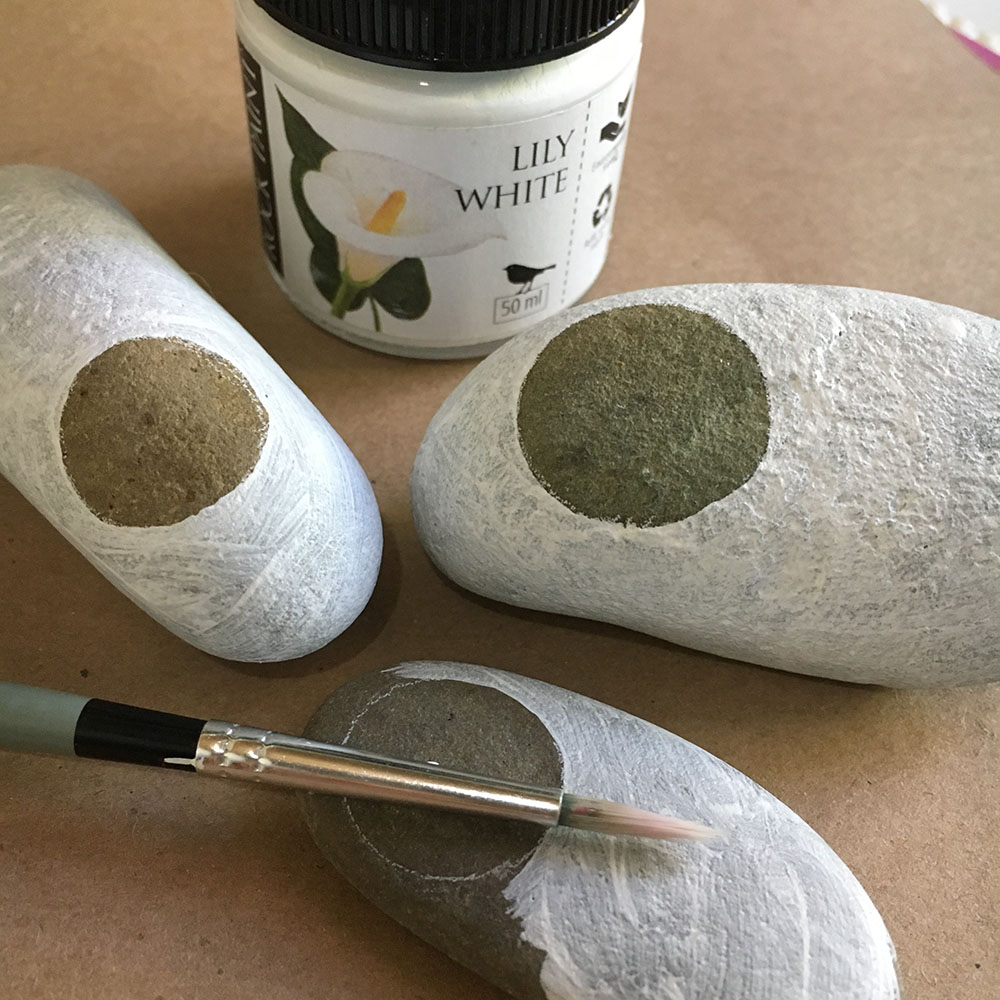
Step 3
Give the babies another coat of white paint so that your bright rainbow colours will show up well.
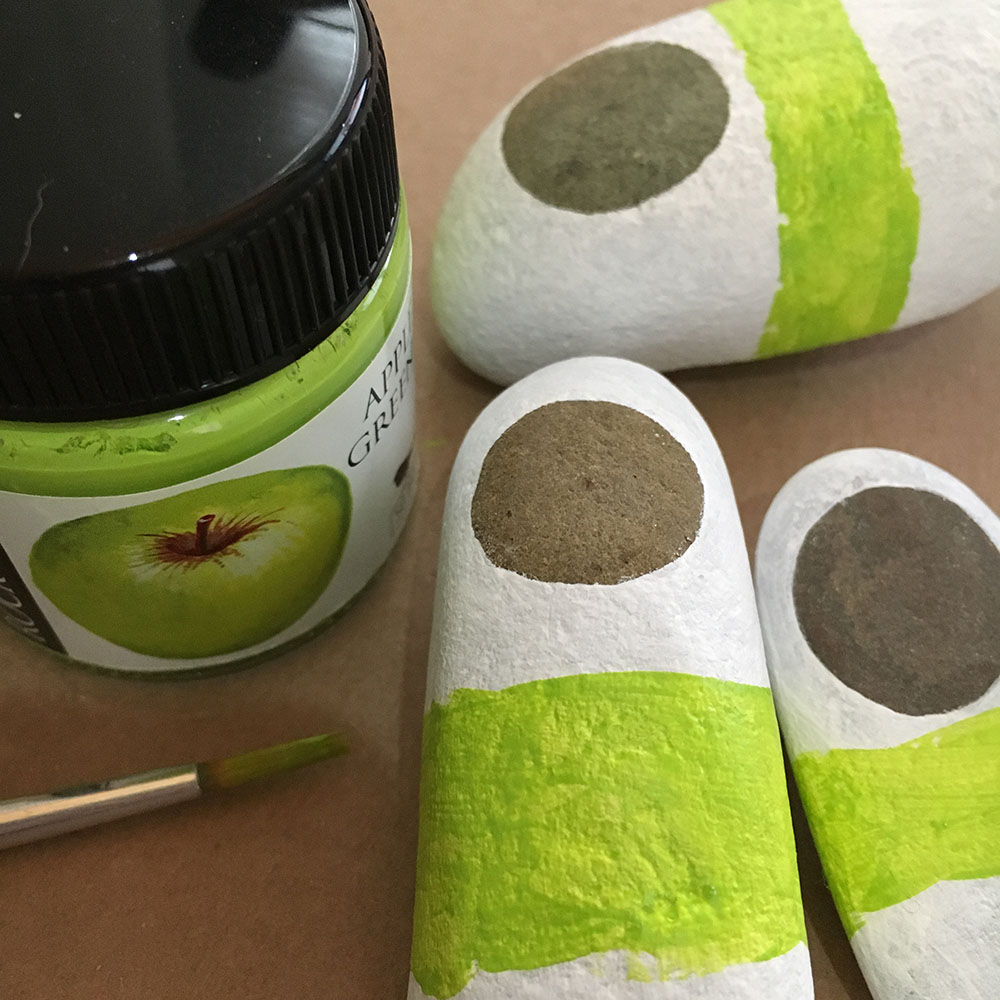
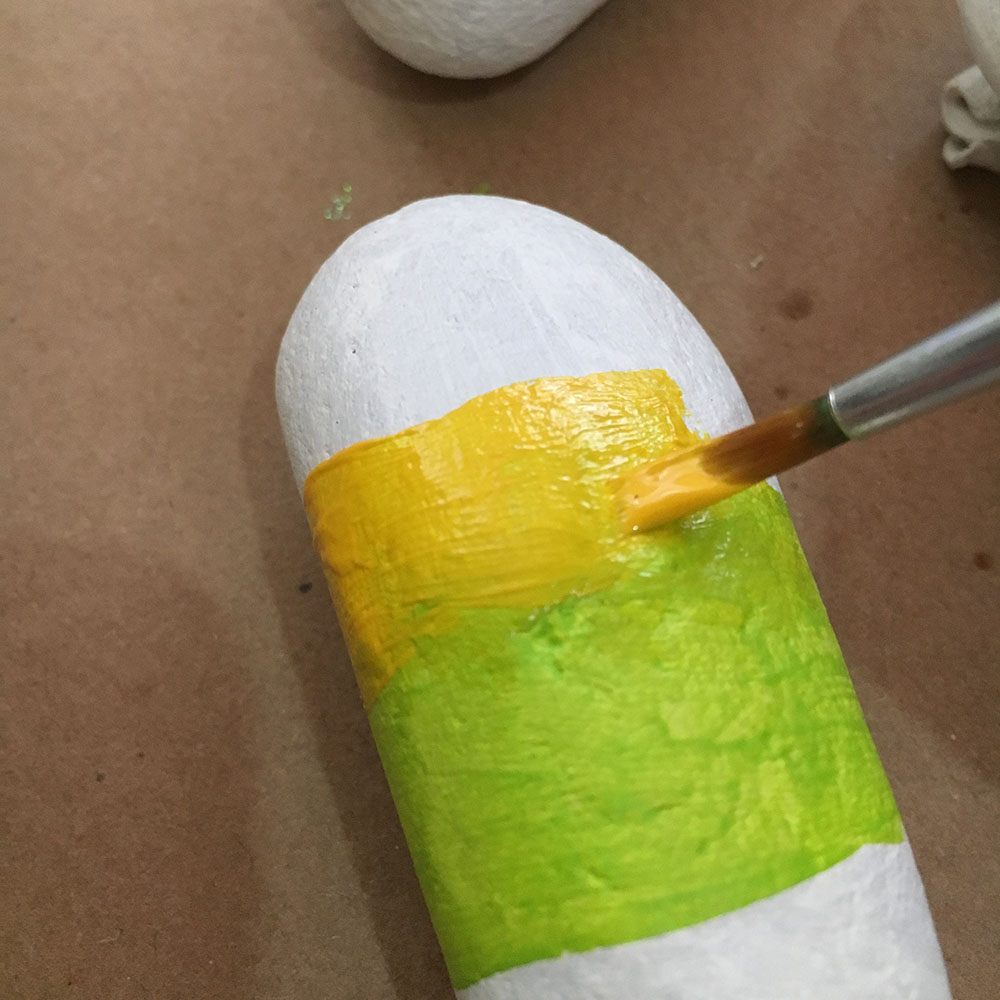
Step 4
Once the white paint is dry, use Apple Green to paint a band of colour right around the middle of the baby.
Step 5
The green paint does not have to be dry, it's better if it's still a bit wet, paint Canary Yellow below the green band, allowing it to meet up with the green area and blending the two colours with your brush.
Step 6
Keep the yellow band quite clean, only blend the area where the two colours meet.
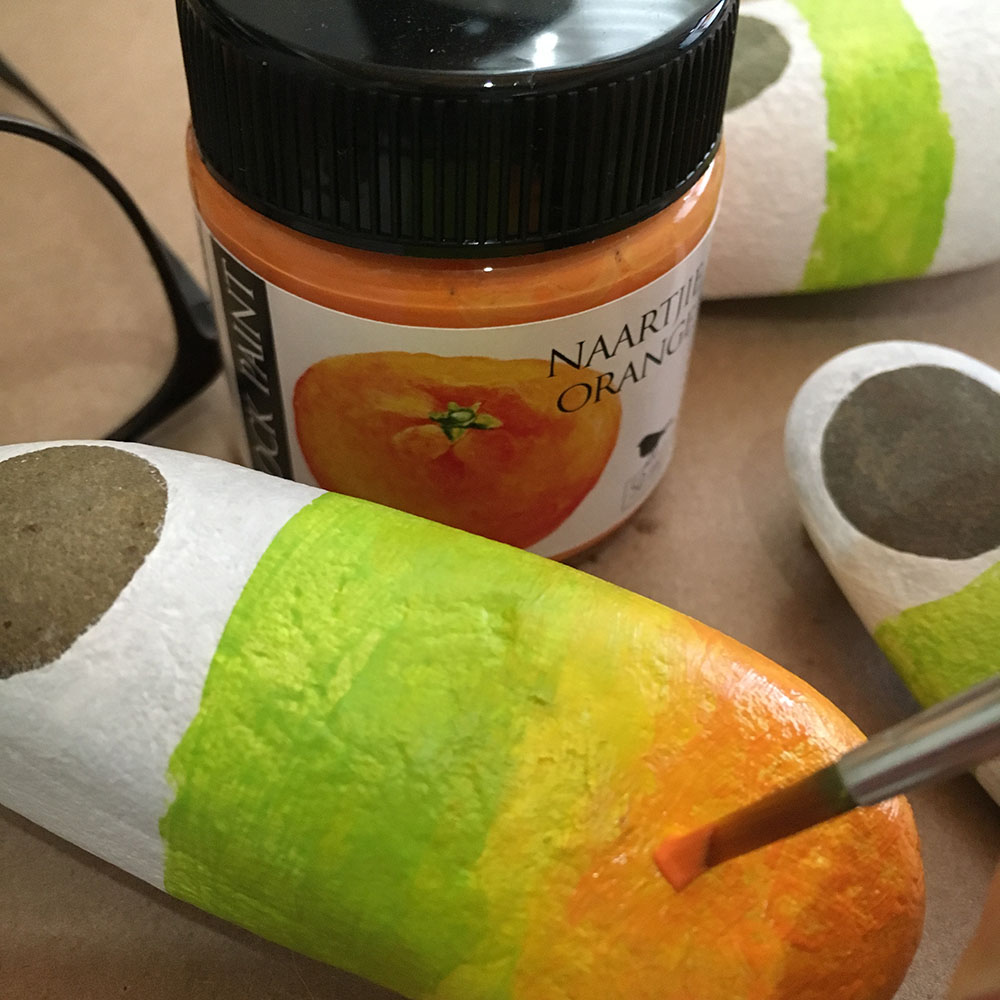
Step 7
Use Naartjie Orange next and paint a band of colour right to the base of the rock, keep the orange colour quite clean and only blend the orange with the yellow where they meet.
Step 8
Allow the paint to dry. Lastly, for the bottom area of the rock, paint Nasturtium Orange over the end, fading it off half way through the lighter orange area, use your brush to create the fade
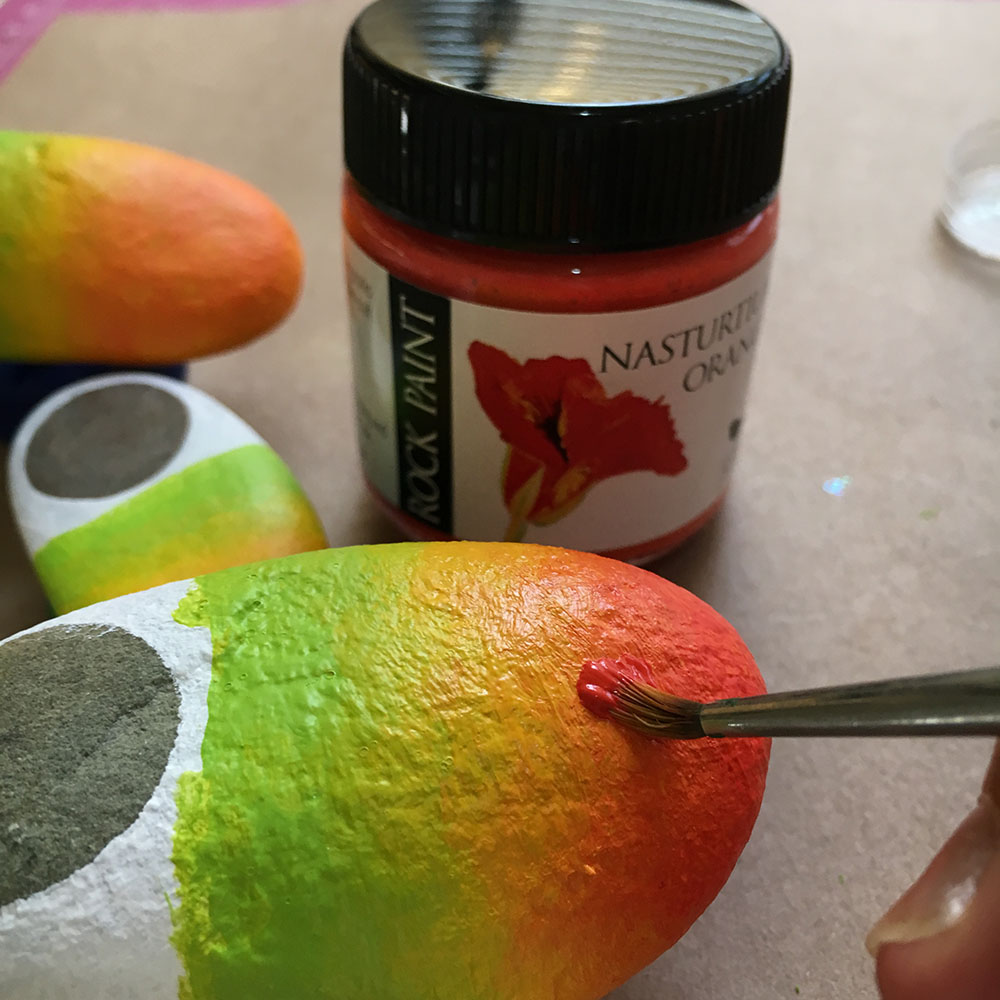
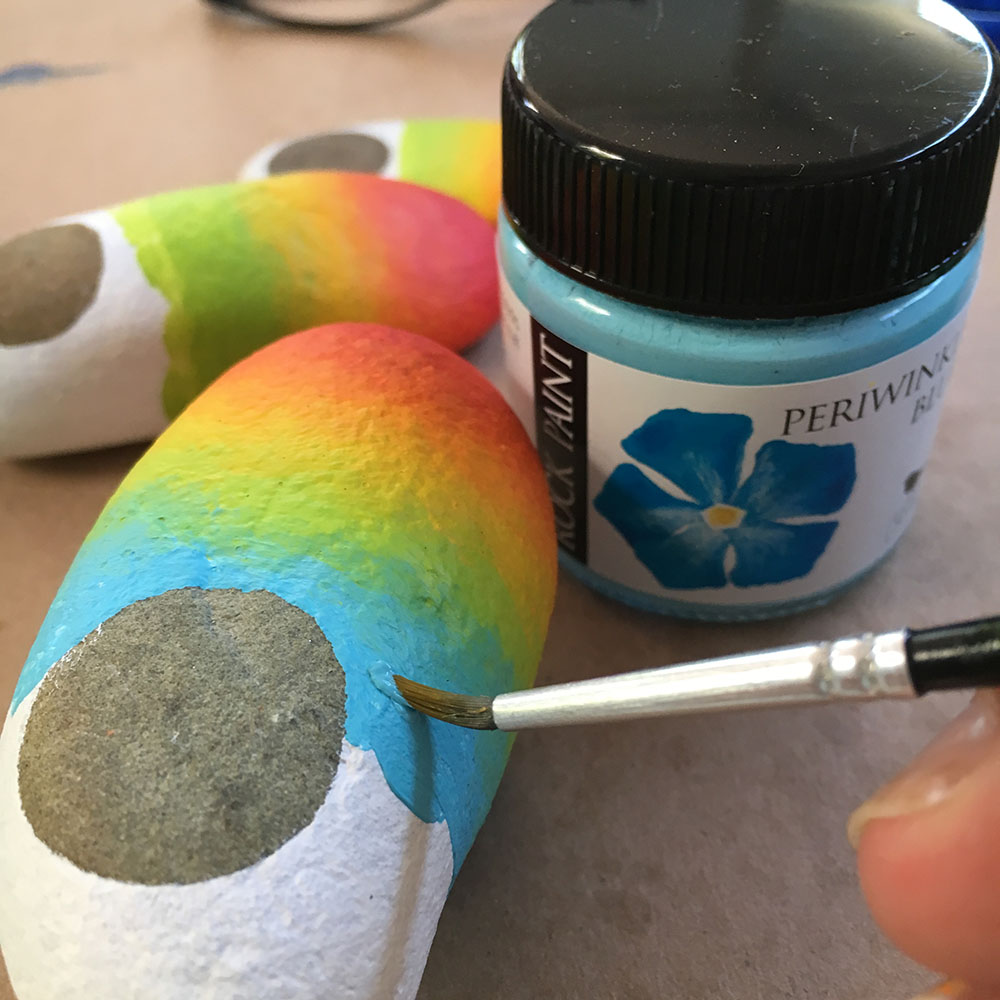
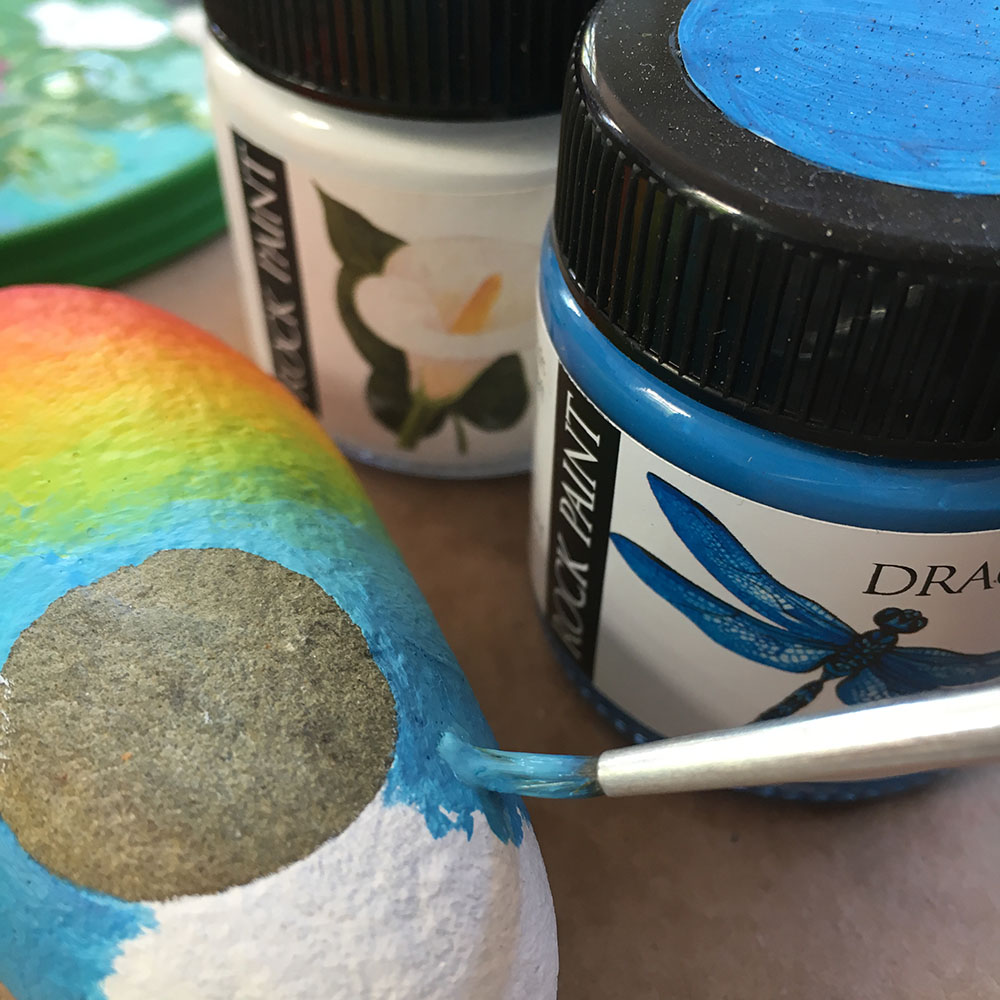
Step 9
10: Once all your paint is dry, start with the other side of the green band and paint a Periwinkle Blue band of colour, blending the area where it touches the green band.
Step 10
The Periwinkle Blue band can come halfway up the face
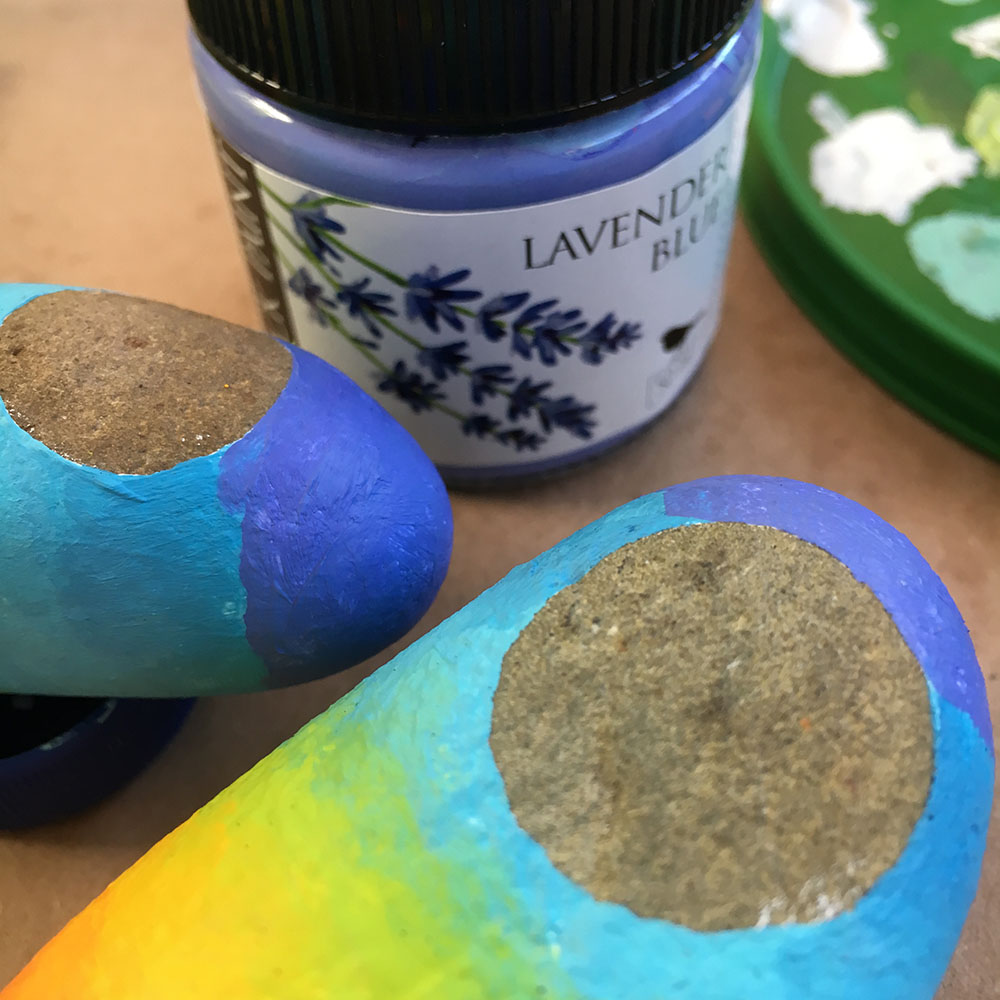
Step 11
Use Lavender Blue over the rest of the head, taking care to blend the area where it touches the Periwinkle Blue.
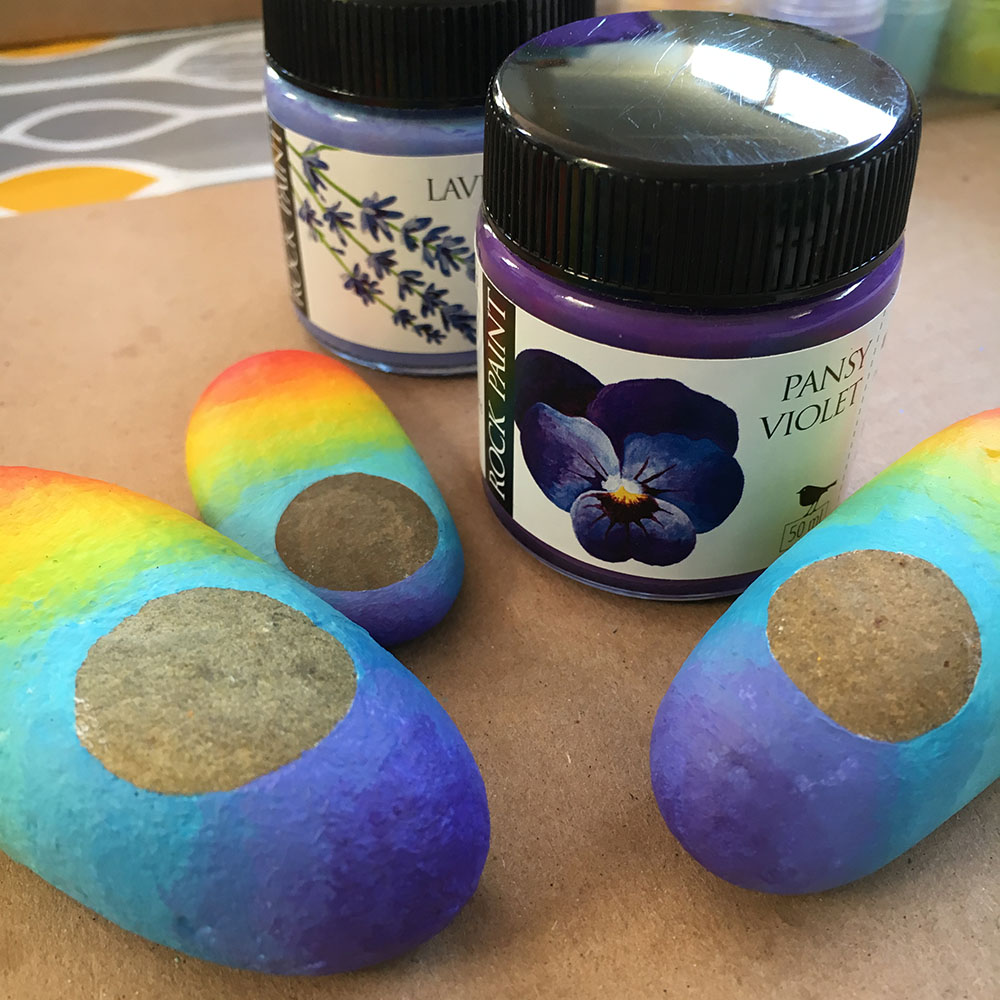
Step 12
Allow all the paint to dry then use Pansy Violet on the very end of the head area of the rock, paint it to fade off half way through the Lavender Blue colour.
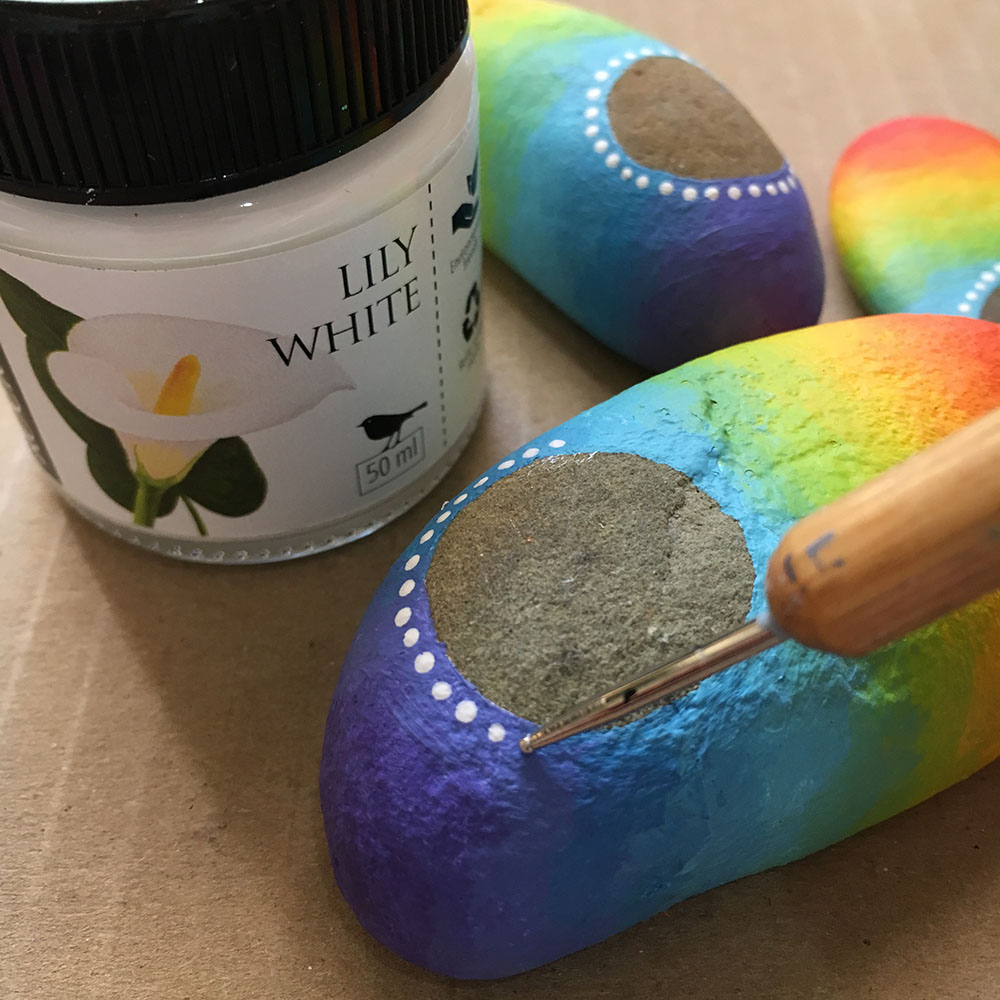
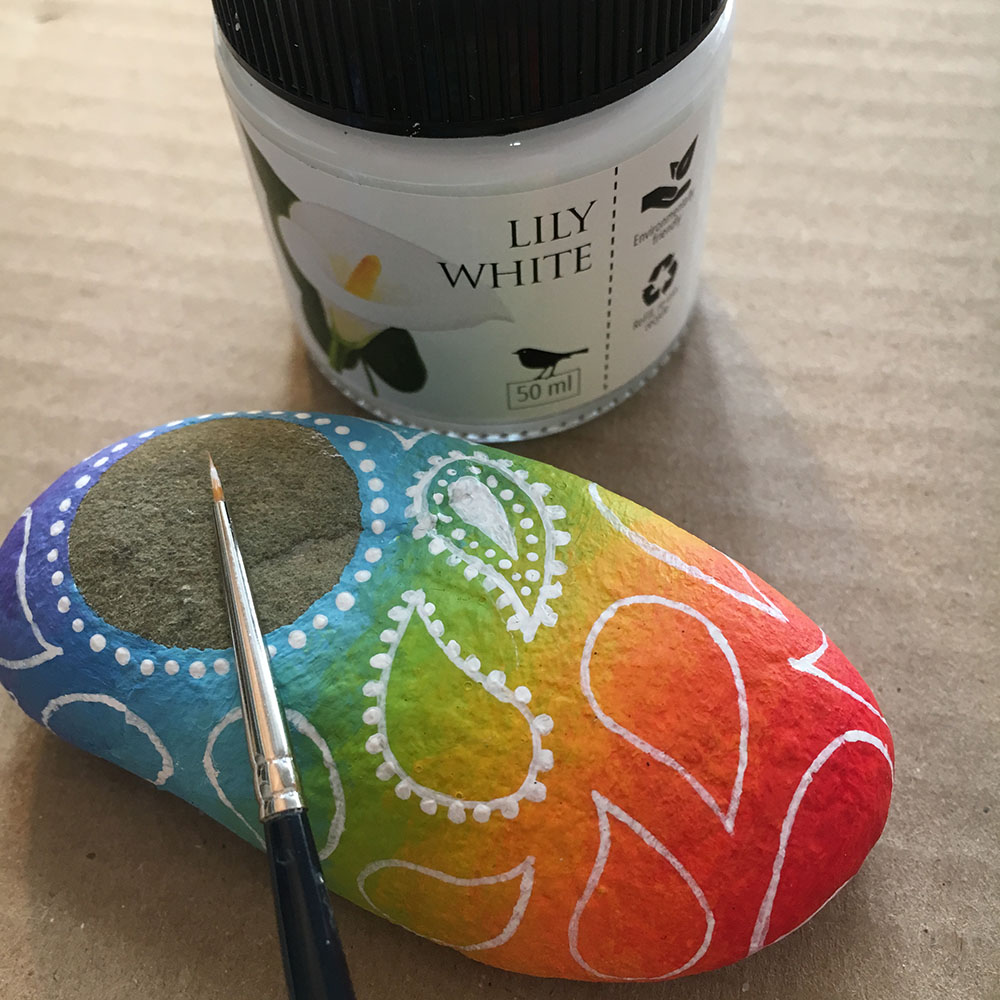
Step 13
Once all the paint is dry front and back of the pebble, you can start with white fine detail work. Using a dotting tool with a small metal ball, dip into white paint and carefully dot Lily White paint all around the face area.
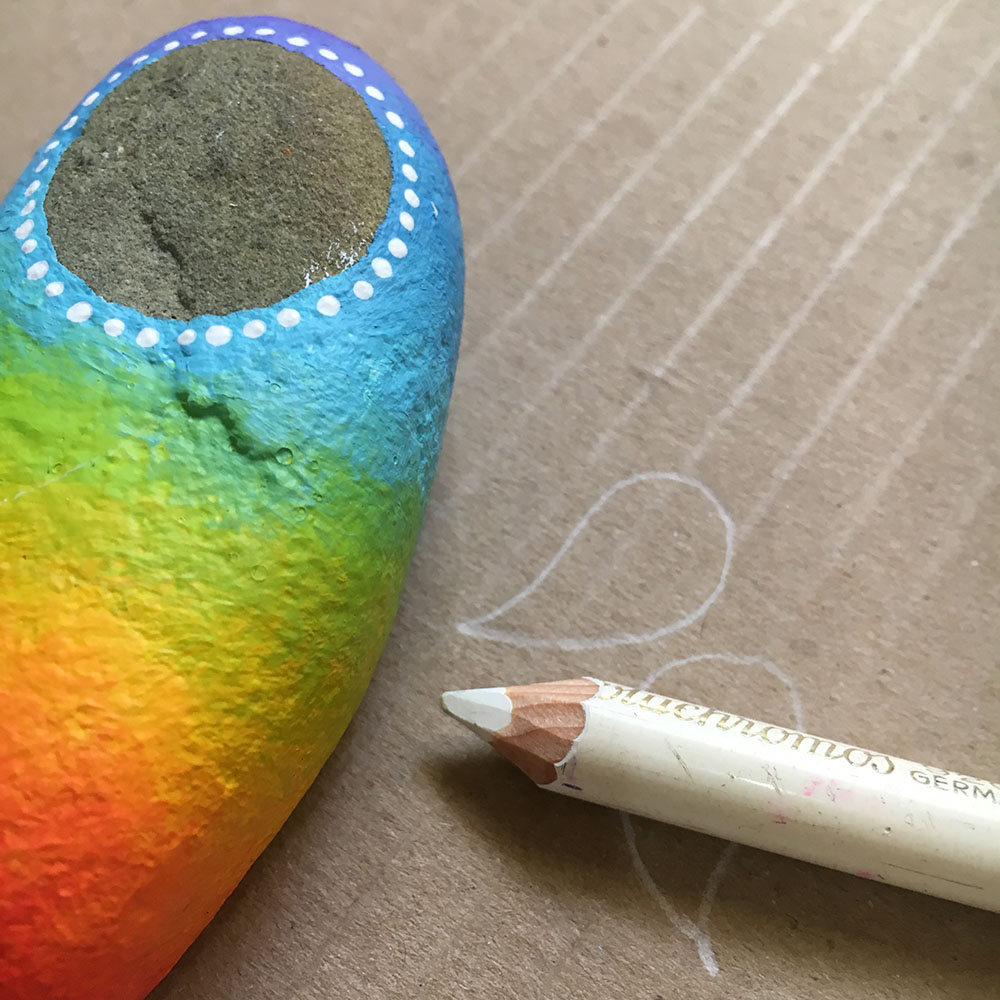
Step 14
When dots are dry, use a white pencil to mark a paisley shape on the rainbow baby. First practive on a piece of paper, it's a teardrop shape.
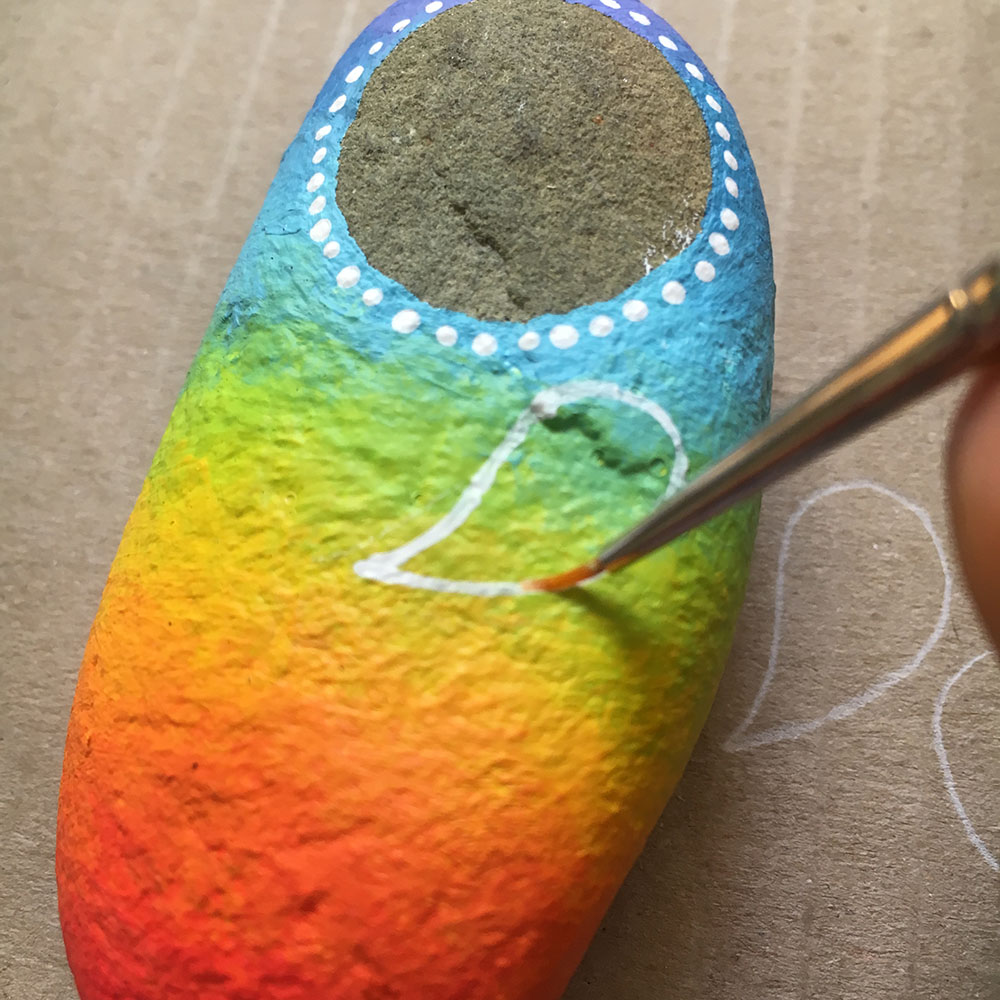
Step 15
Using a fine paint brush (4/0), carefully paint the teardrop shapr. Only dip your paint bristled half way into the paint and hold the brush at a 45º angle, drawing the brush slowly away from you to create a fine, steady line. Practice on paper first if you're not sure.
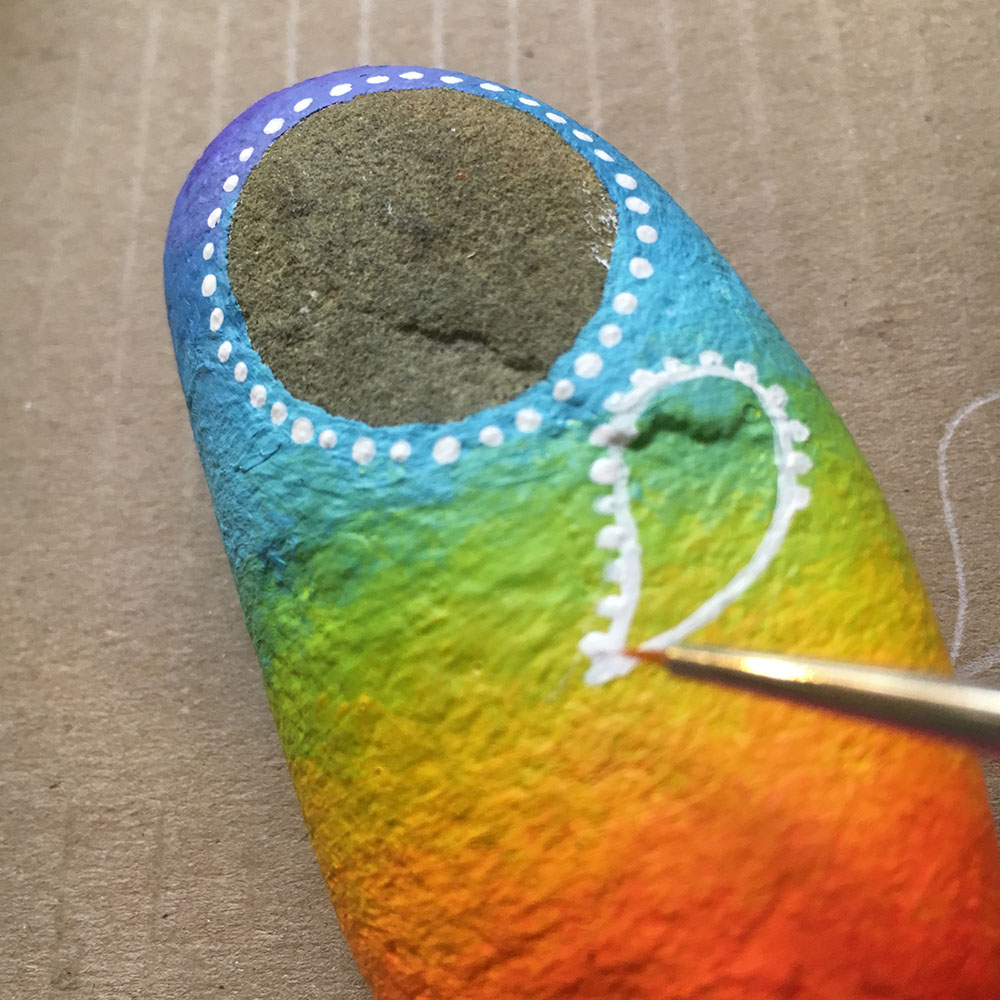
Step 16
Once the teardrop shape is finished and dry enough, add little lines all the wat around the teardrop shape. You could use the dotting tool and add dots instead.
Step 17
With the finest ball of your dotting tool, add a line of little white dots inside your teardrop line. Allow to dry.
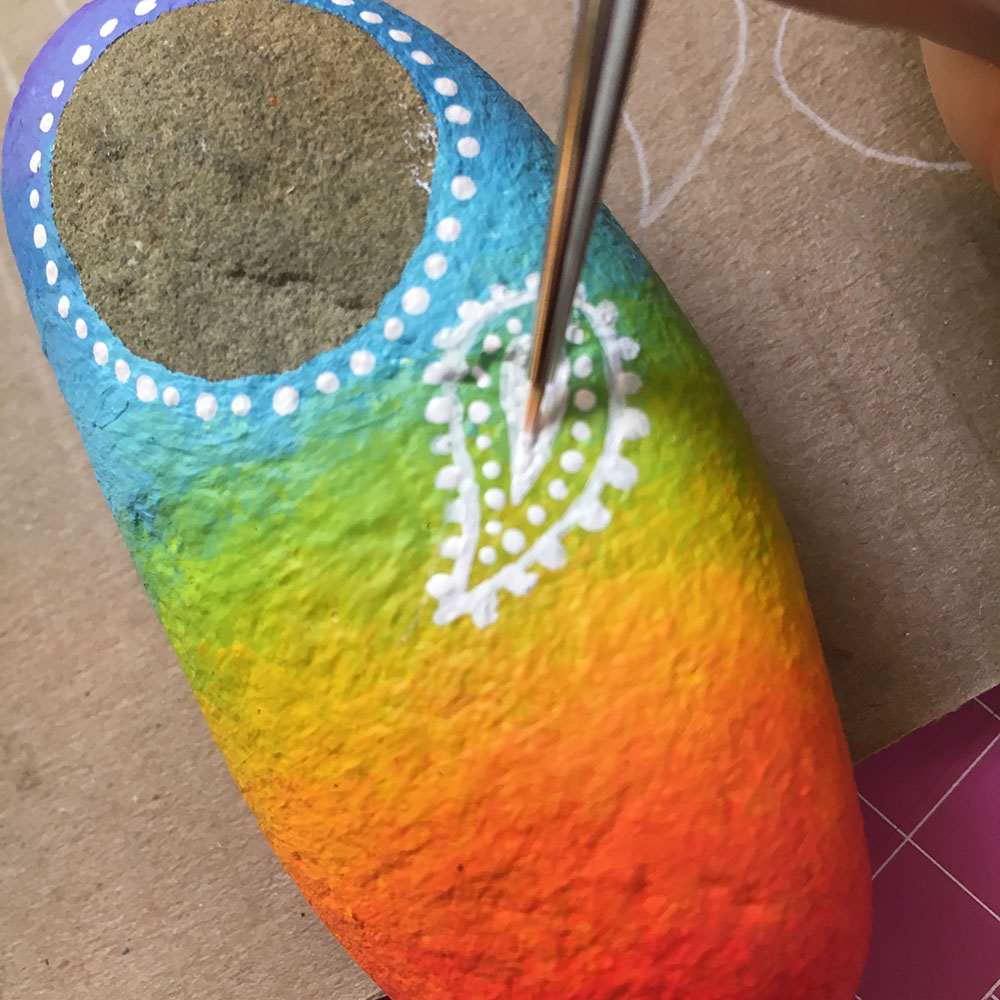
Step 18
It's really easy to smudge your work so make sure you allow time between each stage for your paint to dry sufficiently. Add a small solid teardrop shape inside your line of dots.
Step 19
Continue to mark out and paint teardrop shapes all over the rainbow baby, keeping them with enough space between them, not too close and not too spaced out. More importantly not too close together.
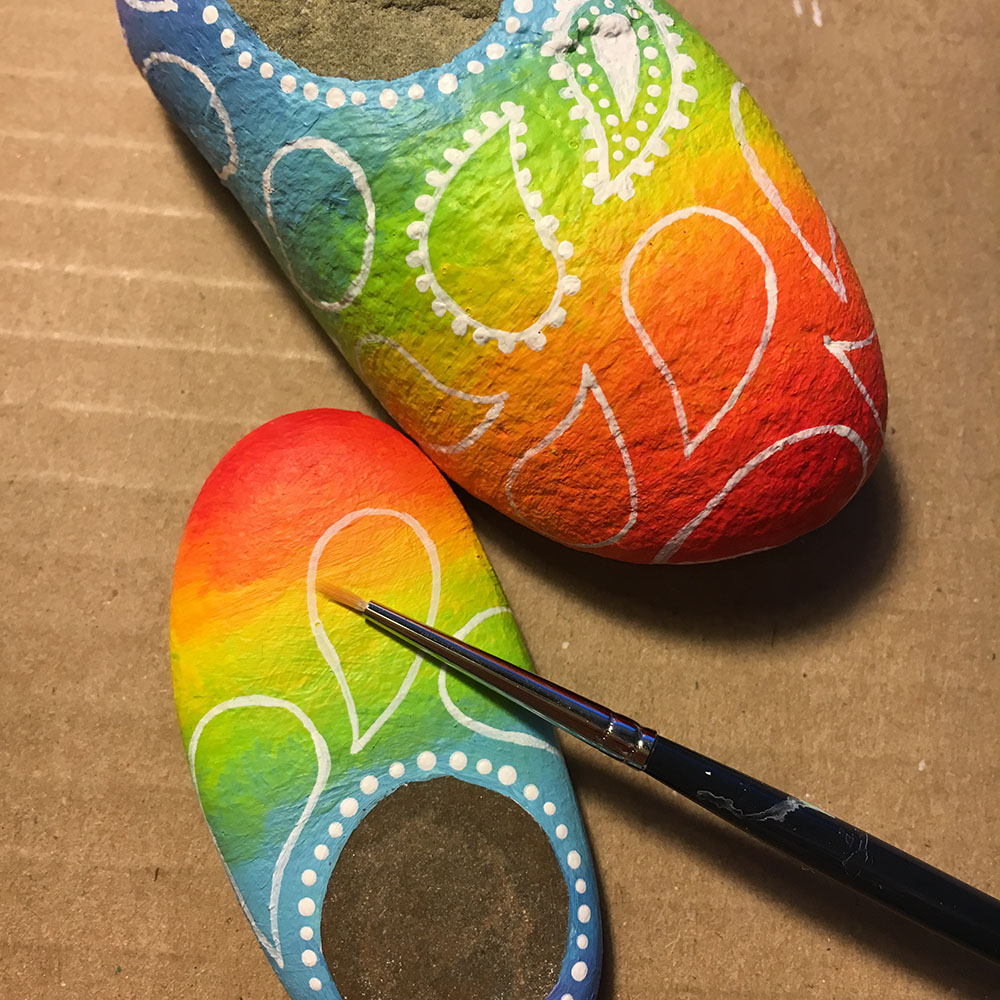
Step 20
This slide shows the ideal spacing between the teardrop shapes.
Step 21
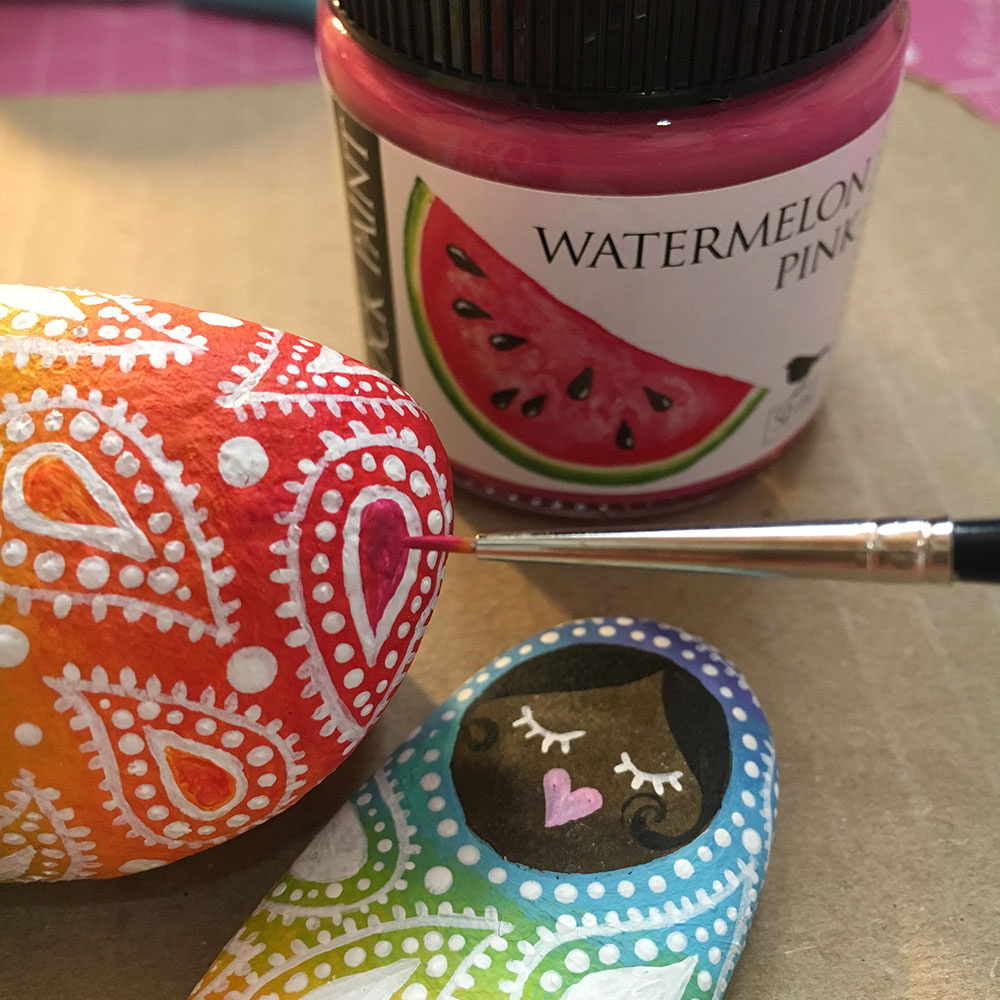
Once the teardrop shapes are dry, start adding more detail, following the same method used for the first paisley. Take care not to smudge your work. If you do smudge, quickly wipe the smudge away with a wet / damp earbud or cloth. Only re-paint the area when it's completely dry again.
Step 22
Paint paisley shapes all over the body area, over the sides and creeping towards the back of the rock but there's noneed to completely decorate the back of the rock.
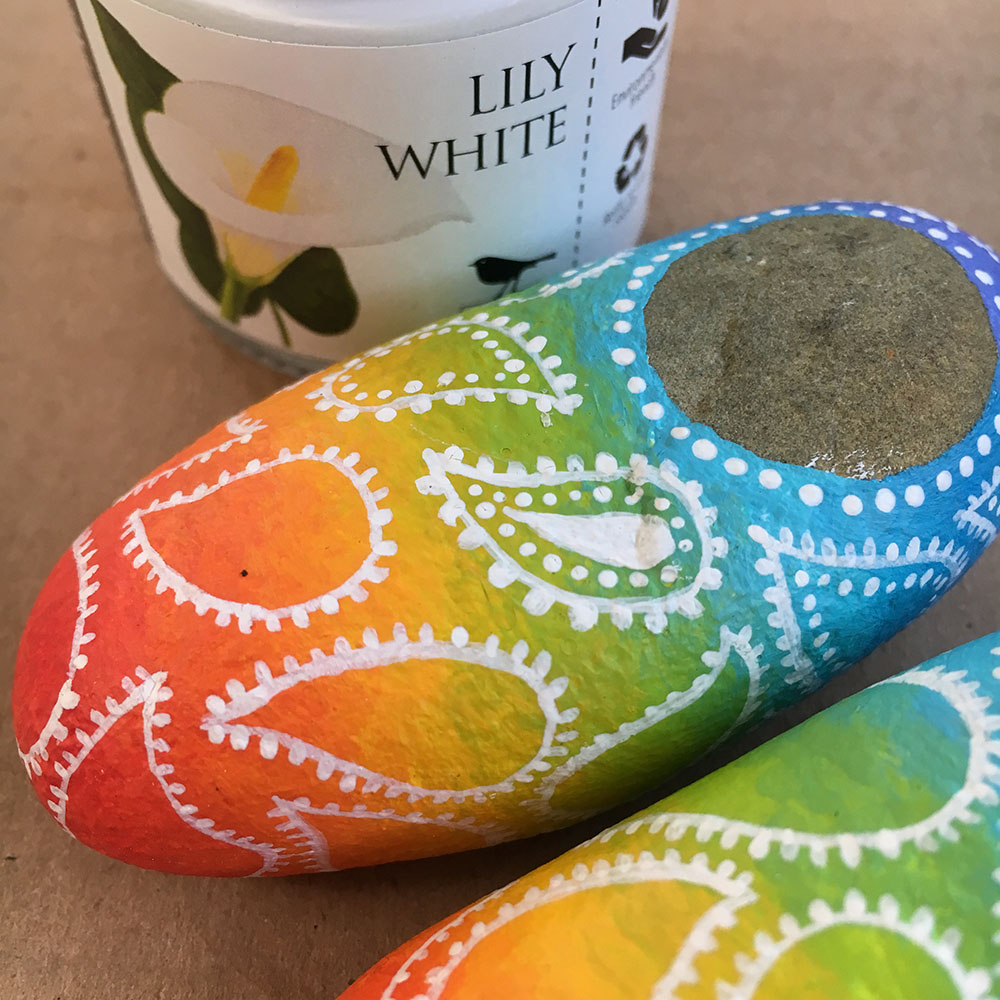
Step 23
This slide shows the paisley work completed.
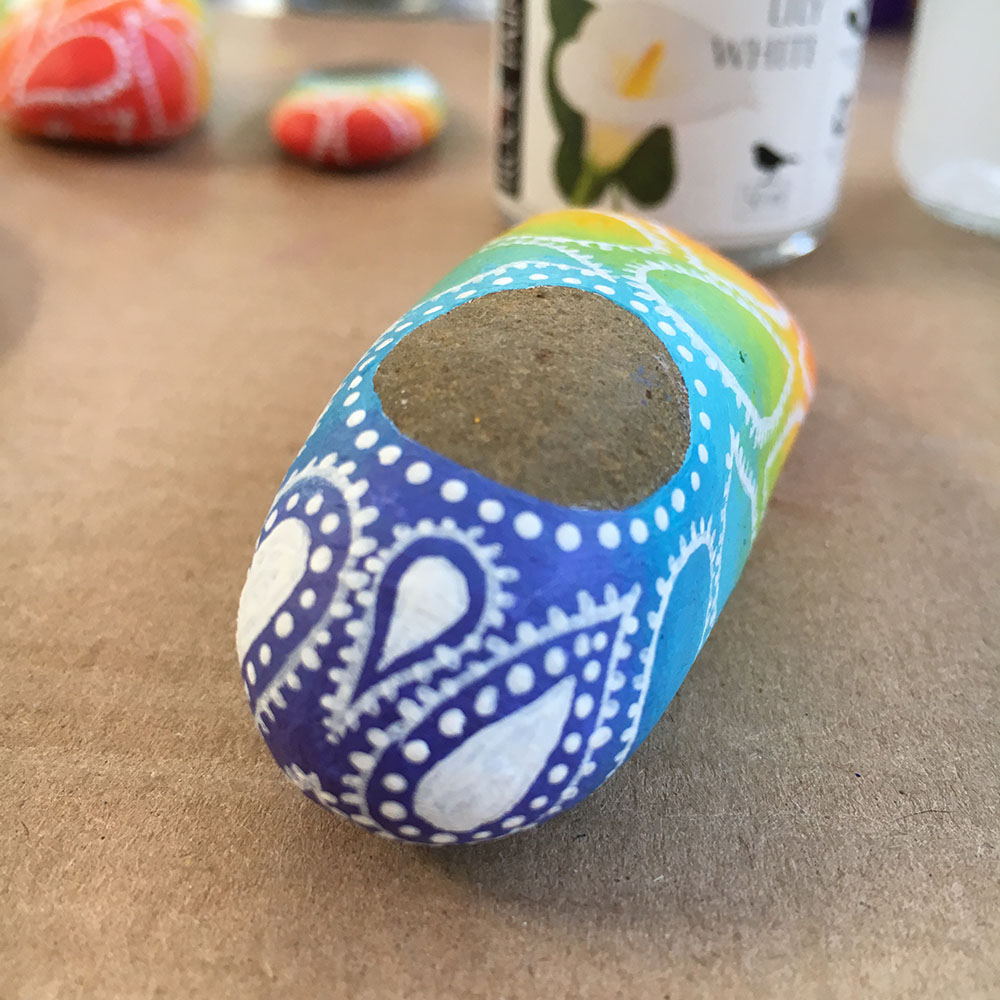
Step 24
If there are some gaps between the paisley shapes, add small white dots with the bigger end of your dotting tool. There should not be too many of these dots, just enough to break up any colour areas.
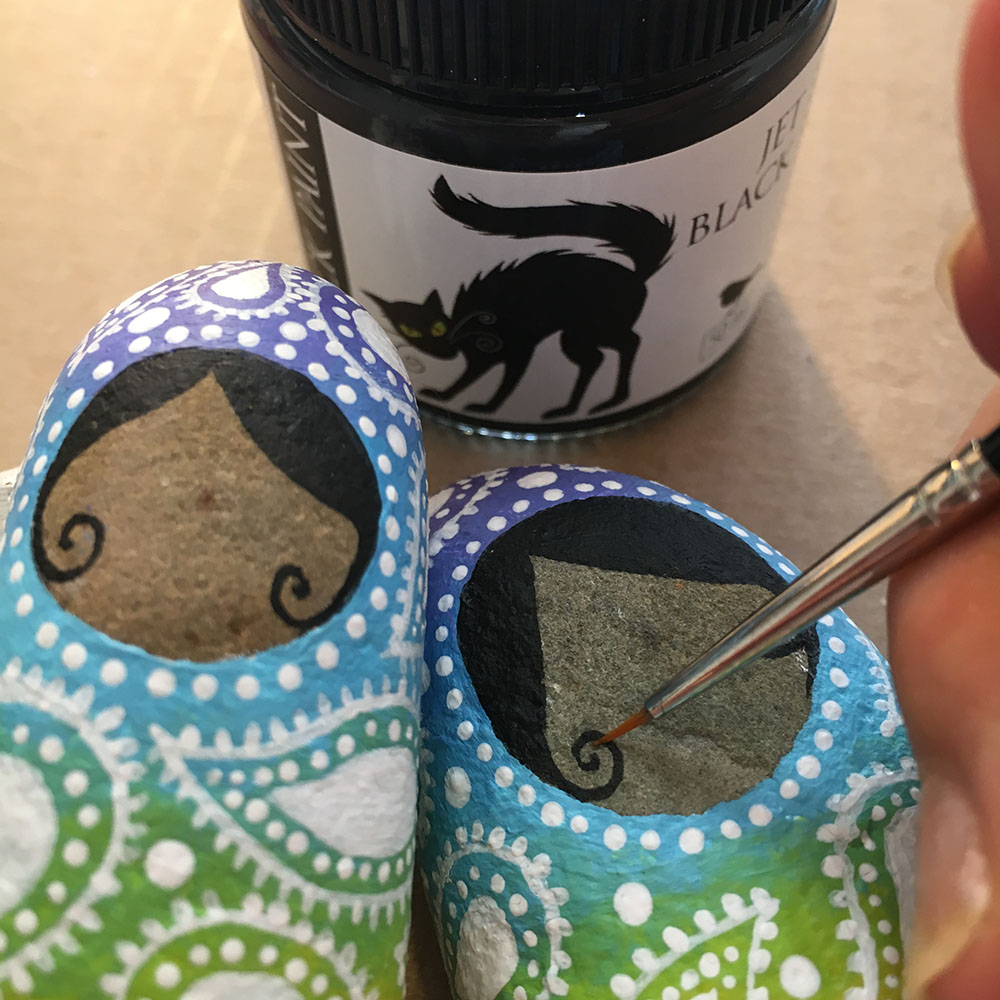
Step 25
Using Jet Black paint and your very fine brush, paint the hair inside the circle face area.
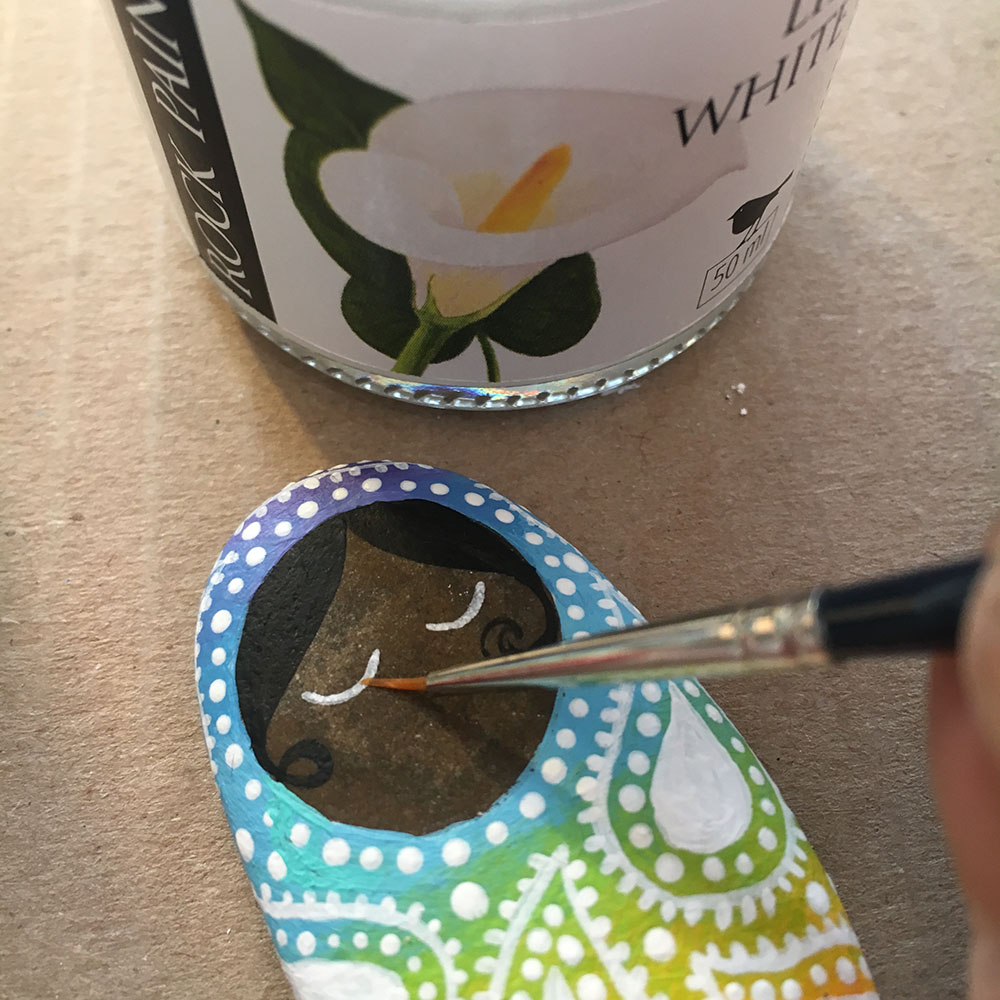
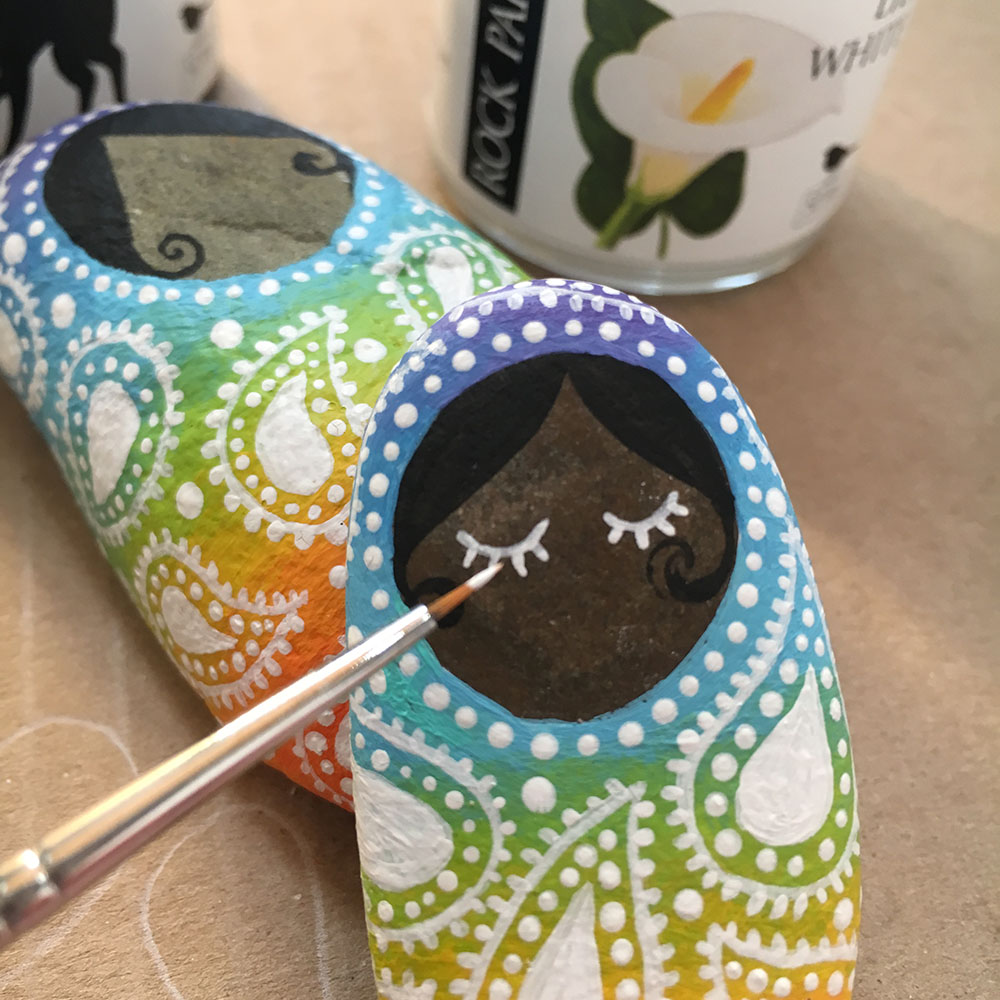
Step 26
Using Lily White paint and your finest brush, carefully paint sleeping eyelids.
Step 27
Add tiny eye lashes (optional - you might be happy with just the sleeping eyelids).
Step 28
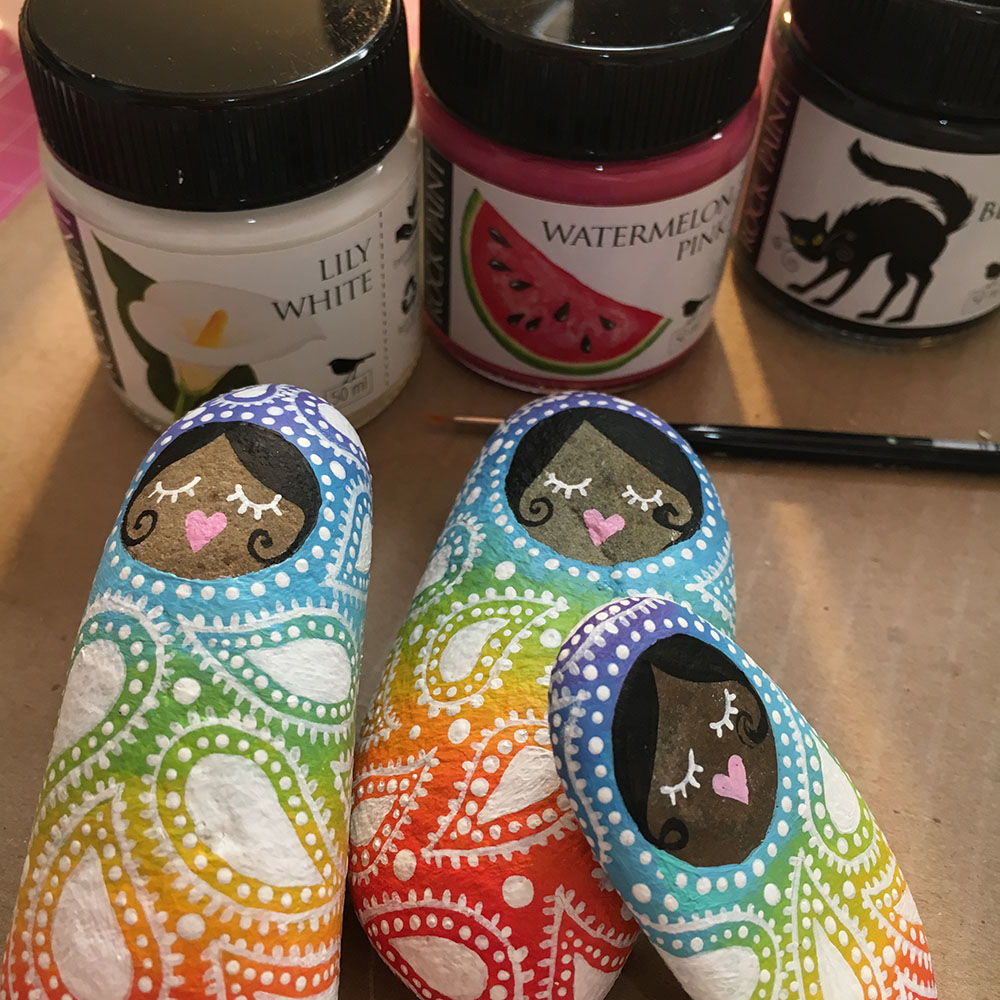
Add tiny heart shaped mouths using either a mix of Watermelon Pink and White or using Piggy Pink paint.
Step 29
The little rainbow baby is complete. If you would like a bit more fine detail, add a teardrop shape inside the white teardrop shape to match the colour behind the paisley shape. You can do this all over the rock, matching the colour behind as you go along. Remember to varnish your rock once all the paint is completely dry.
Products used in this tutorial
-

Watermelon Pink
R44.00 Add to cart -

Nasturtium Orange
R44.00 Add to cart -

Naartjie Orange
R44.00 Add to cart -

Canary Yellow
R44.00 Add to cart -

Apple Green
R44.00 Add to cart -

Periwinkle Blue
R44.00 Add to cart -

Dragonfly Blue
R44.00 Add to cart -

Lavender Blue
R44.00 Add to cart -

White Pencils (each)
R31.00 Add to cart -

Double-Sided Dotting Tool Set of 5
R70.00 Add to cart -

Pansy Violet
R44.00 Add to cart -

Lily White 50ml
R44.00 Add to cart -

Varnish
R70.00 Add to cart


